Home
Roland
Recording Equipment
TD-7
Roland TD-7 User Manual
5
of 1
of 1 rating
178 pages
Give review
Manual
Specs
To Next Page
To Next Page
To Previous Page
To Previous Page
Loading...
Important
Notes
Be
sure
to
use
only
the
adaptor
supplied
with
the
unit.
Use
of
any
other
power
adaptor
could
result
in
damage,
malfunction,
or
electric
shock.
[
Power
Supply
J
OWhen
making
any
connections
with
other
devices,
always
turn
off
the
power
toiiaglliequipment
first;
thisiiiwill
hell?
Prevent
damage
or
malfunction.
,
I
Do
not
use
this
unit
on
the
sarnepower
circuit
with
any
device
that
will
generate
line
noise,
jsuchias
a
motor
or
g
variable
lighting
system.
A
A
O
Thepower
supply
required
for
this
unit
is
shown
on
its
nameplate.
Ensure
that
the
line
voltage
of
your
installation
meets
this
requirement.
lAvoid
damaging
the
power
cord;
do
not
step
on
it,
place
heavy
objects
on
it
etc.
OWhen
disconnecting
the
AC
adaptor
from
the
outlet,
grasp
the
plug
itself;
never
pull
on
the
cord.
I
It
the
unit
is
to
remain
unused
for
a
long
period
of
time,
unplug
the
power
cord.
Placement
I
Do
not
subject
the
unit
to
temperature
extremes
(e.g.
direct
sunlight
in
an
enclosed
vehicle).
Avoid
using
or
storing
the
unit
in
dusty
or
humid
areas
or
areas
that
are
subject
to
high
vibration
levels.
O
Using
the
unit
near
power
amplifiers
(or
other
equipment
containing
large
transformers)
may
induce
hum.
IThis
unit
may
interfere
with
radio
and
television
reception.
Do
not
use
this
unit
in
the
vicinity
of
such
receivers.
_____:.
"—
'
'
'
7
’*’~;:Jun
_
_
um-nu:
W
'
"*" '
"
7
7
W
:27
nuvnauI""'"7*:r_._.
____1uII|l-I-Il""’**7
[
Maintenance
J
O
For
everyday
cleaning
wipe
the
unit
with
a
soft,
dry
cloth..(or
one
that
has
been
slightly
dampened
with
w‘ater)."To
remove
stubborn
dirt,
use
a
mild
neutral
detergent.
Afterwards,
be
sure
to
wipe
the
unit
.th0r<>tl9hlviwith
a.s<>tt.
dry
Cloth-
O
Never
use
benzine,
thinners,
alcohol
or
solvents
of
any
kind,
to
avoid
the
risk
of
discoloration
and/or
deformation.
r
r
r
rr
i-1*"
—
in
'
r
r
Er"
'**;___,_|yflnun||nn|
'
'
r
~r"r"_____
___1
5
1'
1nu:;*;r:.__
‘
Additional
Precautions
I
I
Protect
the
unit
from
strong
impact.
I
Do
not
allow
objects
or
liquids
of
any
kind
to
penetrate
the
unit.
in
the
event
of
such
an
occurrence,
discontinue
use
immediately.
Contact
qualified
service
personnel
as
soon
as
possible.
O
Never
strike
or
apply
strong
pressure
to
the
display.
I
A
small
amount
of
heat
will
radiate
from
the
unit,
and
thus
should
be
considered
normal.
I
Should
a
malfunction
occur
(or
if
you
suspect
there
is
a
problem)
discontinue
use
immediately.
Contact
qualified
service
personnel
as
soon
as
possible.
I
To
prevent
the
risk
of
electric
shock,
do
not
open
the
unit
or
its
AC
adaptor.
3
5
Table of Contents
Default Chapter
6
Table of Contents
6
Chapter 1 Playing the Rm
14
Connections and Precautions
14
Power ON./ Power off
19
Adjusting the LCD Contrast
20
Playing the Demo Songs
21
Quick Start ( Experimenting with Various Performances )
22
It] Patch Selection
22
F2] Rim Shot
22
I3] Choke Effect
24
4] Playing Sequence Patterns
25
F5] Patch Editing
26
J6] the Patch Chain
27
0 | Chapter2 Basicoperation/Thside“Thehtd-7I
32
Basic Operation
32
Setting Parameters
32
The Jump Function
33
A [3] Main Some-N
36
Parameters Inla Patch
39
Other Parameters
40
Chapter3 Patch Setting
41
Setting a Patch
42
Naming a Patch
42
Assigning at Note Number to a Trigger Signal
43
Setting Various Trigger Parameters
50
Instrument Section
51
Setting Sound 1 and 2
51
Rb. Layer
54
Performance Section
59
Effects
61
Parameters for Effect 1
64
Parameters for Effect 2
66
Hi-Hat Control Pedal
67
Patch Copy
73
Global Performance Parameters
75
I Chapter4 Editinglnstrument Sounds
80
Instrument Parameters
80
Instrument Copy
91
0 [Chapter 5 Phrasesequencer I
94
How to Record Sequence Data
94
Phrase Sequencer
97
Patterns
97
Setting Beat and Measure Number and Erasing Sequence Data
100
Selecting a Performance Type
102
Copying Sequence Pattern
103
Tempo, Metronome, Available I Memory and Synchronized Playback
105
Setting the Metronome
105
Tempo Setting
106
Available Memory
107
Synchronized Playback
107
I Chapter6 System Setting
110
MIDI
110
MIDI Messages
110
The TD-7'S MIDI Messages
113
Setting MIDI Parameters
116
Setting the Interface Mode
125
Using the Footswitch and Sound-On-Sound
126
How to Set the Footswitch Mode
126
Using the Sound-On-Sound Function
128
The Sound Setup
131
Initialization
134
Hi-Hat Control Pedal Initialize
134
All Initialize
135
Error Messages
138
Troubleshooting
140
Patch List
143
Waveform List
146
Instrument List
148
Initial Settings
152
Blank Chart
155
I Roland Exclusive Messages
158
I MIDI Implementation
160
I MIDI Implementation Chart
170
I How to Read the MIDI Implementation Chart
172
I Specifications
173
Other manuals for Roland TD-7
Service Notes
17 pages
5
Based on 1 rating
Ask a question
Give review
Questions and Answers:
Need help?
Do you have a question about the Roland TD-7 and is the answer not in the manual?
Ask a question
Roland TD-7 Specifications
General
Display
LCD
MIDI
In, Out, Thru
Effects
Reverb
Sequencer
Yes
Outputs
Stereo output, headphone output
Presets
50 preset kits
Power Supply
AC Adaptor
Related product manuals
Roland V-Drums TD-50
26 pages
Roland V-Drums TD-27
30 pages
Roland V-Drums TD-02KV
2 pages
Roland TD-30 TurboStart
2 pages
Roland T-8
32 pages
Roland TR-6S
39 pages
Roland TR-08
34 pages
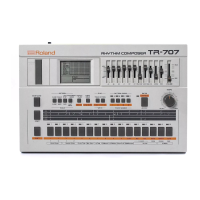
Roland TR-707
13 pages
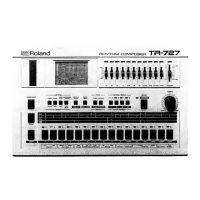
Roland TR-727
56 pages
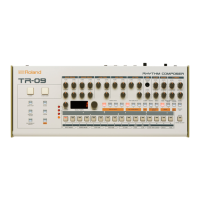
Roland Aoutique TR-09
36 pages
Roland TurboStart VG-99
2 pages
Roland Rhythm Composer TR-505
72 pages