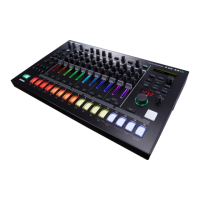
After hooking up the TR-606 as previously described in the Basic Connections
Section, set the MODE Selector (B) to the PATTERN PLAY position. When this is
done, you will notice that the LED on one of the SELECTOR Switches (K) will begin
to flash. This tells you that the flashing SELECTOR Switch (K) is the first Rhythm
Pattern that will play when you press the RUN/STOP button (H).
Also lit on the TR-606 Panel is one of the two LEDs above the PATTERN GROUP
button (N). These indicate from which group (I or II) the flashing Rhythm will play.
To change from one group to the other, press the PATTERN GROUP button (N), and
the LED will change from one to the other. PATTERN GROUP Selection is available
only while the Rhythm is stopped. Press the RUN/STOP button (H) to start the
Rhythm running. Adjust the overall Tempo with the TEMPO control (D), which is
continuous from 40 to 300 beats per minute. While the Rhythm is running, you will
notice that the LED indicators (L) on the SELECTOR Switches (K) flash in sequence
from the left to the right of the unit. The speed of their sequential motion will
correspond to the tempo of the pattern (which is set by the TEMPO control).
Press the RUN/STOP button (H) to stop the Rhythm. When this is done, you will
notice that the LED on the Rhythm you had selected will again begin to flash.
Mixing Percussion Sounds
The level of each percussion sound can be raised or lowered in accordance with your
own taste through use of the six MIX controls (E) at the top of the panel. By using
these MIX controls (E), it is possible to attain the perfect balance between the
instruments for any rhythm.
Switching Rhythm Patterns
It is possible to switch from one Rhythm Pattern to another while the TR-606 Rhythm
is running. The TR-606 will always finish the measure, and play until switched to the
newly selected Rhythm. By switching between the Rhythms, it is possible to try
various Rhythms together to get a feel of switching from a straight beat to a fill or
break.
Chaining Rhythm Patterns
You will notice that the sixteen SELECTOR Switches (K) have been divided into four
Block Groups of four switches each (1-4, 5-8, 9-12, and 13-16). These represent
groupings of Rhythm Patterns that can be chained together to run sequentially in a
group. This is used for performing a two measure repeating rhythm (which is very
common in Rock Music), for doing 4/4 time using scale 2 or 4, or for doing odd time
signatures.
To chain Rhythm patterns together, press two SELECTOR Switches (K) (such as 2
and 4) in a group simultaneously. This action causes the first switch's LED (2) to flash
while the others (3 & 4) illuminate but do not flash. This LED status indicates that the
Rhythms are chained and will play in a sequence. It is possible to chain 2, 3, or 4
Rhythm Patterns together, but they must all be from the same group. You cannot,
however, create more than one chain within each four groups.
For now, select the chained Rhythm Patterns 2, 3 and 4. Press SELECTOR Switches
(K) 2 and 4 simultaneously, and then LED indicators (L) 3 and 4 illuminate while

 Loading...