Roland Support Document Date: 07/15/09 Revision 1.0
Reinitialize The Limit - Do It Yourself Guide
Reinitialize The Limit - Do It Yourself Guide
Further Support
Should further support be needed or any additional questions arise about the processes in this document please contact your local
supporting dealer. As always, thank you for choosing Roland.
7.
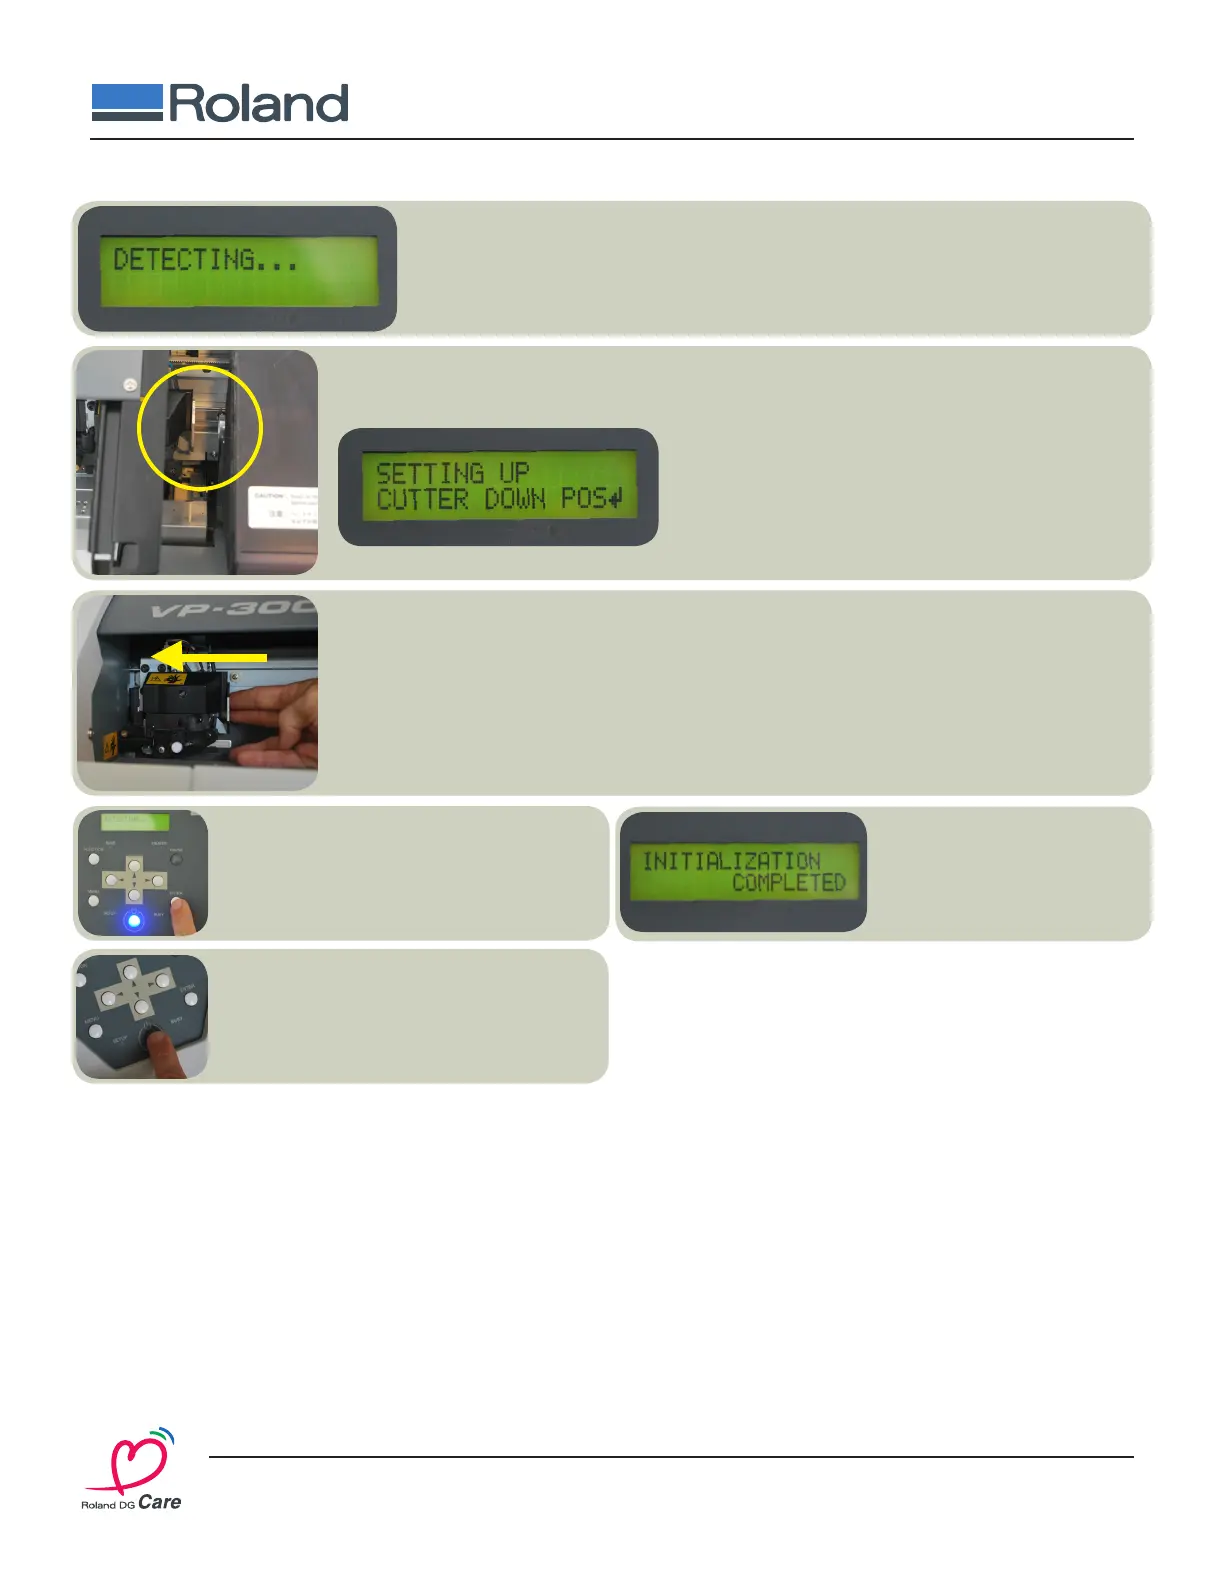
The LCD Panel will now read DETECTING. It is at this time the printer will go through
a procedure and an error may occur. If an error occurs at this time it is most likely that the
Print Carriage was not locked correctly. Power the machine OFF and start the process
again from Step 1.
8.
Once the home position is set up the LCD Panel will read “SETTING UP CUTTER DOWN
POS”. At this time the Cutter Carriage should have separated from the Print Carriage. If
the Cutter Carriage has not separated from the Print
Carriage power the machine OFF and start the process
again from Step 1.
11.
Shortly after the Cut
Carriage returns the LCD
Panel will read INITIALIZE
COMPLETED.
9.
Take the Cutter Carriage and bring it to the left hand side of the machine and press it firmly
against the inner wall to engage the Sheet Cutter. The Sheet Cut Blade will visibly engage at
this time. This action defines the width of the printer and sets the position for engaging the sheet
cutting blade.
10.
Leave the Cut Carriage at the Left
side of the machine and Press ENTER
on the control panel. The Cut Carriage
will return to the right hand side.
12.
Power OFF the machine and restart as
normal. The machine is now ready for use.
If the Limit Initialize fails repeat the
process from Step 1.
 Loading...