4
Panel Descriptions
22
VIDEO SWITCHER [1]–[6] buttons
The buttons change functions depending on the mode that’s
selected.
23
[CUT] button, [AUTO] button
These buttons determine what happens when switching between
videos or else they switch between videos, depending on the
operation mode.
There are two operation modes for switching between videos:
“DISSOLVE” and “PGM/PST”.
Operation
mode
Explanation
DISSOLVE
(factory
setting)
This mode selects the video to output and immediately
outputs it to the PGM bus.
Press the [CUT] or [AUTO] button to select what happens
when you switch between videos (the buttons light up green
when pressed).
Button to operate Action taken when pressed
VIDEO SWITCHER
[1]–[6] buttons
When [CUT] button is lit up green
The video switches instantly.
When [AUTO] button is lit up green
A switch (transition) eect is
applied, and the video switches
automatically.
* The PGM source and PST source buttons blink red during
the transition eect.
PGM/PST
In this mode, the PST video is displayed in the PVW bus, and
you can check the video before outputting it to the PGM bus.
Press the VIDEO SWITCHER [1]–[6] buttons to select a PST
video (the buttons light up green). The content is shown in
the PVW bus.
Button to operate Action taken when pressed
[CUT] button
(lights up red)
The video switches instantly.
[AUTO] button
(lights up red)
A switch (transition) eect is
applied, and the video switches
automatically.
* During the transition eect, the selected VIDEO SWITCHER
button blinks red, and then remains lit up red when the
transition eect nishes.
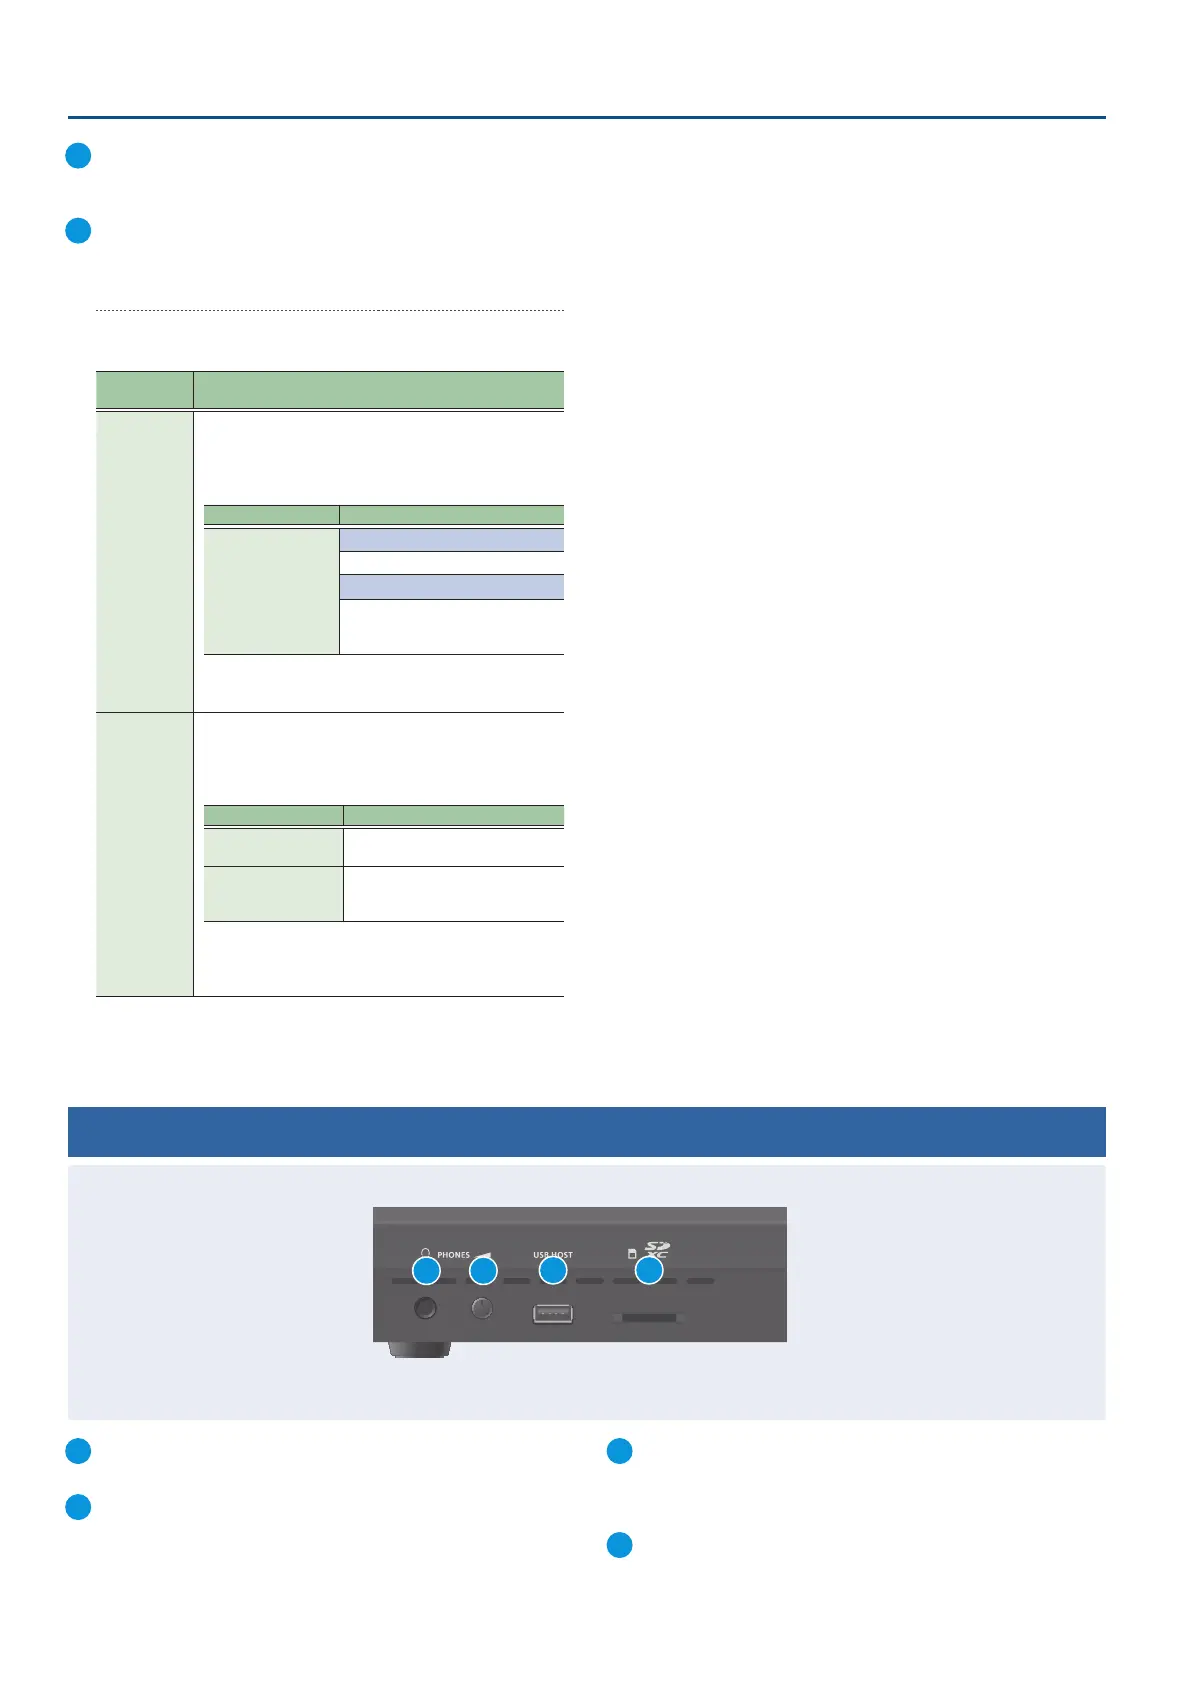
Front Panel
1
PHONES jack
Connect your headphones here.
2
[PHONES] knob
Adjusts the headphone volume.
3
USB HOST connector
Connect USB storage such as a USB ash drive or an external SSD
here, for backing up this unit’s settings or importing materials
from the storage device into this unit.
4
SDXC card slot
Insert an SD card here.
2
4
1
3
 Loading...