Do you have a question about the Rongta Technology RP325 and is the answer not in the manual?
Connect printer and PC directly using an Ethernet cable, ensuring they are on the same network segment.
Connect printer and PC via a router, ensuring both are on the same network segment for communication.
Access the printer's configuration page by entering its IP address into a web browser.
Display network interface details such as Mac Address, IP Address, and Subnet Mask on the web interface.
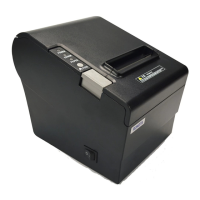
This document outlines the operation and maintenance procedures for the Rongta RP325, RP326, RP327, and RP328 series thermal receipt printers, specifically focusing on how to configure their Ethernet port parameters using a web browser interface. These printers are designed for efficient thermal printing, offering a robust solution for various business environments where receipt printing is essential. The manual serves as a comprehensive guide for users to manage and update the network settings of their thermal printers, ensuring seamless integration into existing network infrastructures.
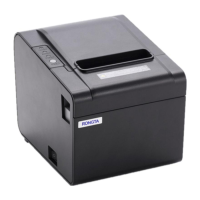
The Rongta RP325/RP326/RP327/RP328 thermal receipt printers are primarily designed for printing receipts quickly and reliably. Their core function revolves around thermal printing technology, which eliminates the need for ink cartridges or ribbons, thereby reducing operational costs and simplifying maintenance. The printers are equipped with an Ethernet port, allowing them to be connected to a local area network (LAN) for network printing capabilities. This network connectivity is a key feature, enabling multiple users or systems within a network to share a single printer resource.
The primary function detailed in this manual is the configuration of the Ethernet port parameters. This involves setting the printer's IP address, subnet mask, and potentially other network-related settings to ensure it can communicate effectively within a given network segment. The configuration process is facilitated through a web-based interface, accessible via a standard web browser such as Microsoft IE or Firefox. This method provides a user-friendly graphical interface for network administrators or users to manage the printer's network identity without requiring specialized software.
The printer's ability to print a self-test page is another crucial function. This page provides vital information, including the printer's current IP address, which is essential for initiating the web-based configuration process. The self-test page acts as a diagnostic tool, confirming the printer's basic operational status and network settings.
Furthermore, the printer's web interface offers a "Printer Status" function. This allows users to remotely monitor various aspects of the printer's operational health. Key status indicators include whether the upper cover is open, if there's a cutter error, if the paper has run out or is about to run out, and if the printer is offline. These functions are critical for proactive maintenance and troubleshooting, ensuring minimal downtime and continuous operation.
The "Configure Interface" function within the web interface is central to managing the printer's network identity. It allows for the modification of fixed IP addresses and subnet masks, providing flexibility in integrating the printer into different network configurations. The ability to save and apply these changes, followed by a system reboot, ensures that the new network parameters are correctly implemented and become active.
The usage features of the Rongta thermal receipt printers, particularly concerning network configuration, are designed for ease of access and management. The process begins with obtaining the printer's default IP address, which is typically 192.168.1.87. This is achieved by performing a simple self-test print, a standard procedure for many network-enabled devices. The self-test page provides a physical record of the printer's current network settings, making it easy to identify the starting point for configuration.
Connecting the printer to a computer for configuration can be done in two ways: direct connection or via a network device (router). For a direct connection, both the printer and the PC must be on the same network segment, meaning they share the same IP address range (e.g., 192.168.1.xx). This simplifies the initial setup for individual users or small networks. When connecting through a network device, the printer, router, and PC must all reside within the same network segment, allowing for integration into larger, more complex network environments.
The web-based configuration interface is a significant usage feature. By simply entering the printer's IP address into a web browser, users gain access to a graphical user interface (GUI) that presents all relevant network settings and printer status information. This eliminates the need for command-line interfaces or proprietary software, making the configuration process accessible to a broader range of users, including those without extensive IT knowledge.
The interface provides clear navigation options, such as "Interface Status," "Printer Status," and "Configure Interface." The "Interface Status" page offers an immediate overview of the printer's network module, including its MAC address, IP address, and subnet mask. This quick glance helps in verifying current settings and diagnosing network connectivity issues.
The "Printer Status" page is a practical usage feature for real-time monitoring. It provides immediate feedback on critical operational parameters, such as the status of the printer's cover, the cutter, and the paper supply. This allows users to quickly identify and address common issues like paper jams or depleted paper rolls, minimizing interruptions to printing operations. The "Print Test Page" button within this interface is a convenient way to generate a self-test print remotely, confirming that the printer is functioning correctly after configuration changes. The "Refresh" button ensures that the displayed status information is always up-to-date.
The "Configure Interface" page is where the core network parameter changes are made. Users can modify the device's IP address and subnet mask directly through input fields. The interface includes "Restore Default," "Save," and "Exit" buttons, providing clear actions for managing configuration changes. The "Save" function is crucial, as it commits the new settings to the printer's memory. The subsequent prompt to "Reboot" the printer is a standard procedure to ensure that the new network parameters are fully applied and become active.
The reboot process itself is guided by clear messages within the web interface, informing the user to wait for the printer to restart and to enter the new IP address in the browser if it has been changed. This guidance ensures that users can seamlessly transition to the printer's new network identity after configuration.
The Rongta thermal receipt printers incorporate several features that simplify maintenance and troubleshooting, particularly concerning their network functionality and operational status. The web-based interface itself acts as a powerful maintenance tool, allowing administrators to remotely monitor and manage the printers without physical access.
One of the primary maintenance features is the ability to remotely check the printer's operational status. Through the "Printer Status" page, users can ascertain if the printer's cover is open, if there's a cutter error, or if the paper is running low or out. These indicators are vital for predictive and reactive maintenance. For instance, if the "Paper Near End" status is active, it signals that a paper roll replacement will soon be necessary, allowing for proactive stocking and replacement before printing operations are interrupted. Similarly, a "Cutter Error" or "Cover Is Open" status immediately points to a specific hardware issue that requires attention.
The "Print Test Page" function, accessible from the web interface, serves as a diagnostic maintenance tool. After making configuration changes or if there are doubts about the printer's functionality, generating a test page confirms that the printer is physically capable of printing and that its internal systems are operational. This helps differentiate between network connectivity issues and hardware malfunctions.
The "Refresh" button on the status pages is a simple yet effective maintenance feature. It ensures that the displayed information is current, which is crucial when troubleshooting intermittent issues or verifying the immediate impact of a physical intervention (e.g., closing the cover or replacing paper).
The "Restore Default" option within the "Configure Interface" section is a critical maintenance feature for network settings. If network configurations become corrupted or if the printer needs to be reset to its factory network settings, this option provides a quick and reliable way to revert to a known good state. This is particularly useful in scenarios where incorrect IP addresses or subnet masks have been applied, leading to network connectivity problems.
The guided reboot process after saving new network parameters is also a maintenance-oriented feature. The system messages prompt the user to restart the printer and to use the new IP address for subsequent access. This structured approach minimizes user error during critical configuration changes and ensures that the printer correctly applies the updated settings. The audible "beep" sound upon successful restart provides clear confirmation that the printer has completed its reboot cycle and is ready for operation with the new parameters.
The overall design of the web interface, with its clear layout and intuitive navigation, contributes to easier maintenance. Users can quickly locate the information they need and perform necessary actions without extensive training. The emphasis on remote access for monitoring and configuration significantly reduces the time and effort required for printer maintenance, especially in environments with multiple printers or geographically dispersed locations.
In summary, the Rongta RP325/RP326/RP327/RP328 thermal receipt printers offer robust functionality for receipt printing, complemented by user-friendly network configuration and maintenance features accessible via a web browser. These features ensure reliable operation, simplified troubleshooting, and efficient management within various network environments.
| Type | Thermal Printer |
|---|---|
| Print Method | Direct Thermal |
| Print Width | 72mm |
| Print Resolution | 203 DPI |
| Paper Type | Thermal Paper |
| Paper Width | 79.5 ± 0.5mm |
| Power Supply | External Power Adapter |
| Connectivity | USB, Ethernet, Serial |
| Paper Thickness | 0.06 to 0.08mm |
| Paper Diameter | 83mm |
| Column Capacity | 576 dots/line |
| Line Spacing | 3.75mm |
| Power | DC 24V/2.5A |
| Power Consumption | Approx. 60W |
| Auto Cutter | Full/Partial Cut |