Page 8
RXT175P
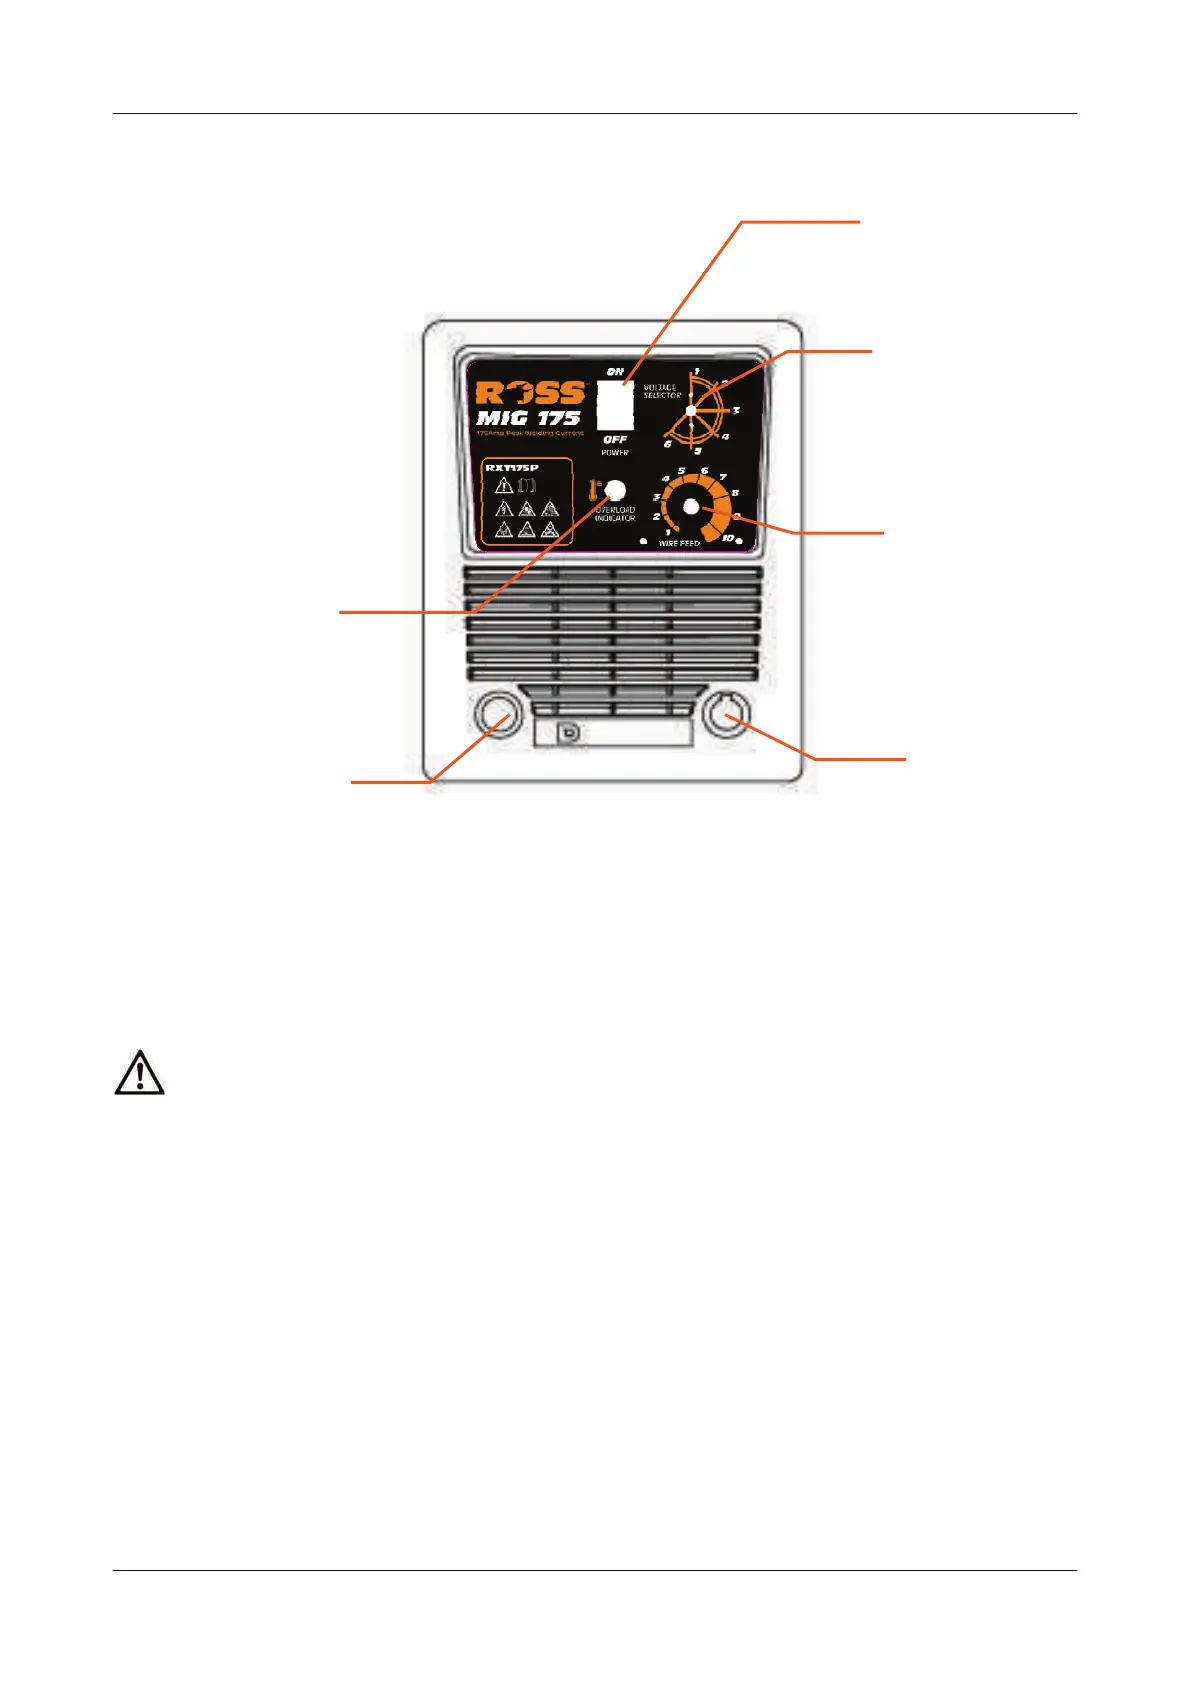
KNOW YOUR WELDER
1) On/off switch
When the switch is in the “ O” position means the power OFF . When the switch in the “1”
position means the power is ON
2) Output power settings
Adjust this knob to increase or decrease the welding current.
CAUTION! Do NOT change the switch position while welding.
3) Wire speed adjustment knob
Adjust this knob to set the wire feeding speed.
4) Earth cable
Use earth clamp to connect earth cable with work piece
5)Welding outlet
The torch is installed at the end of the cable.
6)Overload light
If welding a long time the duty cycle may be exceeded, the overload lamp will turn ON
(orange) and the machine will stop working until the unit has cooled.
7) Welding Gas Hose and Mains Cable
(Not Shown) are located at the rear of the unit.
1
2
3
4
5
6