INSTALLATION
BLADDER INSTALLATION
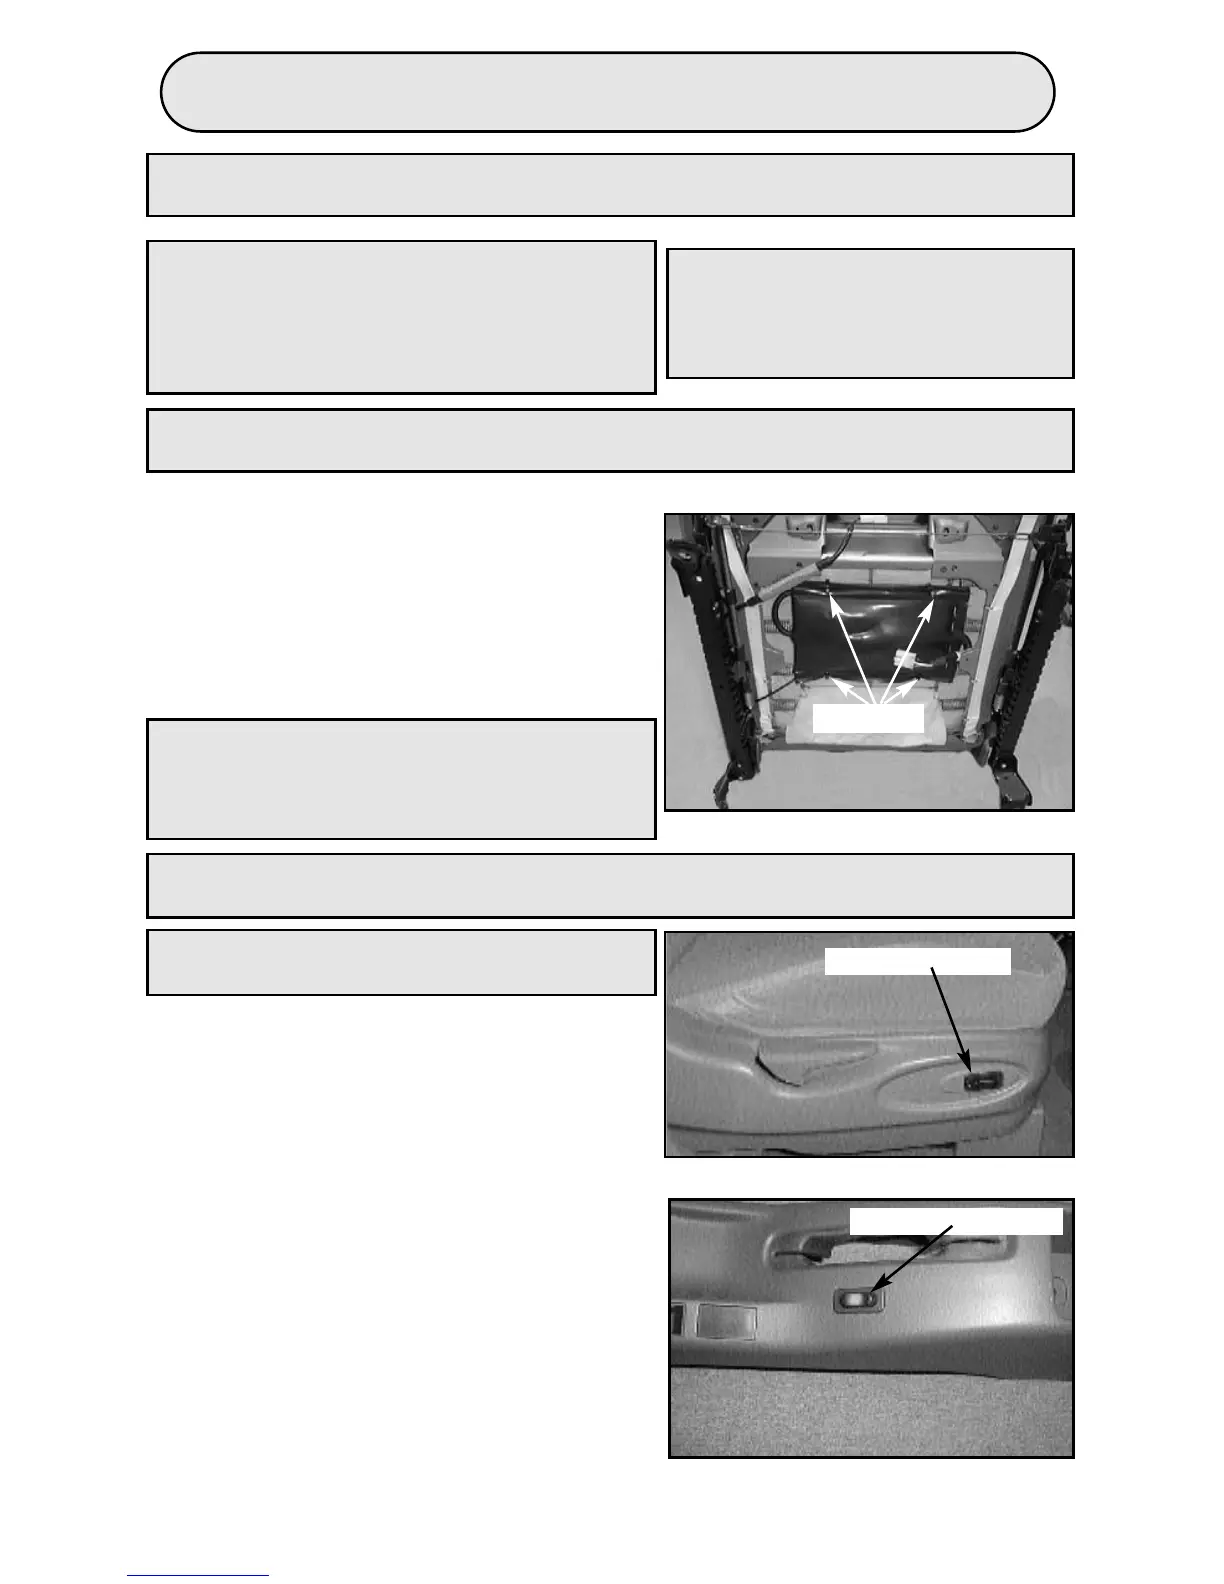
NOTE: Tube should be routed away from
seat track. Avoid kinking bladder
tube or rubbing tube against
sharp edges. Inflatable bladder
must not contact seat springs.
!CAUTION!
Do not apply any external air
sources to inflate bladder other
than manufacturer supplied.
PUMP/POUCH INSTALLATION
1. Connect bladder tube to rubber hose
coming out of pouch.
2. Mount pouch under seat and secure to
seat using cable ties or ratchet fasteners
where appropriate. F
IGURE 4
3. Secure bladder tube and pouch rubber
hose with cable ties to prevent them
from moving.
NOTE: Do not add holes to pouch, use
existing holes only. Damage can
occur to enclosed components
and void warranty.
cable ties
FIGURE 4
SWITCH INSTALLATION
NOTE: Console or seat plastic cuts best
at room temperature.
SWITCH INSTALLATION: FIGURES 5 & 6
1. Choose a switch location on a flat
surface on the console or the seat side
panel.
2. Remove center console or side seat
panel as needed.
3. Cut a 1/2” x 1-3/8” hole in the console
or the seat side panel using ROSTRA
tool (250-1428) or using T
EMPLATE A ON
PAGE 6.
4. Place the bezel from hardware package
onto switch.
5. Insert switch through opening and snap
in place.
seat panel switch
center console switch
PAGE 5
FIGURE 6
FIGURE 5