INSTALLATION
BLADDER INSTALLATION
NOTE: BLADDER PERFORMANCE DEPENDS GREATLY ON
POSITIONING AND HOW WELL THE BLADDER IS
SECURED IN PLACE
.
STEP 1:
To detach the seat cover apply one of the following
steps:
A. J-Clips: Insert panel puller into channel (in the
seam on bottom edge of seat back) and pull the
other side of the seam over the channel to
release.
B. Zipper: Unzip as necessary.
C. Hog-Ring: Requires Hog-ring pliers and
replacement rings. Cut existing rings to remove.
D. Removable Pocket: Held in with push-pins or
screws. Usually removed from bottom edge of
seat back.
E. Rigid back: Remove screws from bottom edge of
seat back.
S
TEP 2:
To expose the seat cushion apply the following
steps:
A. Turn the seat cover inside-out as you roll it up.
B. Working from the rear, detach the front of the
seat cover from the frame. It will be held in
place by Velcro, Springs, Hog-rings or Tie-bar
(visible from bottom edge)
S
TEP 3:
A. If the seat has spring support it will use a rear
mounted bladder. There are three sizes:
1) Standard 250-02038 12in. (30.5cm) or more
2) Extended 250-02039 12in. (30.5cm) or more
3) Small 250-02041 10.5in. (26.5cm) or more
B. If the seat is molded plastic or foam without
any support it will require a front mounted
bladder (250-02042)
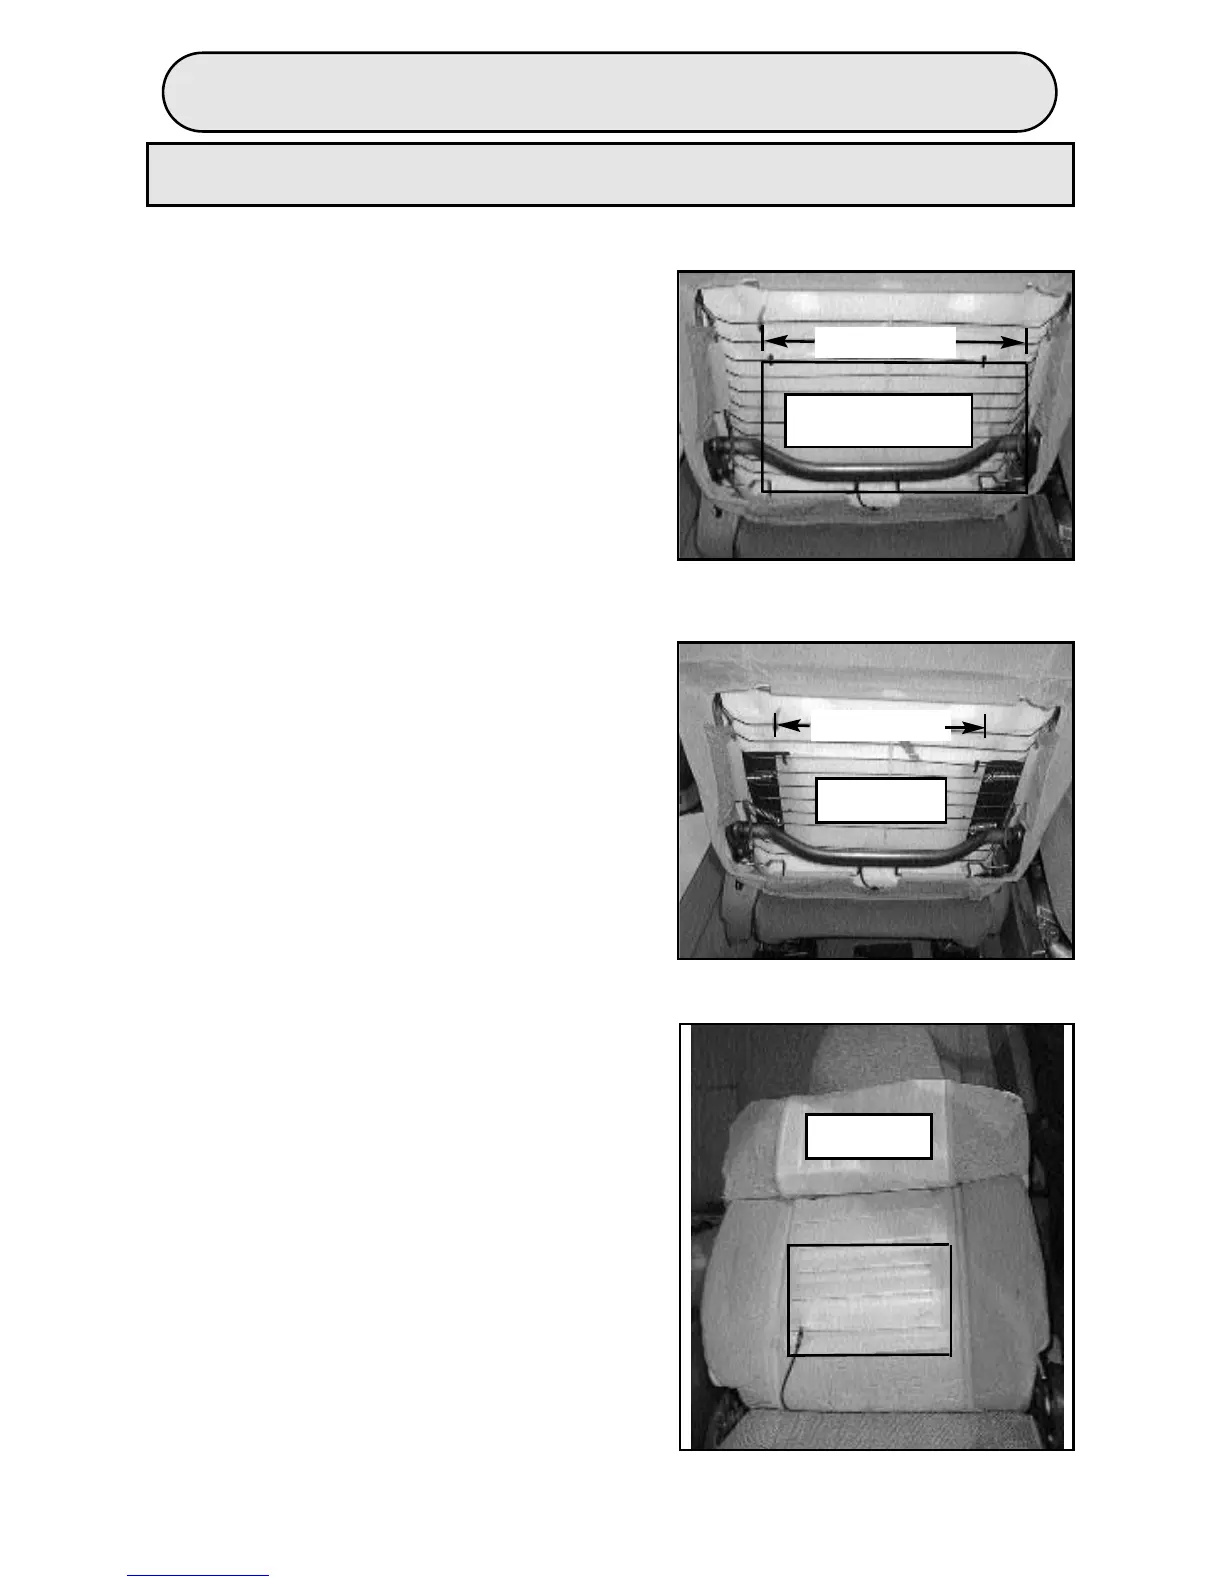
S
TEP 4:
To mount the bladder:
A. STANDARD/EXTENDED/SMALL BLADDER
(FIGURES 1 & 2) Insert bladder between springs
and seat back cushion (inflatable bag toward
cushion and tube down). route tube to the right
and guide tube next to seat hinge and exit
under seat. Make sure tube routes inside of the
seat hinges, not around the outside. Use tie
straps to secure bladder back to seat springs.
B. FRONT BLADDER: (F
IGURE 3)
Use double sided tape and/or cable ties to
secure bladder back to cushion.
12in(30.5cm)
standard/extended
bladder
10in(26.5cm)
small bladder
front bladder
FIGURE 1
FIGURE 2
FIGURE 3
PAGE 4