H
I
Rev. 08-Mar-11
Pg. 3/6
R6 Hanging Speaker
Installation Instructions
If you have any questions please call : 1-780-962-0868
J
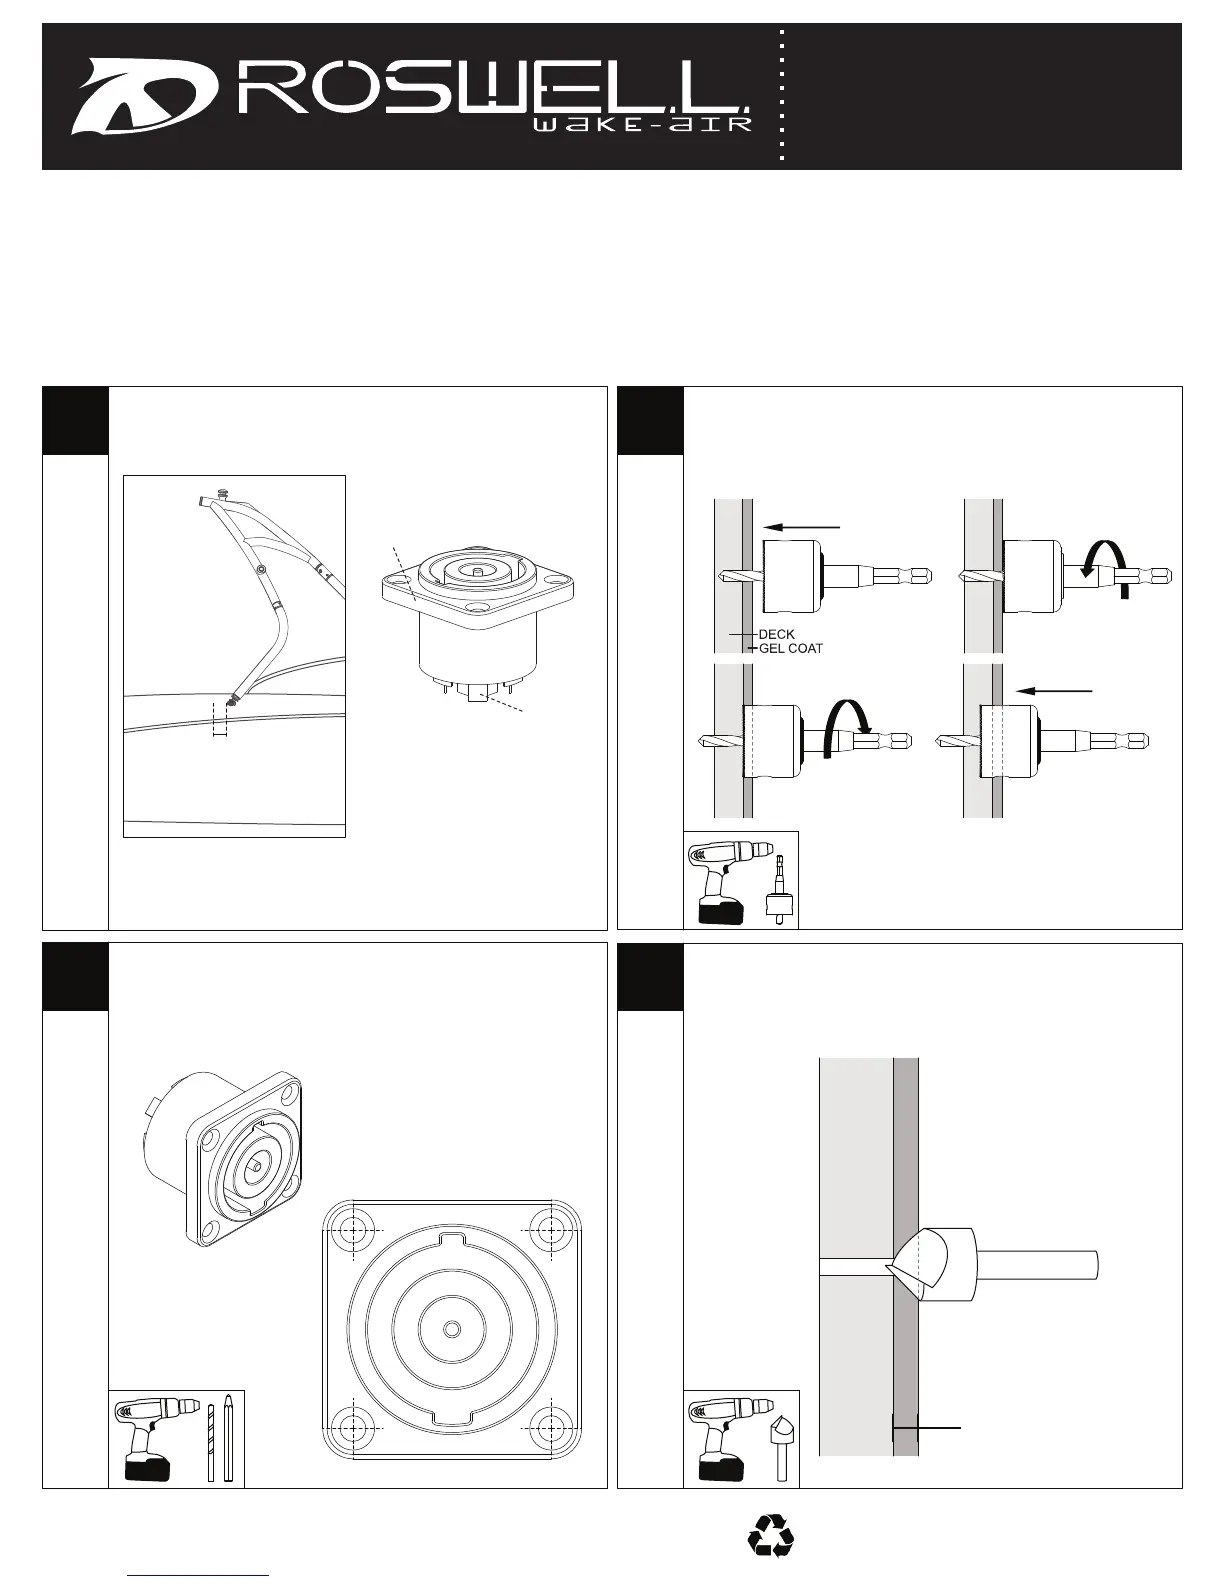
Begin by marking the area on the deck you wish to
drill, making sure the lip of the female speakon
connector will not touch the mount.
1) Carefully drill the pilot hole. 2) Just before the hole
saw comes into contact with the gel coat run the drill in
reverse while slowly allowing the blade to contact the
deck (this will help protect the gel coat from cracking).
K
NOTES
* A CERTIFIED MARINE ELECTRICIAN IS REQUIRED FOR THE INSTALLATION INSIDE THE BOAT *
Included with your MASTER Wiring Harness is an 8-pole Female Speakon Connector, 4 5/36” screws, and 8
Sta-Kon connectors. To install the Female Speakon Connector to the deck the installer will need to drill a hole
using a 1.25” hole saw through the deck of the boat. The hole should be positioned 2” to 4” aft or behind the
rear tower mounts.
Note – Before drilling check inside the gunwales of the
boat to ensure you will not be drilling into any electrical
wires or cables!
3) Once the hole saw passes through
the gel coat, switch the drill back into
forward and 4) finish drilling the hole.
Insert the female speakon connector into your new
hole. Mark the 4 small screw holes on the speakon
with a pencil and remove it from the hole. Drill the 4
holes you just marked using a 7/64” drill bit.
With your countersink bit (we recommend 1/2”),
carefully countersink each hole—do not go past the
gel coat layer (this is to again help prevent the gel coat
from cracking).
2-4”
Female Speakon
Connector
Lip
Flat Tabs
Reverse
Forward
1) 2)
3) 4)
1.25”
7/64”
1/2”
Do not go past gel
coat layer
 Loading...