Do you have a question about the Rotel RC-870 and is the answer not in the manual?
Keep the owner's manual near the unit and record the serial number for reference.
Important safety notes regarding AC outlet usage, wattage limits, and amplifier connections.
Connect the AC line cord to a wall outlet matching the unit's voltage rating.
Connect or disconnect the AC line cord only after turning off the power switch.
Ensure proper ventilation by not blocking holes and providing space to prevent overheating.
Do not open the cabinet; consult a professional if a foreign object enters the unit.
Place the unit on a level, dry, cool surface away from direct sunlight and enclosed spaces.
Disconnect the AC cord and all other connected cords before transporting the unit.
Immediately disconnect power if the unit gets wet and consult a qualified professional.
Clean the front panel with a soft, dry cloth; avoid using chemicals like benzine or thinners.
Button to turn the unit on/off; indicator lights up when power is active.
Allows private listening by plugging in headphones, muting the speakers.
Dual concentric knob to adjust the volume level for both stereo channels.
Selects reproduction mode: STEREO, MONO, or MUTE.
Used to listen to signals from connected tape decks for monitoring or copying.
Selects the desired audio input source (PHONO MM/MC, TUNER, CD).
Instructions for setting up and listening to a turntable (MM or MC cartridge).
Steps to listen to a compact disc player or tuner inputs.
How to select and play back audio from a connected tape deck.
Procedure for recording a desired program source to a tape deck.
Instructions for performing tape-to-tape copying between two connected tape decks.
Guidance on potential causes of hum and noise in audio installations.
Explanation of the protection relay circuit that prevents popping noise on power-up.
Information on the unit's variable voltage capability and settings for different regions.
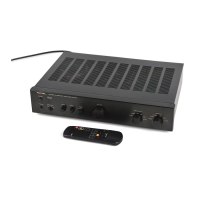
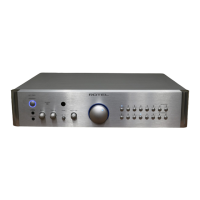
The Rotel RC-870 is a stereo control amplifier designed to provide high-quality sound and top performance, incorporating the latest electronic technology and human-engineering concepts for functional beauty.
The RC-870 serves as the central control unit for an audio system, allowing users to connect various components like turntables, CD players, tuners, and cassette decks, and manage their audio signals. It features an input selector to choose the desired audio source, a volume control for adjusting sound levels, and a mode selector for stereo, mono, or mute listening. The amplifier includes a protection relay circuit to prevent popping noises during power-on, ensuring a smooth and safe startup.
Power and Connections: Before operation, ensure all connections are properly made and the volume control is set to minimum. The unit connects to a household wall outlet, and its AC outlets (rated at 200 watts maximum) provide power to other audio components. These outlets are switched, turning on or off with the RC-870's power. It's crucial not to connect equipment exceeding the 200-watt rating or power amplifiers to these outlets. RCA pin cords are used for connecting components, with L (left) and R (right) markings matched correctly. A grounding wire from the turntable should be connected to the GND terminal on the amplifier.
Listening to a Turntable: The RC-870 offers two sets of PHONO input terminals: MM (Moving Magnet) and MC (Moving Coil). For an MM-type cartridge, use the PHONO MM terminals; for an MC-type cartridge, use the PHONO MC terminals. If you have two turntables, one with an MM cartridge and one with an MC cartridge, both can be connected simultaneously. To listen, set the Tape Monitor selector to OFF, the Input selector to the appropriate PHONO (MM or MC) position, start playing the turntable, and then raise the volume.
Listening to a CD Player or Tuner: To listen to a compact disc player or tuner, set the Tape Monitor selector to OFF. Then, set the Input selector to CD for a CD player or TUNER for radio broadcasts. Play the CD or tune to the desired station according to the equipment's instructions, and adjust the volume.
Playing Back a Tape Deck: To play back a tape, set the Tape Monitor selector to TAPE 1 or TAPE 2, start playback on the tape deck, and raise the volume.
Recording Program Source: To record a program, play the desired source. The signal from the source is sent through the TAPE MONITOR OUT terminals on the rear panel. Put the tape deck into record mode. During recording, the Volume control and Mode selector will not affect the signal sent through the TAPE MONITOR OUT terminals.
Dubbing (Tape-to-Tape Copying): The RC-870 supports two modes of dubbing between two connected tape decks: from TAPE 1 to TAPE 2, and from TAPE 2 to TAPE 1. To dub, set the Tape Monitor selector to "12" (TAPE 1 to TAPE 2) or "21" (TAPE 2 to TAPE 1). Play back the source tape (TAPE 1 or TAPE 2) and put the destination tape deck (TAPE 2 or TAPE 1) into record mode. During dubbing, you can listen to the signal with the Volume control or Mode selector, but these adjustments will not affect the recorded signal. When listening to a source selected by the Input selector, ensure the Tape Monitor selector is set to OFF.
Headphone Jack: For private listening, plug headphones into the headphone jack. This action cuts off sound from the speakers. The headphone volume can be regulated with the main volume control.
Volume Control: This dual concentric knob adjusts the volume level. Turning clockwise increases the volume, and counter-clockwise decreases it. It allows for either separate or combined adjustment of both channels.
Mode Selector: This selector chooses the stereo signal's reproducing mode. "STEREO" is for normal stereo reproduction, "MONO" for monophonic reproduction. The "MUTE" position cuts off the unit's output, silencing all sound.
Tape Monitor Selector: This selector is used to listen to a signal from a tape deck. Setting it to TAPE 1 listens to the deck connected to TAPE 1 terminals, and TAPE 2 listens to the deck connected to TAPE 2 terminals. The "12" position enables tape-to-tape copying from TAPE 1 to TAPE 2, and "21" enables copying from TAPE 2 to TAPE 1. Ensure this selector is set to OFF when listening to a source selected by the Input selector.
Input Selector: This selector chooses the input signal from components connected to PHONO MM, PHONO MC, TUNER, and CD terminals on the rear panel. It is operable when the Tape Monitor selector is set to the OFF position.
Hum and Noise Reduction: To minimize hum and noise in a high-fidelity installation, ensure all component connections are properly made and RCA pin jacks are securely inserted. The location of the audio system should be carefully selected to avoid noise from fluorescent lamps or thermostats. If noise persists, consult your dealer.
Power Supply Safety: Always connect the AC line cord to a household wall outlet, ensuring the outlet voltage matches the unit's electrical rating. Connect or disconnect the AC line cord only after turning off the power switch to prevent shock noise or speaker damage.
Ventilation: Never block the ventilation holes on the top and bottom of the unit. Provide ample ventilation space around the unit to prevent damage from excessive heat.
Cabinet Integrity: To avoid electric shock or component damage, never open the cabinet. If a foreign object enters the unit, turn off the power, disconnect the wall plug, and consult a qualified electrician or dealer.
Installation Environment: Place the unit on a level, flat surface free from humidity, vibration, high temperature, and direct sunlight. Avoid highly enclosed spaces like near a wall or on a bookshelf, as poor ventilation can cause undesirable effects.
Moving the Unit: When transporting, remove the AC cord from the wall outlet and all other connected cords from the rear panel to prevent wire breakage and short circuits.
Water Exposure: If the unit gets wet, immediately disconnect the AC cord and consult your dealer or a qualified electrician.
Cleaning: Do not use chemicals such as benzine or thinners on the front panel. Always use a soft, dry cloth to clean the unit.
Owner's Manual: Keep the owner's manual near the unit and record the serial number (found on the rear panel) on the cover for future reference.
| Type | Stereo Preamplifier |
|---|---|
| Frequency Response | 10Hz - 100kHz (±0.5dB) |
| Output | 1V (Pre out) |
| Weight | 5.9kg |
| Input Sensitivity (line) | 150mV |
| Signal-to-Noise Ratio (line) | 95dB |
| Output Impedance | 100Ω |
| Signal to Noise Ratio | 95dB |
| Dimensions (WxHxD) | 440 x 73 x 316mm |
| Input Impedance | 47kΩ (line) |
| Dimensions | 440 x 73 x 316mm |
| Input Sensitivity | 150mV (MM), 2.5mV (MC) |