EasyManua.ls Logo

Rotel RX-1052 V03 - User Manual

Rotel RX-1052 V03
8 pages
Print Icon
To Next Page IconTo Next Page
Loading...
1
Rotel of America 54 Concord St North Reading, MA 01864 Ph: 978-664-2870 Fax: 978-664-4109
Technical Information
DATE:
January 20, 2011
MODEL:
RX-1052 V03
Software Upgrade Instructions
The procedure to update the RX-1052 software is accomplished with the use
of the Rotel Upgrade Manager computer communications program.
This software is only for the RX-1052 V03. The V03 version can be determined by
the RDS logo on the front panel, or a small “V03” denoted on the rear panel above
the serial number sticker. Rotel does not take any responsibility for loss of
information or problems resulting from a failed download. Units that fail after a
download may be returned to Rotel for attention under warranty.
Items needed for upgrade:
Windows-compatible PC with serial port connection, or USB-to-serial adapter.
RS232 cable with DB-9 to RJ-45 terminations.
Upgrade software and Rotel Upgrade Manager download program.
Rotel Upgrade Manager Program Installation
1. Download and save the update files from Rotel to a folder on the PC. Make
note of where the files are saved. (example: C:\Temp)
2. From the Windows Start Menu, choose “Run…”
3. When the run window opens, click Browse and locate the folder where the files
were saved to, and select the file named “Rotel Upgrade Manager.exe”
4. Hit OK to run the setup program.
5. Once setup is running, follow the prompts to install the program into the folder
of your choice.
6. When installation is complete, please refer to the upgrade instructions on the
following page.
Question and Answer IconNeed help?

Do you have a question about the Rotel RX-1052 V03 and is the answer not in the manual?

Summary

Software Upgrade Instructions

Rotel Upgrade Manager Installation

Steps to install the Rotel Upgrade Manager software program onto a PC.

RX-1052 Software Upgrade Procedure

Initial Setup and Connection

Power off unit, connect RS232 cable, power on to standby mode.

Launching Upgrade Software

Start the Rotel Upgrade Manager program from the PC's start menu.

Selecting the Firmware File

Click 'Open' and select the correct software file to load for the upgrade.

Configuring Communication Settings

Set the appropriate COM port and Baud rate (38400) for the PC connection.

Starting the Upgrade Process

Click 'Next' to initialize the communication port and begin the update.

Verifying Version and Cycling Power

Power cycle the unit, verify software version, and prepare for data write.

Monitoring Data Transfer

Observe progress as sectors are erased and new data is written to flash.

Completing the Flash Update

Confirm the checksum, complete the flash update, and exit the manager.

Restoring Default Settings

Reset the unit to its factory default configuration after the upgrade.

Troubleshooting Common Issues

Communication Port Errors

Resolve "Communication port initial Error!" by checking port existence and usage.

Device Initialization Failures

Address "Failed the Device Initialization" by checking connections and unit status.

Identifying COM Ports

Steps to confirm the correct COM port assignment using Windows Device Manager.

Adjusting COM Port Properties

Modify COM port settings such as number and buffer levels for better performance.

Overview

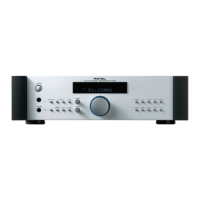
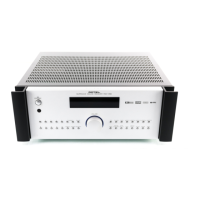
This document outlines the software upgrade procedure for the Rotel RX-1052 V03, a device whose software can be updated using a computer communications program called the Rotel Upgrade Manager. The V03 version of the device is identifiable by an RDS logo on the front panel or a "V03" marking on the rear panel above the serial number. Rotel emphasizes that it is not responsible for data loss or issues arising from a failed download, though units that fail post-download may be eligible for warranty service.

Function Description

The Rotel RX-1052 V03 is an electronic device, likely an audio receiver or similar component, that requires periodic software updates to maintain optimal performance and introduce new features. The core function described in this manual is the process of updating its internal software using a Windows-compatible personal computer. This update mechanism ensures the device can adapt to new standards, fix bugs, or enhance its operational capabilities over time. The upgrade process involves downloading specific software files and utilizing a dedicated manager program to transfer these files to the device's main flash memory.

Usage Features

The upgrade process for the Rotel RX-1052 V03 is designed to be user-friendly, albeit requiring a few specific steps and components.

  • System Requirements: To perform an upgrade, users need a Windows-compatible PC equipped with a serial port connection or a USB-to-serial adapter. A specific RS232 cable with DB-9 to RJ-45 terminations is also essential for connecting the device to the computer. The necessary upgrade software and the Rotel Upgrade Manager download program must also be acquired and installed.
  • Software Installation: The Rotel Upgrade Manager program is installed by downloading the setup file, locating it via the Windows Start Menu's "Run" command, and following the on-screen prompts. Users can choose their preferred installation directory.
  • Connection and Preparation: Before initiating the upgrade, the device and all other system components must be powered off using the rear panel power switch. The RS232 cable is then connected between the device and the computer. The device is subsequently powered on to standby mode via its rear panel switch.
  • Launching the Upgrade Manager: The Rotel Upgrade Manager program is launched from the PC's Start Menu, typically found within a folder labeled "Rotel Upgrade Manager."
  • File Selection: Within the Upgrade Manager, users click the "Open" button to browse for and select the current software file (a .BIN file) that needs to be loaded onto the device.
  • Port and Baud Rate Configuration: Crucially, the correct serial port (COM1 or another appropriate COM port) and a baud rate of 38400 must be selected within the Upgrade Manager. The manual provides guidance on how to determine the correct COM port, especially for USB-to-serial adapters.
  • Initiating the Download: After configuring the port and baud rate, clicking the "Next" button initiates the communication port initialization. The program will prompt the user to press "Next" again to start the download procedure.
  • Device Initialization and Power Cycle: The program will indicate "Device Initialization OK" and instruct the user to power the device off and then back on using the rear panel AC power switch. During this phase, the device's front display and LEDs will not illuminate, which is normal.
  • Version Verification: After the power cycle, clicking "Next" again displays the currently installed software version. Users are advised to verify that the new software to be loaded is indeed newer than the existing version before proceeding.
  • Data Transfer: A final click of the "Next" button begins the data transfer, displaying "Sector Erasing" followed by "Writing data in FLASH....." This process can take several minutes, with USB-to-serial adapters potentially requiring up to 20 minutes, while built-in serial ports typically complete it within 5 minutes.
  • Completion and Exit: Upon successful completion, the program will display "Checksum OK" and "Complete Flash update procedure." Users can then press the "Exit" button to close the Upgrade Manager.
  • Post-Upgrade Reset: After the upgrade, it is strongly recommended to reset the unit to its default configuration. This is achieved by powering off the unit via the rear panel AC switch, disconnecting the RS232 cable, and powering it back on. With the unit powered on, users simultaneously press and hold the SPEAKER B, TUNE/PRESET, and MONO front panel buttons. They then use the CD or VIDEO 3 buttons as up/down cursor keys to navigate to "SAVE," and the VIDEO 2 and VIDEO 4 buttons as left/right cursor keys to select "SAVE YES" to restore factory default settings.

Maintenance Features

The manual provides extensive troubleshooting information, which serves as a critical maintenance feature for users encountering issues during the upgrade process.

  • Troubleshooting Communication Errors: The document highlights the importance of selecting the correct COM port, whether it's a built-in serial port or a USB-to-serial adapter. Incorrect selection leads to communication errors.
  • USB-to-Serial Adapter Driver Verification: Users are advised to ensure they have the latest drivers for their USB-to-serial adapters, as outdated or incorrect drivers can cause connection problems even if the adapter appears in Windows.
  • "Communication port initial Error!" Solutions:
    • Solution #1: Verify the existence of the selected COM port and ensure it's not already in use by another program. The manual refers to a section on "Confirming and Changing the COM Port" for detailed instructions.
    • Solution #2: Close all other open programs that might be utilizing the serial port.
  • "Failed the Device Initialization" Solutions: This error indicates that the program cannot connect to the Rotel unit despite the COM port being selected.
    • Solution #1: Confirm that the correct baud rate (38400) is selected and that the unit is in the ON state. Users are instructed to power the unit off and on via the back panel AC power switch, then power it up via the front panel power button before reattempting the update.
    • Solution #2: If the first solution fails, perform a Factory Default on the unit. This option is located on the DEFAULT page of the unit's Main Menu. Set it to 'YES' and press Enter to reset.
    • Solution #3: For USB-to-serial adapters, verify that the latest drivers are installed from the manufacturer's website.
    • Solution #4: If a non-Rotel supplied cable is used, it's recommended to obtain an upgrade cable from Rotel or an authorized dealer, as incorrect pin configuration on the RJ45 to DB9 cable can cause this error.
  • Confirming and Changing the COM Port: Detailed steps are provided to identify and, if necessary, change the COM port assigned to the serial port or USB-to-serial adapter:
    • Right-click "My Computer" on the desktop and select "Properties."
    • Navigate to the "Hardware" tab and select "Device Manager."
    • Expand "Ports (COM & LPT)" to see the assigned COM port for the USB-to-serial adapter.
    • For NEC updaters that only allow COM ports 1-6, instructions are given to remap higher-numbered COM ports. This involves right-clicking the USB-to-Serial adapter in Device Manager, selecting "Properties," then "Port Settings," "Advanced," and finally choosing an available COM port from the drop-down menu.

This comprehensive guide ensures that users can effectively manage and maintain their Rotel RX-1052 V03 by providing clear instructions for software upgrades and robust troubleshooting support.

Rotel RX-1052 V03 Specifications

General IconGeneral
Channels2
Total Harmonic Distortion0.03%
Damping factor180
Signal to noise ratio100dB (line)
Power Output100 watts per channel (stereo)
Tuning rangeFM, AM
Input Sensitivity200mV (line)
OutputPreout
Speaker load impedance4-16 ohms

Related product manuals