34
FA ROTEX RoCon HP - 03/2013
4 x Faults and malfunctions
4.4 Configuration DIP switch
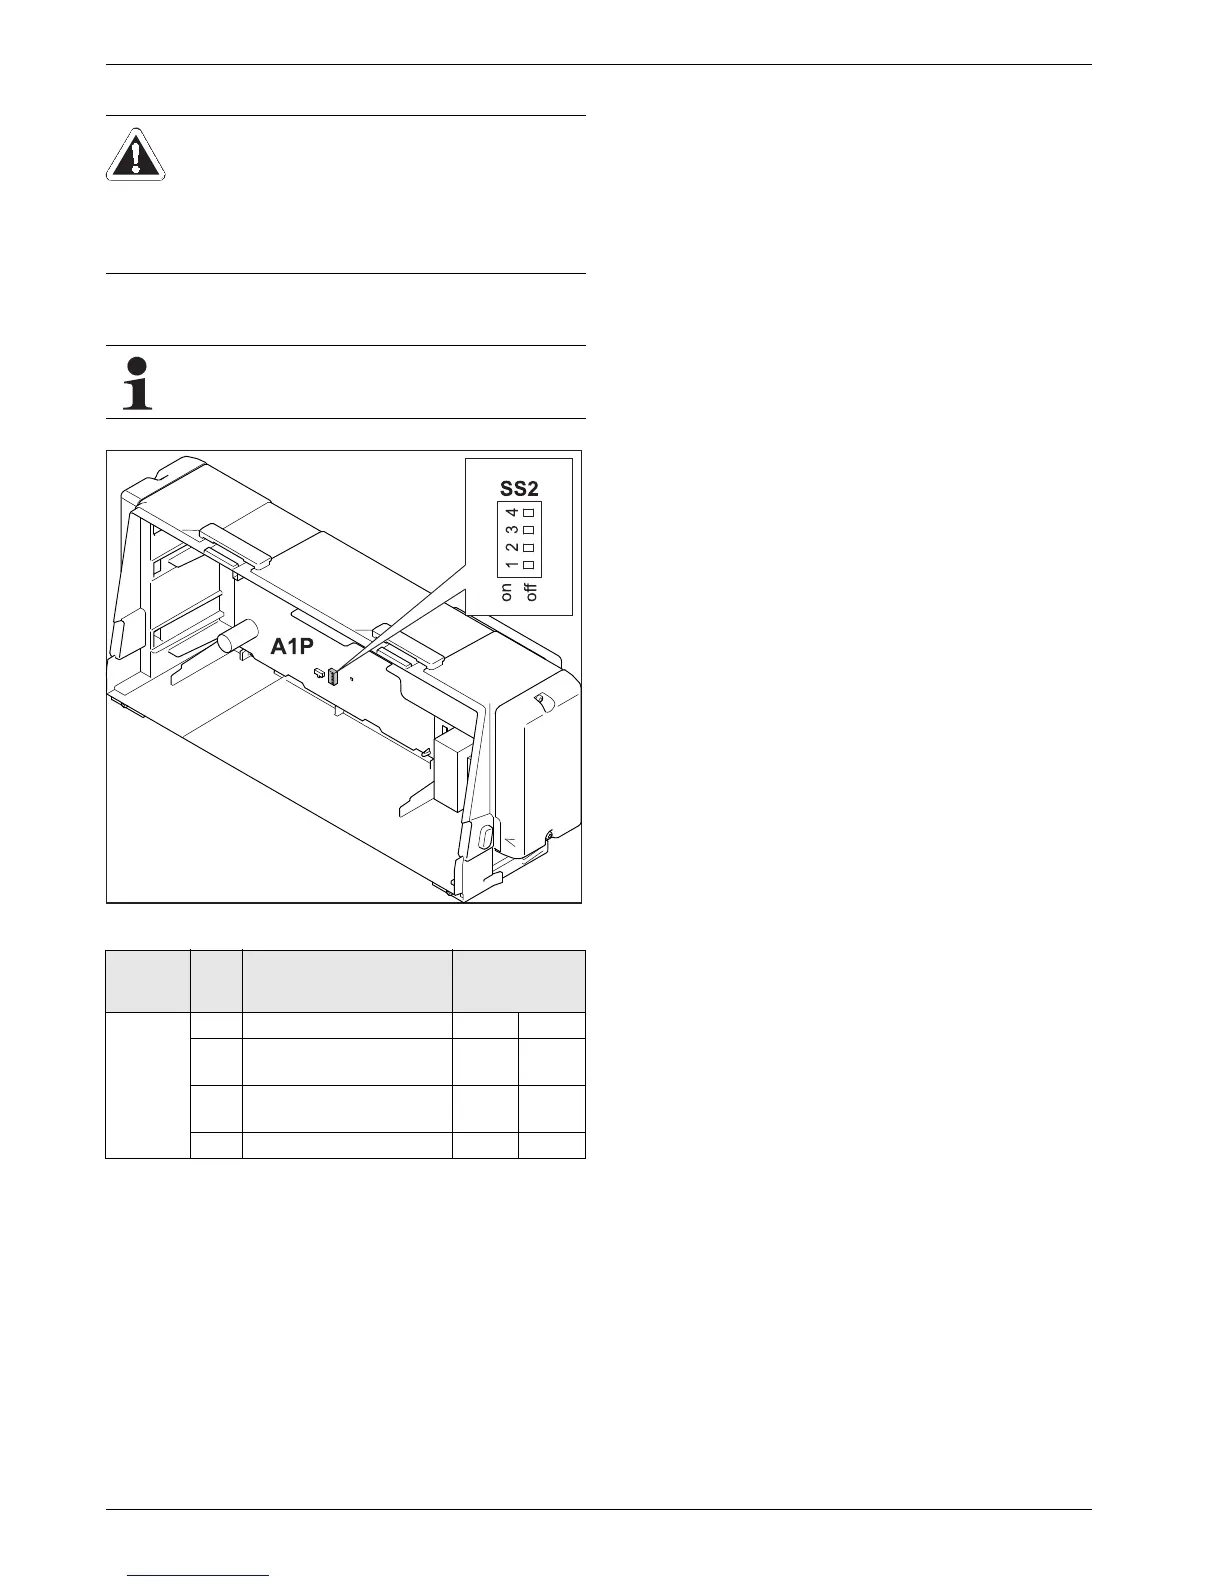
Ɣ Check the DIP switch setting on the A1P circuit board of the
HPSU compact, adjust where necessary (see tab. 4-3).
Tab. 4-3 DIP Switch Settings (* = factory setting)
WARNING!
To make changes to the DIP switch settings, the
installation must first be disconnected from the power
supply.
Î Non compliance may cause damage to the
HPSU compact.
DIP switch settings are not recognised until a brief inter-
ruption to the power supply.
Fig. 4-3 Setting of DIP switch SS2
DIP
switch
No. Designation Setting
SS2
1 Do not change. – –*
2
Domestic hot water gener-
ation
On* Off
3
Room thermostat/pump in
continuous operation
On Off*
4 Do not change. – –*
 Loading...