4 Installation
Installation manual
5
RRLQ011~016CA
Outdoor unit for air to water heat pump
4P385895-1A – 2016.03
(mm)
>150
620
350
(345-355)
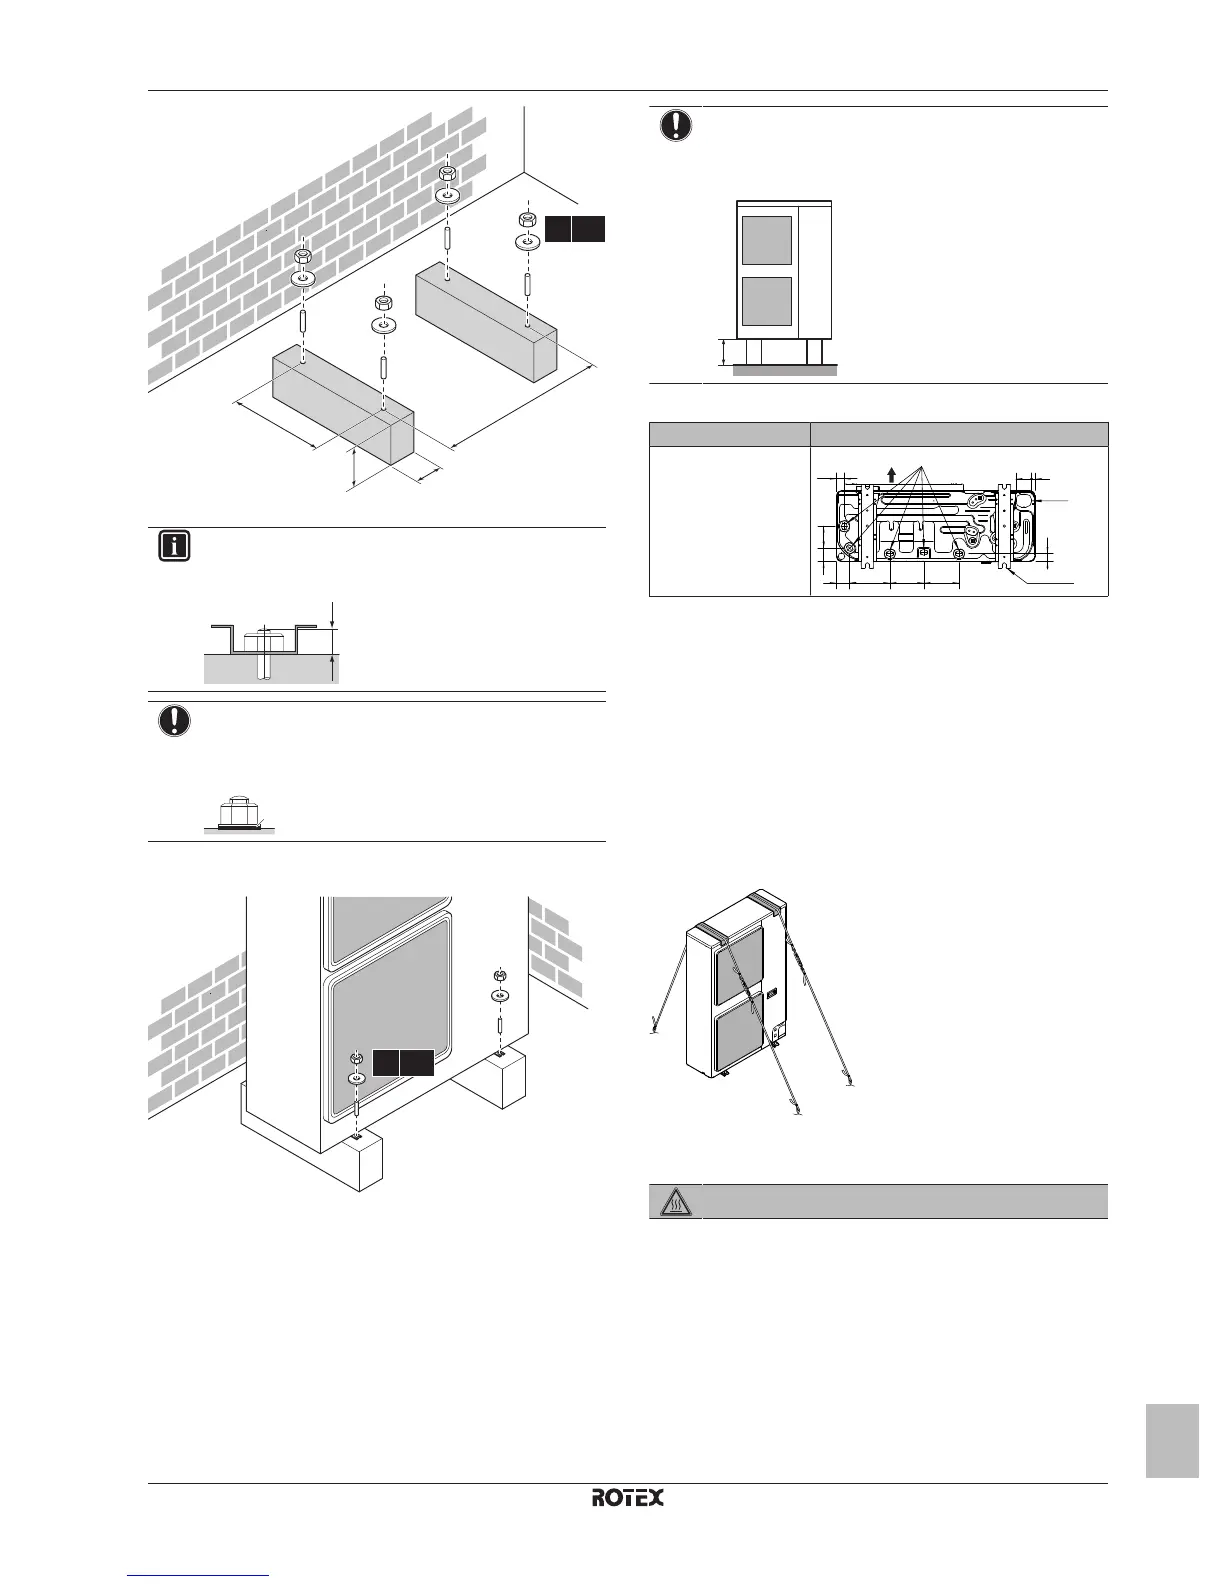
4× M12
a
a Make sure not to cover the drain holes.
INFORMATION
The recommended height of the upper protruding part of
the bolts is 20mm.
NOTICE
Fix the outdoor unit to the foundation bolts using nuts with
resin washers (a). If the coating on the fastening area is
stripped off, the nuts rust easily.
4.1.2 To install the outdoor unit
4.1.3 To provide drainage
Make sure that condensation water can be evacuated properly.
NOTICE
If drain holes of the outdoor unit are covered by a mounting
base or by floor surface, raise the unit to provide a free
space of more than 150mm under the outdoor unit.
Drain holes
Model Bottom view (mm)
RRLQ
a Discharge side
b Drain holes
c Knockout hole (piping intake - downwards route)
d Anchor points
4.1.4 To prevent the outdoor unit from falling
over
1 Prepare 2 cables as indicated in the following illustration (field
supply).
2 Place the 2 cables over the outdoor unit.
3 Insert a rubber sheet between the cables and the outdoor unit
to prevent the cable from scratching the paint (field supply).
4 Attach the cable’s ends. Tighten those ends.
4.2 Connecting the refrigerant piping
DANGER: RISK OF BURNING
4.2.1 To connect the refrigerant piping to the
outdoor unit
1 Do the following:
▪ Remove the service cover (a) with screw (b).
▪ Remove the piping intake plate (c) with screw (d).


 To Next Page