RotorWay International
Exec 162F Maintenance Manual
60
Rev. 1 8/00
ROTOR HUB: SLIDER BALL ADJUSTMENT COLLAR
The Slider Ball Adjustment Collar (part no. E49-3230) is adjusted and set on the swash plate assembly at the factory.
However, it may need to be re-adjusted occasionally if the helicopter is exposed to severe or radical temperature changes.
1. Using a protractor level, set the swash plate perpendicular to the main shaft. Rotating the blades may help you in
achieving the fore and aft angles. If a protractor level is not available, centering the cyclic stick should place the swash
plate at a relative perpendicular angle to the shaft. Loosen the two set screws (part no. E00-9302, Ref. 16 on print
E49-2002) three full turns. With your fingers, loosen the adjustment collar approximately 2 full turns in a counter
clockwise direction, until it can be turned easily. Again using your fingers, turn the collar in a clockwise direction until
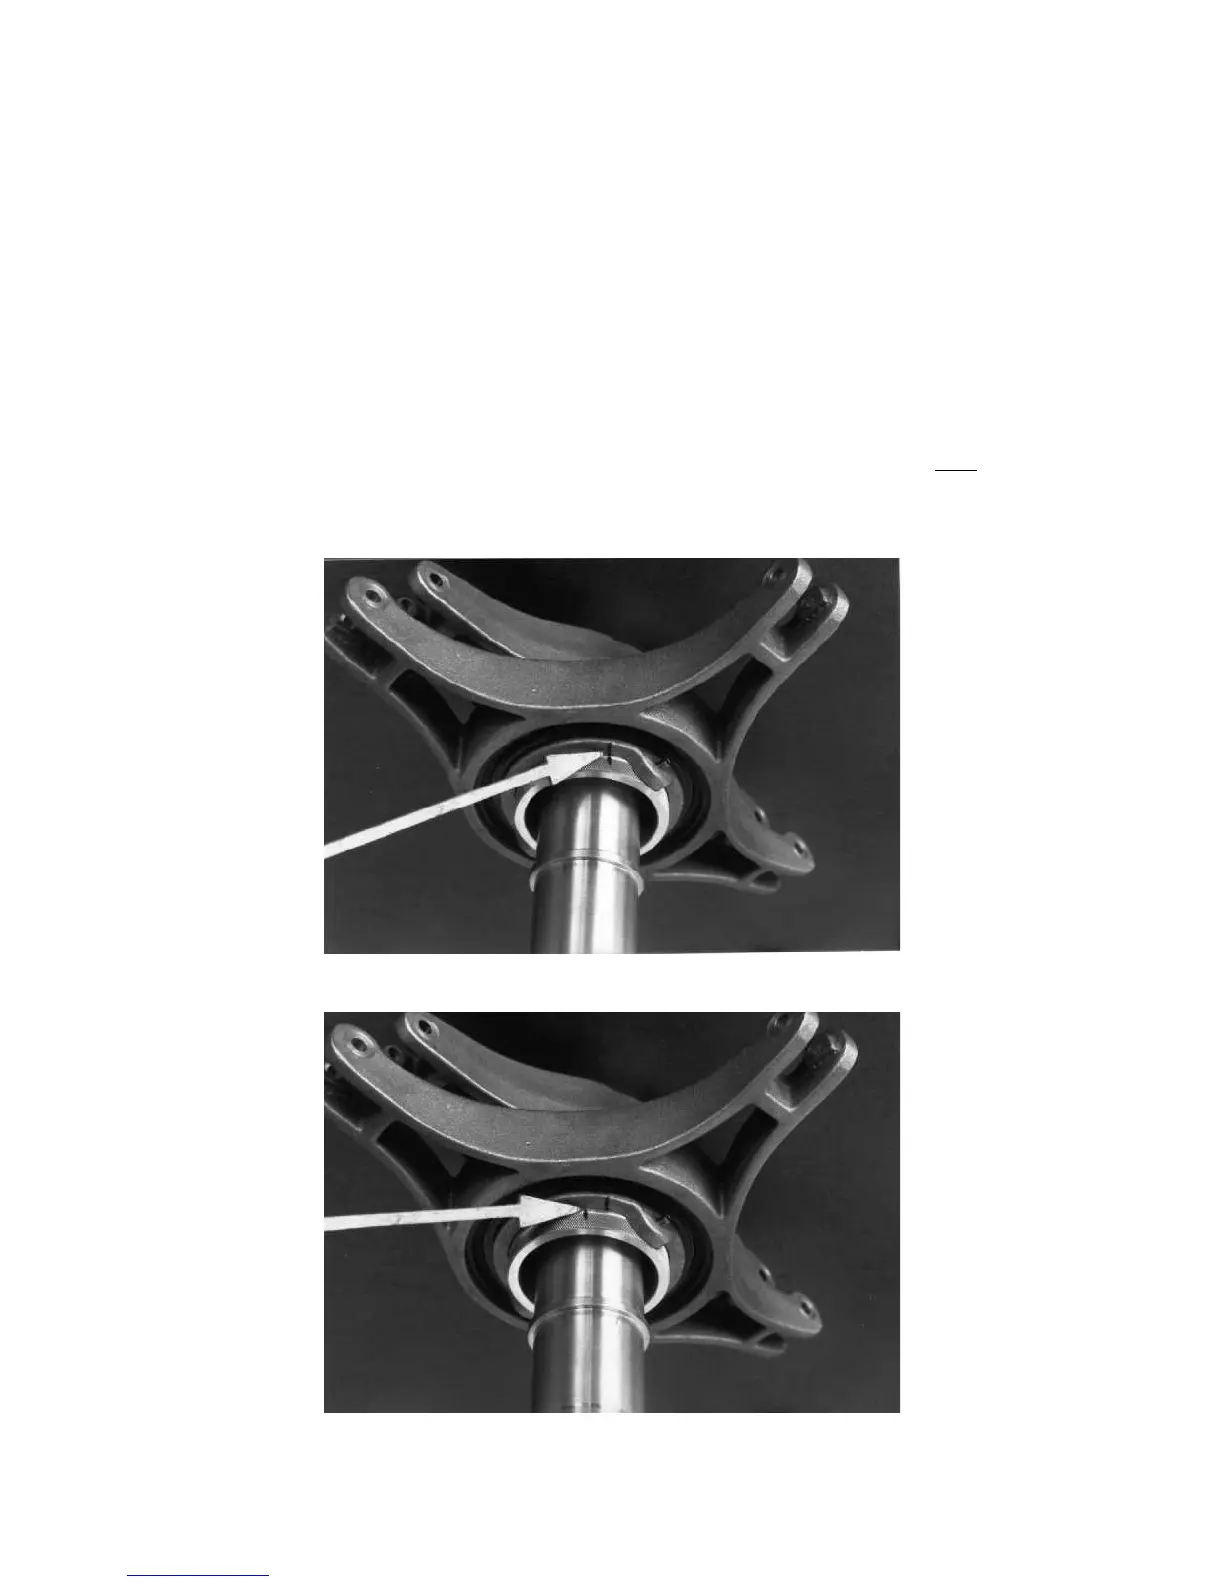
it comes to a stop. Make an index mark on the adjustment collar and non-rotating swashplate with a pencil or marker.
Back off the adjustment collar counter clockwise 1/2". Then tighten the two set screws. See photos #14-16. Note: Use
silicone on the set screws to help lock them in position and prevent them from backing out. Do
NOT use loctite.
Photo #14: Placing an index mark.
Photo #15: View after the collar has been backed off.