6 7
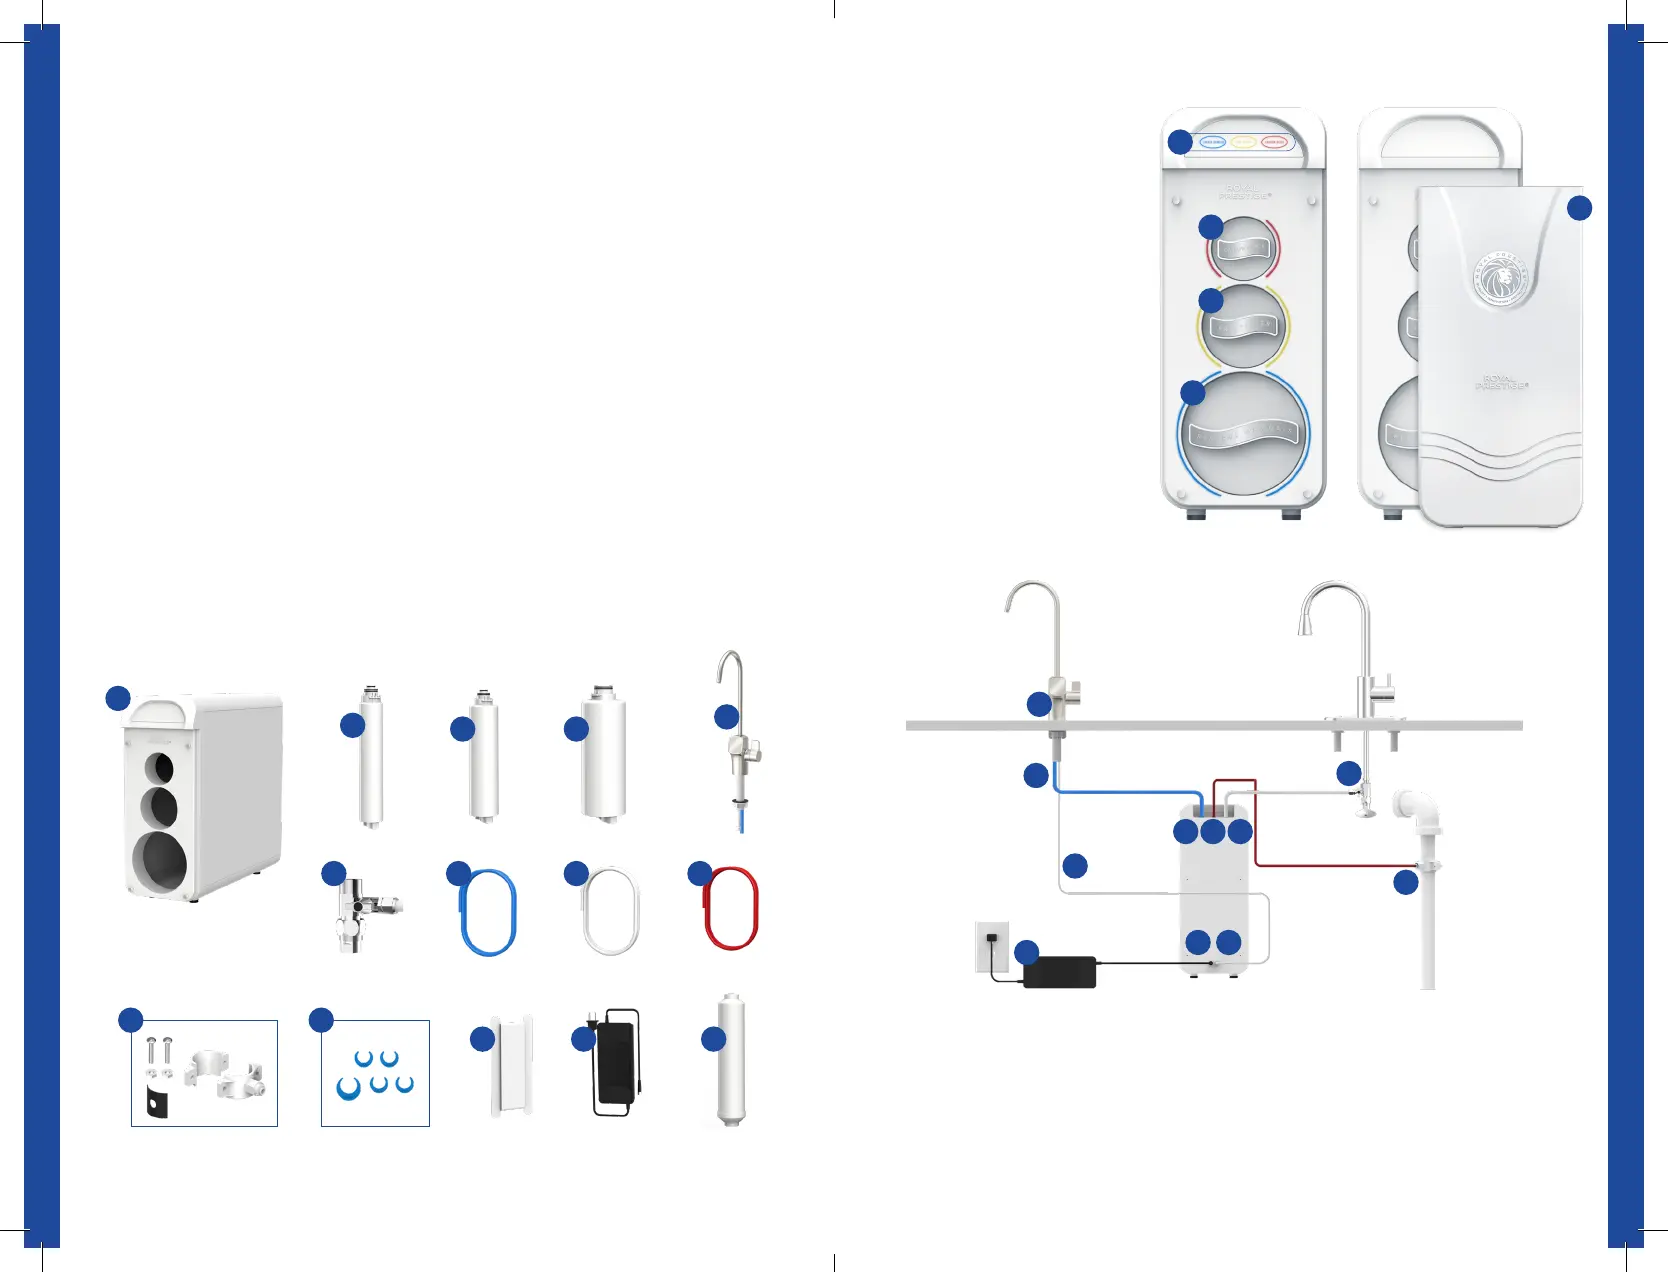
Below you will find a visual representation of the Royal Prestige
®
FrescaFlow
components and a sample connection diagram.
For a smooth installation process, please study the components and
connection points.
J→G: Using the “White PE Tubing” connect the “Feed Water Adapter” to “Input Water Port.”
L→I: Using the “Red PE Tubing” connect the “Drain Bracket” to “Drain Water Port.”
K→H: Using the “Blue PE Tubing” connect the “Faucet Quick-Connect Fitting” to “Filtered
Water Port.”
F→N: From “Faucet Power Port” to “Faucet Power Cord”
E→M: From “Power Port” to “Power Adapter”
Note: Picture is for reference only.
1. System Housing Set (1)
2. Carbon Block Filter (1) (CB)
3. Pre-Filter (1) (PF)
4. Reverse Osmosis Filter (1) (RO)
5. Royal Prestige
®
FrescaFlow Faucet
6. Feed Water Adapter Set 3/8” - 1/2” (1)
7. Blue PE Tubing 3/8”X 60” (1)
(Fixed to Faucet)
8. White PE Tubing 1/4” X 60” (1)
(Fixed to Feed Water Adapter)
9. Red PE Tubing 1/4” X 60” (1)
10. Drain Bracket Set 1/4” X 1” (1)
11. Blue Lock Clips - Large and Small (5)
12. Teflon Tape (1)
13. Power Adapter Set (1)
14. Extra Part: External Mineralization
Cartridge (1). Please see
separate instructions included
with Mineralization Cartridge for
installation and assembly steps.
BEFORE YOU START
A. Filter Life Indicators
B. Carbon Block Filter (CB)
C. Pre-Filter (PF)
D. Reverse Osmosis Filter (RO)
E. System Power Port
F. Faucet Power Port
G. Input Water Port
H. Filtered Water Port
I. Drain Water Port
J. Feed Water Adapter
K. Blue PE Tubing
Pre-Attached to Faucet
L. Drain Bracket
M. Power Adapter
N. Faucet Power Cord
O. Royal Prestige
®
FrescaFlow
Faucet
P. Removable Front Cover
Body
Components
1
2
9
10 11
13 14 12
7 8 6
3 4
5
A
P
B
C
D
K
G H I
L
M
O
N
J
E F
 Loading...