EasyManua.ls Logo

Ruckus Wireless ZoneFlex R500 Unleashed - User Manual

Ruckus Wireless ZoneFlex R500 Unleashed
4 pages
Print Icon
To Next Page IconTo Next Page
Loading...
Copyright © 2015 Ruckus Wireless, Inc.
Published September 2015, Part Number 800-70564-002 Rev C
Page 1 of 4
Unleashed
TM
R500 Access Point
Quick Setup Guide
This Quick Setup Guide provides step-by-step instructions on how to
set up your Ruckus Wireless Unleashed R500 Dual Band 802.11ac WiFi
Access Point. After completing the steps described in this Guide, the
Unleashed Master Access Point (Master AP) will be created. Additional
Unleashed access points can be added to the network for additional
coverage and capacity.
Before You Begin
Before deploying Ruckus Wireless products, please check for the latest
software and release documentation.
User Guides and Release Notes are available at
http://support.ruckuswireless.com/documents.
Software Upgrades are available at
http://support.ruckuswireless.com/software.
Open Source information is available at
http://opensource.ruckuswireless.com.
Software License and Limited Warranty are available at
http://support.ruckuswireless.com/warranty.
Package Contents
Unleashed R500 Access Point
One wall-mount anchor kit, including two 1" No. 8 steel panhead
Phillips sheet metal screws, one 5mm M2.5 x 1.06 Torx security
screw, and wall-mount anchors
One external T-bar bracket (two unassembled parts)
•One unit removal pin
Regulatory flyer
Product warranty statement
Declaration of Conformity, if required
•This
Quick Setup Guide
Step 1: Collect Tools and Setup Requirements
Make sure that you have the following setup requirements:
A PC/Mac/mobile client with a WiFi network adapter and a web
browser
One Cat 5e Ethernet cable
Network switch or router, with Internet connectivity
An AC power adapter (sold separately), or
an 802.3af or 802.3at -compliant Power over Ethernet (PoE)
switch or PoE injector
No. 2 Phillips screwdriver and T8 Torx driver for wall mounting
anchor kit
When mounting the Unleashed R500 to a truss or pole, two
customer-supplied cable ties
Step 2: Connect the AP to Power and Your Network
Figure 1. : Top view
1 After removing your Unleashed AP from its package, connect it
to your network switch or router using an Ethernet cable.
2 Using an AC adapter (sold separately), connect the AP 12VDC
port to a protected power source.
Alternatively, connect the PoE port to a PoE injector or PoE
switch for both power and network connections.
3 Verify that the Power LED on the external enclosure is a steady
green.
Figure 2. : Bottom view
Step 3: Log In and Run the Setup Wizard
1 As soon as the Unleashed AP is powered on and connected to
the local network, it boots up and begins broadcasting a
temporary unencrypted ESSID named “Configure.Me-[xxxxxx]”
from the 2.4 GHz radio only.
2 Using your client’s WiFi configuration settings, select and
associate to the “Configure.Me-[xxxxxx]” SSID.
3 Launch a web browser and enter the following into the
browser’s URL bar:
unleashed.ruckuswireless.com, and
press
Enter.
Figure 3. Connect to the “ConfigureMe” SSID
\
Figure 4. : Select Create New Unleashed Network
4 Select Create New Unleashed Network, and click
Start to begin.
5 The “Configuring Unleashed Master” progress screen displays
the progress. Wait until the initialization process completes.
.
6 Once initialization is complete, ensure that you are still
connected to the “Configure.Me” SSID, and click
Next.
7 You will be redirected to the Setup Wizard. Complete the steps
in the Setup Wizard and click
Finish.
Note: If you will be using PoE, then you will need a Cat 5e (or
better) Ethernet cable to connect the AP to the PoE injector or
switch.
PoE Port 12VDC Port
Note: Do NOT disconnect the power or network cable from
the device during the setup process.
Note: The Unleashed Master initialization process can take
up to 5 minutes to complete.
Question and Answer IconNeed help?

Do you have a question about the Ruckus Wireless ZoneFlex R500 Unleashed and is the answer not in the manual?

Summary

Step 1: Collect Tools and Setup Requirements

Step 2: Connect the AP to Power and Your Network

Step 3: Log In and Run the Setup Wizard

Step 4: Customize Your Wireless LANs

Step 5: Deploy Additional Unleashed Access Points

(Optional) Mounting Instructions

Mounting on a Flat Surface

Instructions for attaching the AP to a flat surface using mounting hardware.

Mounting on a Recessed Drop-Ceiling T-Bar

Instructions for mounting the AP to a recessed drop-ceiling T-bar.

Mounting on a Flush Drop-Ceiling T-Bar

Instructions for mounting the AP to a flush drop-ceiling T-bar using the integrated bracket.

Mounting on a Truss or Pole

Instructions for fastening the AP to a truss or pole using cable ties.

Overview

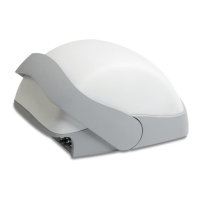
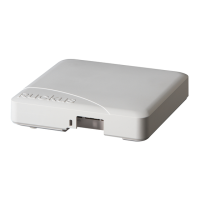
The Ruckus Wireless Unleashed R500 Access Point is a dual-band 802.11ac WiFi access point designed for creating or expanding a wireless network. It functions as part of the Ruckus Unleashed system, where one R500 AP acts as the "Master AP" to manage the network, and additional R500 APs can be added as "member APs" to extend coverage and capacity.

Function Description:

The primary function of the Unleashed R500 is to provide wireless connectivity for client devices within a local area network. When powered on and connected to the local network, it broadcasts a temporary, unencrypted ESSID (e.g., "Configure.Me-[xxxxxx]") from its 2.4 GHz radio. This allows a client device (PC/Mac/mobile client with WiFi) to connect to the AP and access a web-based setup wizard for initial configuration.

Once configured, the Master AP establishes the Unleashed network, which includes defining Wireless LANs (WLANs) with specific settings. These WLANs are then broadcast by the Master AP and any connected member APs, allowing client devices to connect to the secure wireless network. The Unleashed system centralizes management, meaning that once the Master AP is configured, additional member APs automatically retrieve all WLAN and other network settings upon connection, simplifying deployment.

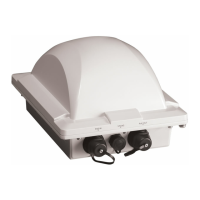
The R500 supports both Power over Ethernet (PoE) and a 12VDC power adapter for power, offering flexibility in deployment scenarios. It integrates with a network switch or router that provides Internet connectivity, enabling client devices connected to the R500 to access the internet.

Usage Features:

  • Easy Setup Wizard: The device features a guided setup wizard accessible via a web browser. After connecting to the temporary "Configure.Me" SSID, users navigate to unleashed.ruckuswireless.com to initiate the setup process. This wizard guides users through creating a new Unleashed network, configuring initial WLAN settings, and setting up administrator credentials.
  • Master AP Initialization: The setup process involves an "Unleashed Master" initialization, during which the selected R500 AP configures itself to manage the network. This process can take up to 5 minutes.
  • Dashboard Management: After successful login, users are presented with an "Unleashed Dashboard," which provides an overview of the Ruckus Unleashed network. From this dashboard, users can manage existing WLANs, create new WLANs, and view connected clients and access points.
  • WLAN Customization: The dashboard allows for fine-tuning the settings of existing WLANs and creating additional ones. This includes editing configurations such as security protocols, SSIDs, and other wireless parameters.
  • Scalable Deployment: The Unleashed system is designed for scalability. Once the Master AP is configured, additional R500 APs can be easily added to the network. These "member APs" simply need to be connected to the same Layer 2 network (subnet) and powered on; they will automatically discover the Master AP and join the Unleashed network, extending wireless coverage without requiring individual configuration.
  • Flexible Power Options: The R500 can be powered either by an external 12VDC power adapter (sold separately) or through an 802.3af or 802.3at compliant Power over Ethernet (PoE) switch or PoE injector. This allows for deployment in locations where traditional power outlets may not be readily available, simplifying cabling.
  • Various Mounting Options: The R500 offers multiple mounting possibilities to suit different environments:
    • Flat Surface Mounting: Can be mounted directly to a wall or ceiling using screws and anchors. A mounting template is provided for accurate drill hole placement.
    • Recessed Drop-Ceiling T-Bar Mounting: Utilizes an enclosed T-bar bracket to attach the AP to a recessed drop-ceiling T-bar. The bracket minimizes ceiling tile displacement.
    • Flush Drop-Ceiling T-Bar Mounting: Can be mounted to a flush drop-ceiling T-bar using an integrated bracket mechanism, where the AP rotates to lock into place.
    • Truss or Pole Mounting: Can be secured to a truss or pole using customer-supplied cable ties fed through slots on the back of the AP.
  • Locking Mechanism: For flat surface mounting, a unit removal pin is used to release a locking mechanism, allowing the AP to be securely attached or detached from the mounting screws. Similar mechanisms are used for T-bar mounting to ensure the AP is firmly in place.

Maintenance Features:

  • Software Upgrades: Ruckus Wireless provides software upgrades for the Unleashed R500, which can be accessed through their support website. Keeping the software updated ensures optimal performance, security, and access to new features.
  • Documentation Access: Comprehensive user guides and release notes are available online, providing detailed information on device operation, configuration, and troubleshooting.
  • Open Source Information: Information regarding open-source components used in the device's software is accessible, adhering to open-source licensing requirements.
  • Warranty Information: Software license and limited warranty details are provided, outlining the terms of support and coverage for the device.
  • LED Indicators: The Power LED on the external enclosure provides a visual status indicator. A steady green light indicates that the device is powered on and functioning correctly.
  • Unit Removal Pin: A specialized unit removal pin is included with the package. This pin is essential for releasing the locking mechanisms used in various mounting configurations, facilitating secure installation and removal of the AP for maintenance or relocation.
  • Security Screw: For flush drop-ceiling T-bar mounting, a Torx security screw is used to lock the AP in place, providing an additional layer of security against unauthorized removal. A T8 Torx driver is required for this.
  • System Reboot/Power Cycle: During the setup process or after configuration changes, the system may require a reboot. Users are advised not to disconnect power or network cables during these critical phases to avoid data corruption or incomplete configuration.
  • Network Reconnection: After certain configuration changes (e.g., modifying WLAN settings), client devices may be temporarily disconnected from the network. Users will need to manually reconnect to the configured WLAN.
  • Troubleshooting Resources: The availability of online documentation and support resources allows users to troubleshoot common issues and find solutions, ensuring continuous operation of the wireless network.

Ruckus Wireless ZoneFlex R500 Unleashed Specifications

General IconGeneral
Wireless Standard802.11ac
MIMO Technology2x2:2
Power over Ethernet (PoE)802.3af/at
Spatial Streams2
Maximum Power Consumption12.95 W
BeamFlex+Yes
Frequency Bands2.4 GHz and 5 GHz
AntennaIntegrated
Antenna Gain5 dBi
Operating Temperature0°C (32°F) to +50°C (122°F)
Mounting OptionsWall, ceiling
ModelZoneFlex R500 Unleashed
Maximum Data Rate1300 Mbps

Related product manuals