5
ASSEMBLY
• At least 3 people should install the awning. Contact a professional installer if you are uncer-
tain how to install the awning.
• Unpack all the parts and place them near the intended awning installation location. Make sure
all the parts are included.
• Make sure that there are no children or animals in the area in which the awning will be
installed.
• They can injure themselves on the awning parts or tools left lying around.
• Carefully unpack the awning from the package and remove all plastic guards and plastic bags.
• Remove the protective film before you install the awning. The film is intended to protect the
paint before the awning is installed.
• Place the awning in a location where it cannot be
damaged or become dirty.
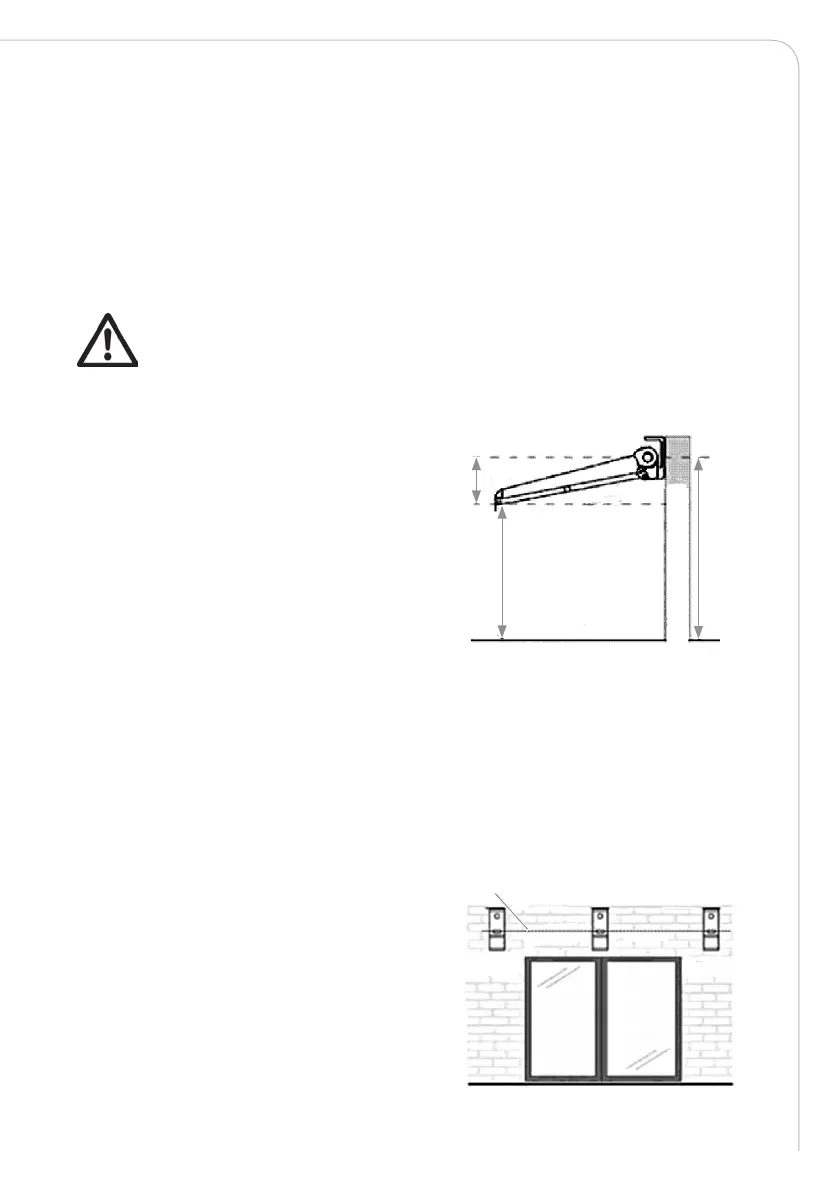
• Factor in the tilt angle of the awning when
you determine the awning’s height.
We recommend a tilt angle of 14°.
• The awning can be mounted on the roof, but this requires installation by a professional
installer.
• Once the height has been determined, use a spirit level to mark the height with a line. It is
essential that line is straight.
• The holes for the wall mounts must align both vertically and horizontally.
• All wall brackets must be used. The wall brackets must be positioned near the arm brackets
• and centred for 4.5x3m and 3.6x2.5m terrace awnings.
• Mark the locations for the drilled holes in the wall.
• Use a drill and bit suitable for your wall when drilling the holes. If you are uncertain
• which bit is suitable for your wall, consult with
a professional.
• Fasten the wall brackets with bolts that are
suitable for your wall. If you are uncertain
which bolts are suitable for your wall, consult
with a professional.
Be aware that the awning can suddenly extend while it is being unpacked.
Ground
Height of awning front
Tilt angle
Height of fall
Wall cross-section
Bracket height
Bracket
Chalk line
Bracket
Ground
Door/
window