6
ENG
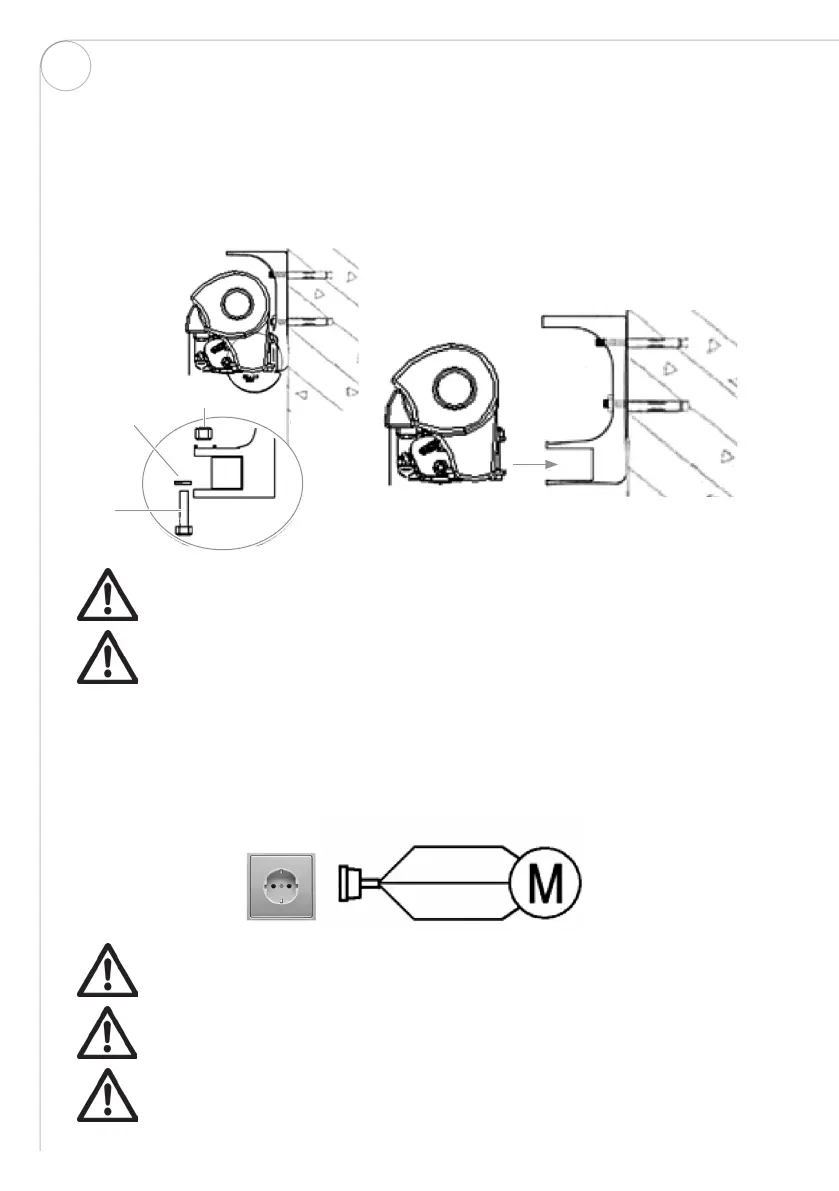
MOUNTING THE AWNING ON THE WALL BRACKETS
• Unscrew the nuts and bolts in the wall brackets.
• Fasten the screw square beam in the wall brackets.
• Fasten the awning by tightening the bolts and nuts on the wall brackets.
• Tighten the nuts to ensure that the awning is secured on the wall mounts.
Awning as
viewed from
the side
Wall
Cross-
section
Nut
Flat washer
Bolt
Wall cross-section
Electrical outlet
Plug
Brown
Blue
Yellow/Green
Remove securing straps after installation, otherwise the awning can extend. Save the
straps for later use when storing the awning.
NOTE! Incorrectly positioning or installing the awning can result in serious personal
injury or property damage. Only install the awning yourself if you fully understand the
installation instructions and if your are certain that the wall on which it will be mounted
is suitable for this purpose. Contact a qualified installer for assistance – for your own
sake and for the sake of others.
ELECTRICAL CONNECTION
• The awning with remote control has an electric cord and plug. Connect the awning to a
grounded electrical outlet after it has been mounted on the wall brackets.
The awning must be connected to an electrical outlet with protection class IP44 or higher,
otherwise there is a risk of electric shock. For yours and others safety, we recommend that
a earth fault breaker is installed.
Improper connection can cause serious damage to the remote control and/or motor.
Make sure that all connections are correct before the awning is used.