TRAMPOLINE MAT ASSEMBLY
Step 7 –Mat Assembly – Insert Cable Wires
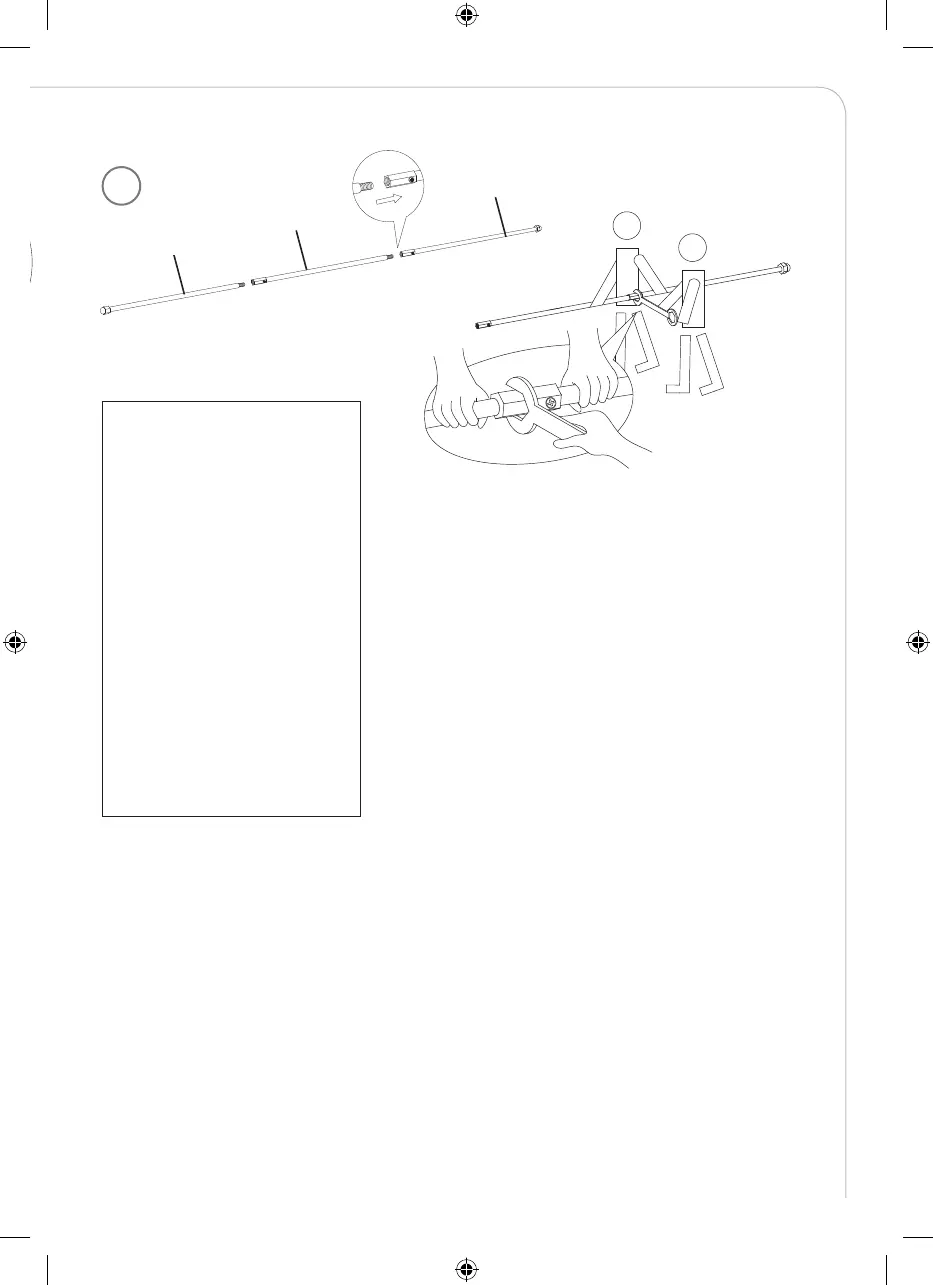
A. Before attaching the springs, you first need to insert two cable wires into the underside of the mat. First
connect two sets of cable wires in the sequence shown below (i.e. connect Cable Wire A with Nut Cap (# N) to
Cable Wire A (# J), then to Cable Wire with Nut Cap (# K). Tighten Nut Cap with Wrench (# H) as shown below.
B. Insert the two sets of assembled cable wires through the loops sewn to the underside of Trampoline Mat (# 18)
as shown in FIGURE 15.
7A
Before fi tting the springs, you must
fi rst insert two cable wires into the
bottom of the mat. Fit 2 sets. /
Innan du monterar fjädrarna måste
du först sätta in två kabelvajrar i
undersidan av mattan. Montera
2 st set. /
Før du monterer fjærene, må du
sette to kabelvaiere på undersiden
av trampolinen. Monter to sett. /
Bevor Sie die Federn anbringen,
müssen Sie zunächst die zwei
Kabeldrähte in der Unterseite des
Trampolins einsetzen. Montage
2er-Set. /
Ennen jousien asennusta sinun
täytyy ensin pujottaa kaksi
kaapelivaijeria maton alapuolelle.
Asenna kaksi sarjaa.
TRAMPOLINE FRAME ASSEMBLY
Step 6 –Attach Side Leg Supports
Attach the Side Leg Supports assembled in Step 5 to form the trampoline frame as shown below. Secure all
tubes using Arc Washer (# G), Spring Lock Washer (# E), Screw (# F) and Allen Wrench (# I) as shown in
FIGURE 11.
Hint: Make sure the holes on all the steel tubing parts are aligned and are facing outward.
The complete trampoline frame should look as shown in FIGURE 12.
63
IM_759013120301_Trampoline_Advanced_550x400cm_v3.indd 63 2021-01-27 17:49