TRAMPOLINE FRAME ASSEMBLY
Step 6 –Attach Side Leg Supports
Attach the Side Leg Supports assembled in Step 5 to form the trampoline frame as shown below. Secure all
tubes using Arc Washer (# G), Spring Lock Washer (# E), Screw (# F) and Allen Wrench (# I) as shown in
FIGURE 11.
Hint: Make sure the holes on all the steel tubing parts are aligned and are facing outward.
The complete trampoline frame should look as shown in FIGURE 12.
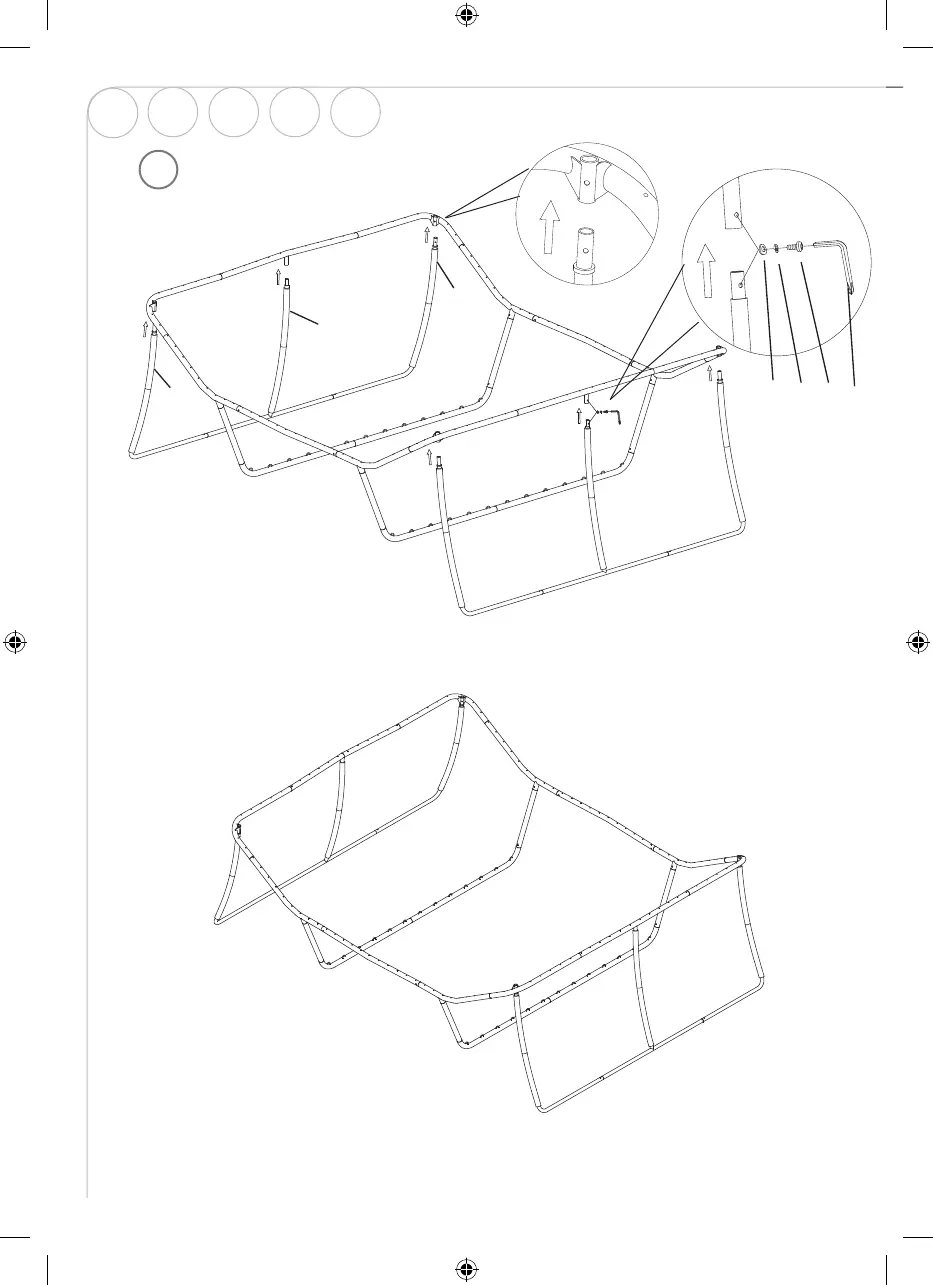
6
ENG
SE NO DE FI
62
IM_759013120301_Trampoline_Advanced_550x400cm_v3.indd 62 2021-01-27 17:49