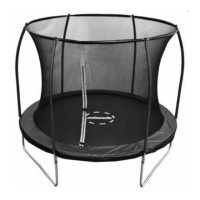
DISASSEMBLY OF THE TRAMPOLINE AND ENCLOSURE
Step 16
Connect Arched Tube (# 28) to the two sides of Short Horizontal Tubes using Arc Washer (# G), Spring Lock
Washer (# E), Screw (# F) and Allen Wrench (# I) as shown in FIGURE 26.
Repeat the same for all Arched Tubes.
15
16
DISASSEMBLY OF THE TRAMPOLINE AND ENCLOSURE
Step 17
Slide Curved Vertical Tube (# 23) into the bottom sleeves of Enclosure Netting (# 29) as shown in FIGURE 27.
Repeat the same for all Curved Vertical Tubes.
Step 18
Connect Curved Vertical Tube (# 23) to Arched Tube (# 28) using Arc Washer (# G), Spring Lock Washer (# E),
Screw (# F) and Allen Wrench (# I) as shown in FIGURE 28. Repeat the same for all four tubes.
ENG
SE NO DE FI
78
IM_759013120301_Trampoline_Advanced_550x400cm_v3.indd 78 2021-01-27 17:49