8
MATAWAY
Do not operate this equipment until you
have read the SAFETY, CONTROLS and
OPERATION sections of this manual
thoroughly.
To prevent injury, use an adequate lifting
device (i.e., hoist, or fork lift) to remove unit
from pallet.
1. Remove the crate top and sides.
Banding is under tension and may snap back
when cut. Wear eye protection and stay clear
when cutting the band.
2. Remove and discard banding attaching the
Mataway to the pallet,
3. Remove the transmission belt cover. Tilt unit
forward and support the chassis with jack stands.
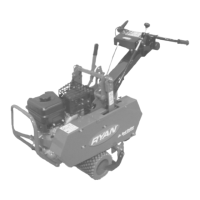
4. Remove the belt shield under frame G (Figure 3).
To prevent fuel spillage and/or the risk of re
or personal injury from inhalation of fumes,
be sure fuel tank is empty before tilting the
unit forward.
Support rear of tilted unit adequately.
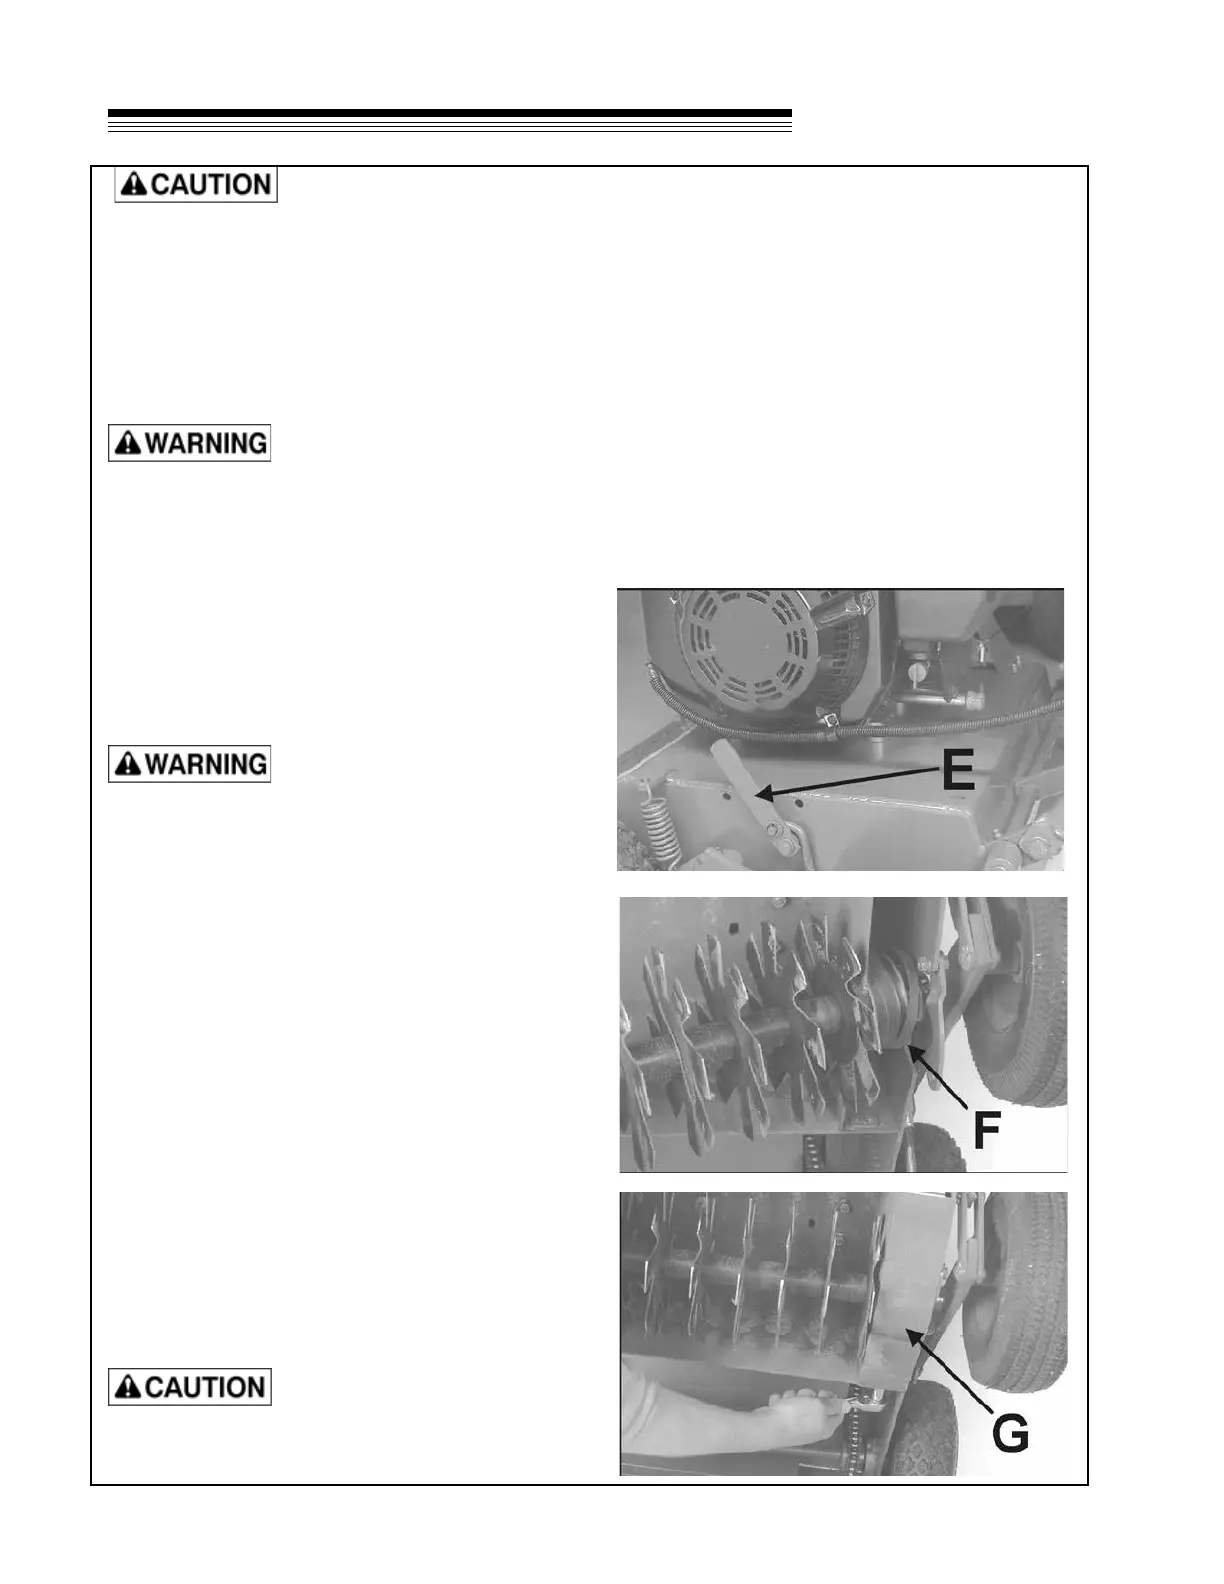
5. Move the reel clamp levers E (Figure 1) (left and
right side) rearward to release the reel clamps.
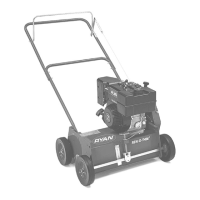
6. Position the reel with the pulley toward the right
side of the machine. Slip the 3 belts around the
pulley F (Figure 2).
7. Position the pillow block in the recessed part of
the frame on each side so the pillow block groove
ts over the frame.
8. Hook the retaining clamp rods into the holes in
the reel clamps, then rotate the levers forward
until they lock over the center to secure the reel.
If necessary, the over center tension can be
adjusted with the turnbuckles on the reel clamp
rod assemblies.
A loose reel may cause injury or property
damage. Be certain the reel clamp lever locks
SET-UP
over center to keep the reel from working
loose.
9. Install the belt shield G under the frame and
secure it with (1) 5/16-18 X 3/4 screw and
lockwasher.
10. Remove jack stands and set unit on the ground.
11. For nal adjustment of the reel, refer to the
Adjustment section of this manual.
Ensure the engine is level, then check the
engine oil level. Top off if necessary. See the
adjustment section for setting blade height.
FIGURE 1
FIGURE 2
FIGURE 3