12
WASHER
CARRIAGE
BOLT
WORK
REST
ASEMBLY
Fig. 6
KNOB
PIN
ASSEMBLY
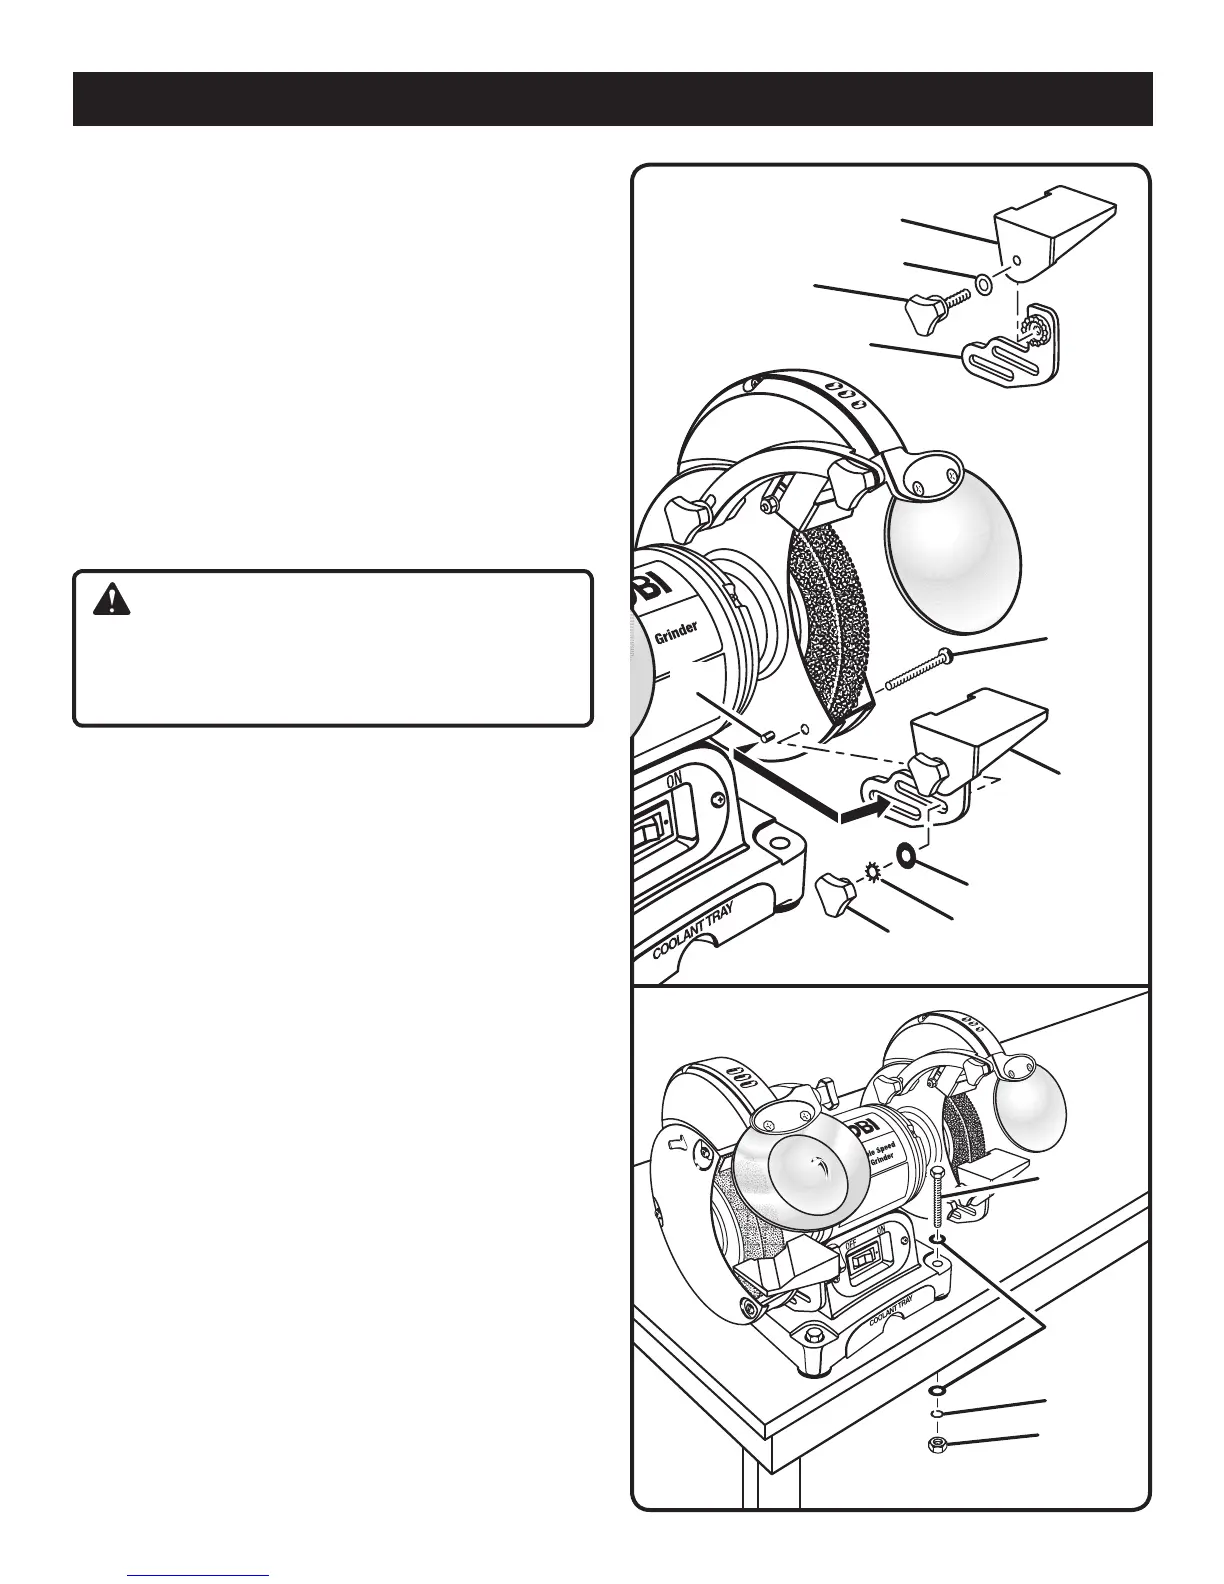
MOUNTING WORK REST
See Figure 6.
n Remove the knob, star washer, and washer from the car-
riage bolt on the lower portion of wheel guard.
n Using the slotted screw, star washer, washer and fasten-
ing knob, attach the work rest bracket to the inside of the
wheel guard as shown.
NOTE: The grooved work rest mounts on the left side.
NOTE: The work rest bracket's lower slot must be posi-
tioned over the pin on the guard.
n With the remaining fastening knob, install the work rest
to the bracket.
NOTE: Adjust the distance between the wheel and the work
rest to maintain 1/16 in. or less separation as the diameter
of the wheel decreases with use.
WARNING:
Always make sure your bench grinder is securely
mounted to a workbench. Failure to do so could result
in an accident resulting in possible serious personal
injury.
MOUNTING GRINDER TO WORKBENCH
See Figure 7.
If grinder is to be used in a permanent location, it should be
fastened securely to a firm supporting surface, such as a
workbench with bolts.
n Use 1/4 in. bolts, washers, and nuts (not included). The
bolt length should be 1-1/2 in. plus the thickness of the
workbench.
n Locate and mark the holes where the grinder is to be
mounted.
n Drill four 3/8 in. diameter holes through workbench.
n Place sander on workbench, aligning holes in base with
holes drilled in workbench.
n Insert four 1/4 in. diameter bolts and washers and attach
nuts securely.
Fig. 7
WORK REST
(RIGHT)
LARGE
KNOB
WORK REST
BRACKET
STAR WASHER
Fig. 6
HEX NUT
LOCK
WASHER
WASHERS
WASHER
HEX BOLT
WASHER