15
MAINTENANCE
CHUCK REMOVAL
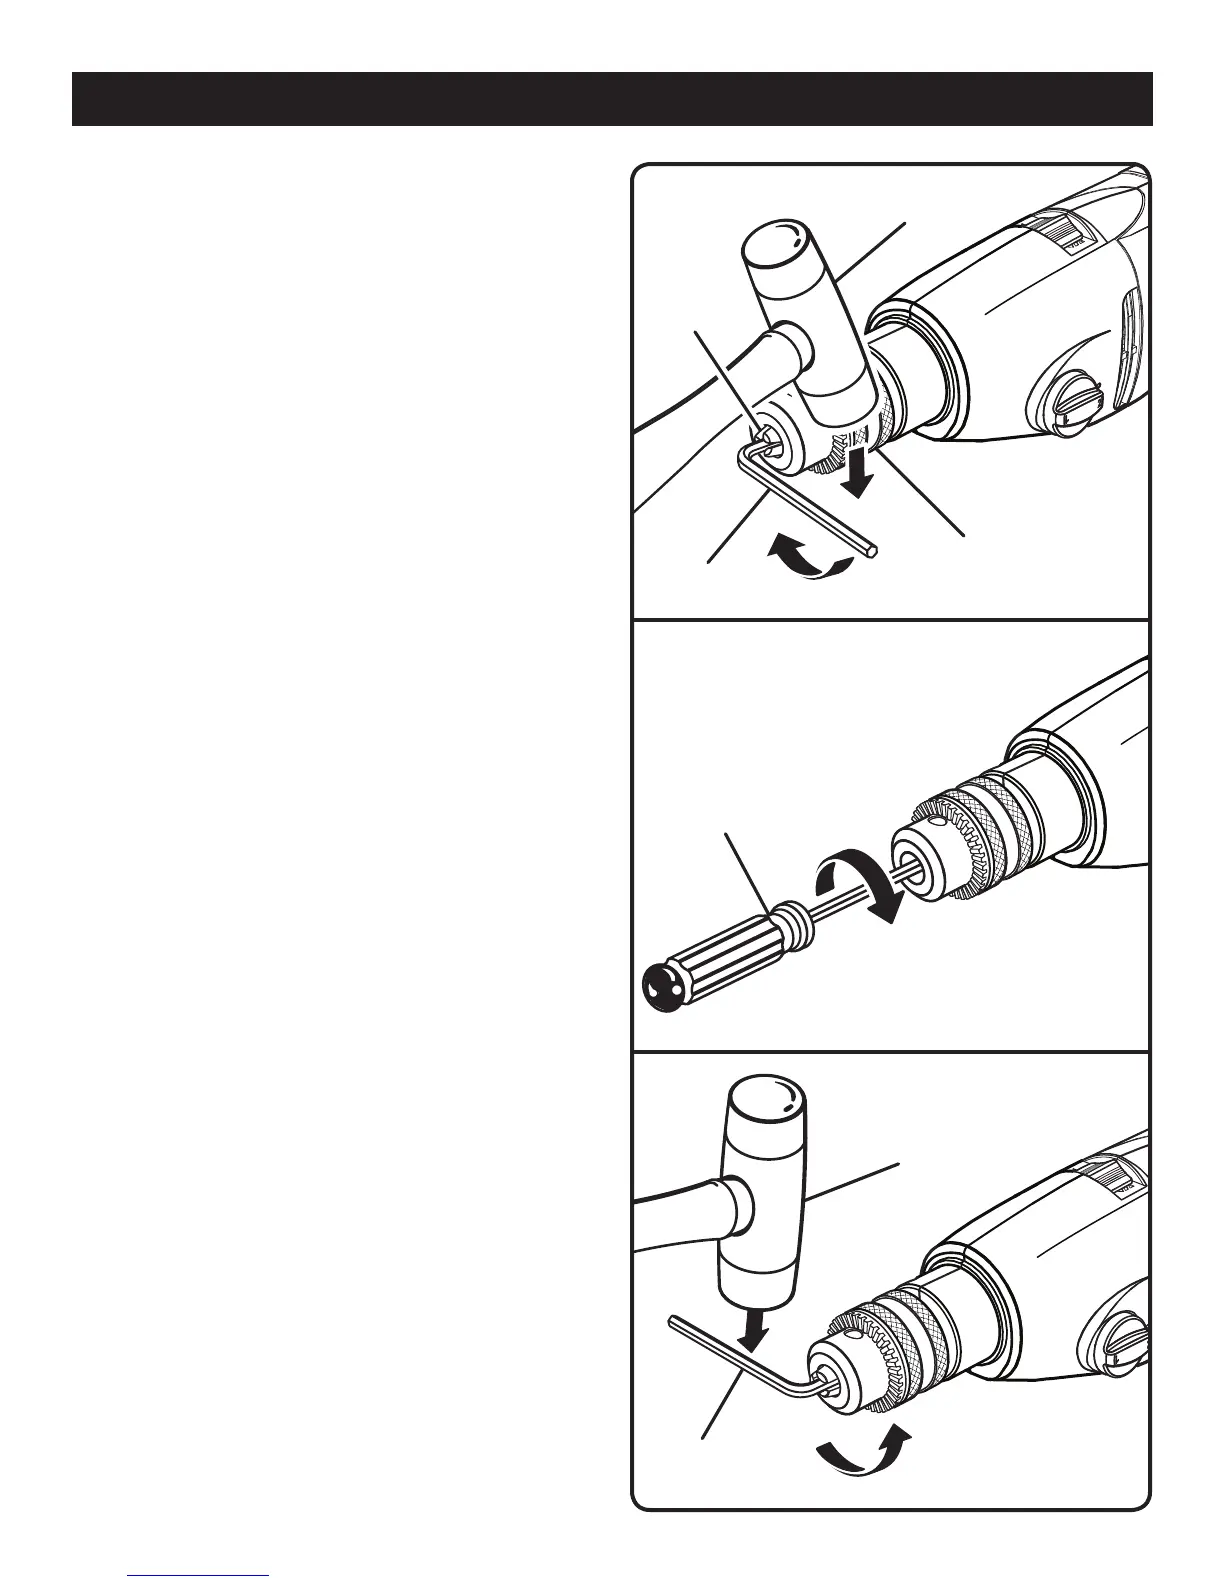
See Figures 11 - 13.
The chuck may be removed and replaced with a new one.
Unplug the drill.
Open chuck jaws using the provided chuck key.
Insert a 5/16 in. or larger hex key into the chuck of the
drill and tighten the chuck jaws securely.
Tap the hex key sharply with a mallet in a clockwise
direction. This will loosen the screw in the chuck for easy
removal.
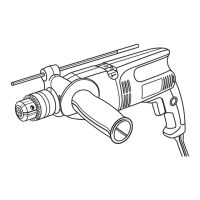
Open chuck jaws and remove hex key. Remove the chuck
screw by turning it in a clockwise direction.
NOTE: The screw has left hand threads.
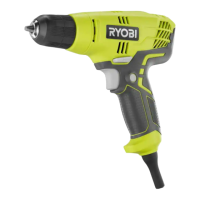
Insert hex key in the chuck and tighten chuck jaws
securely.
Tap sharply with a mallet in a counterclockwise direction.
This will loosen chuck on the spindle. It can now be
unscrewed by hand.
TO RETIGHTEN A LOOSE CHUCK
The chuck may become loose on the spindle and develop a
wobble. Also, the chuck screw may become loose, causing
the chuck jaws to bind and prevent them from closing. To
tighten:
Unplug the drill.
Open the chuck jaws.
Insert the hex key into the chuck and tighten the chuck
jaws securely. Tap the hex key sharply with a mallet in
a clockwise direction. This will tighten the chuck on the
spindle.
Open the chuck jaws and remove the hex key.
Tighten the chuck screw by turning it in a counterclockwise
direction.
NOTE: The chuck screw has left hand threads.
Fig. 13
Fig. 11
Fig. 12
HEX KEY
CHUCK
MALLET
CHUCK
JAWS
SCREWDRIVER
MALLET
HEX KEY