43 - English
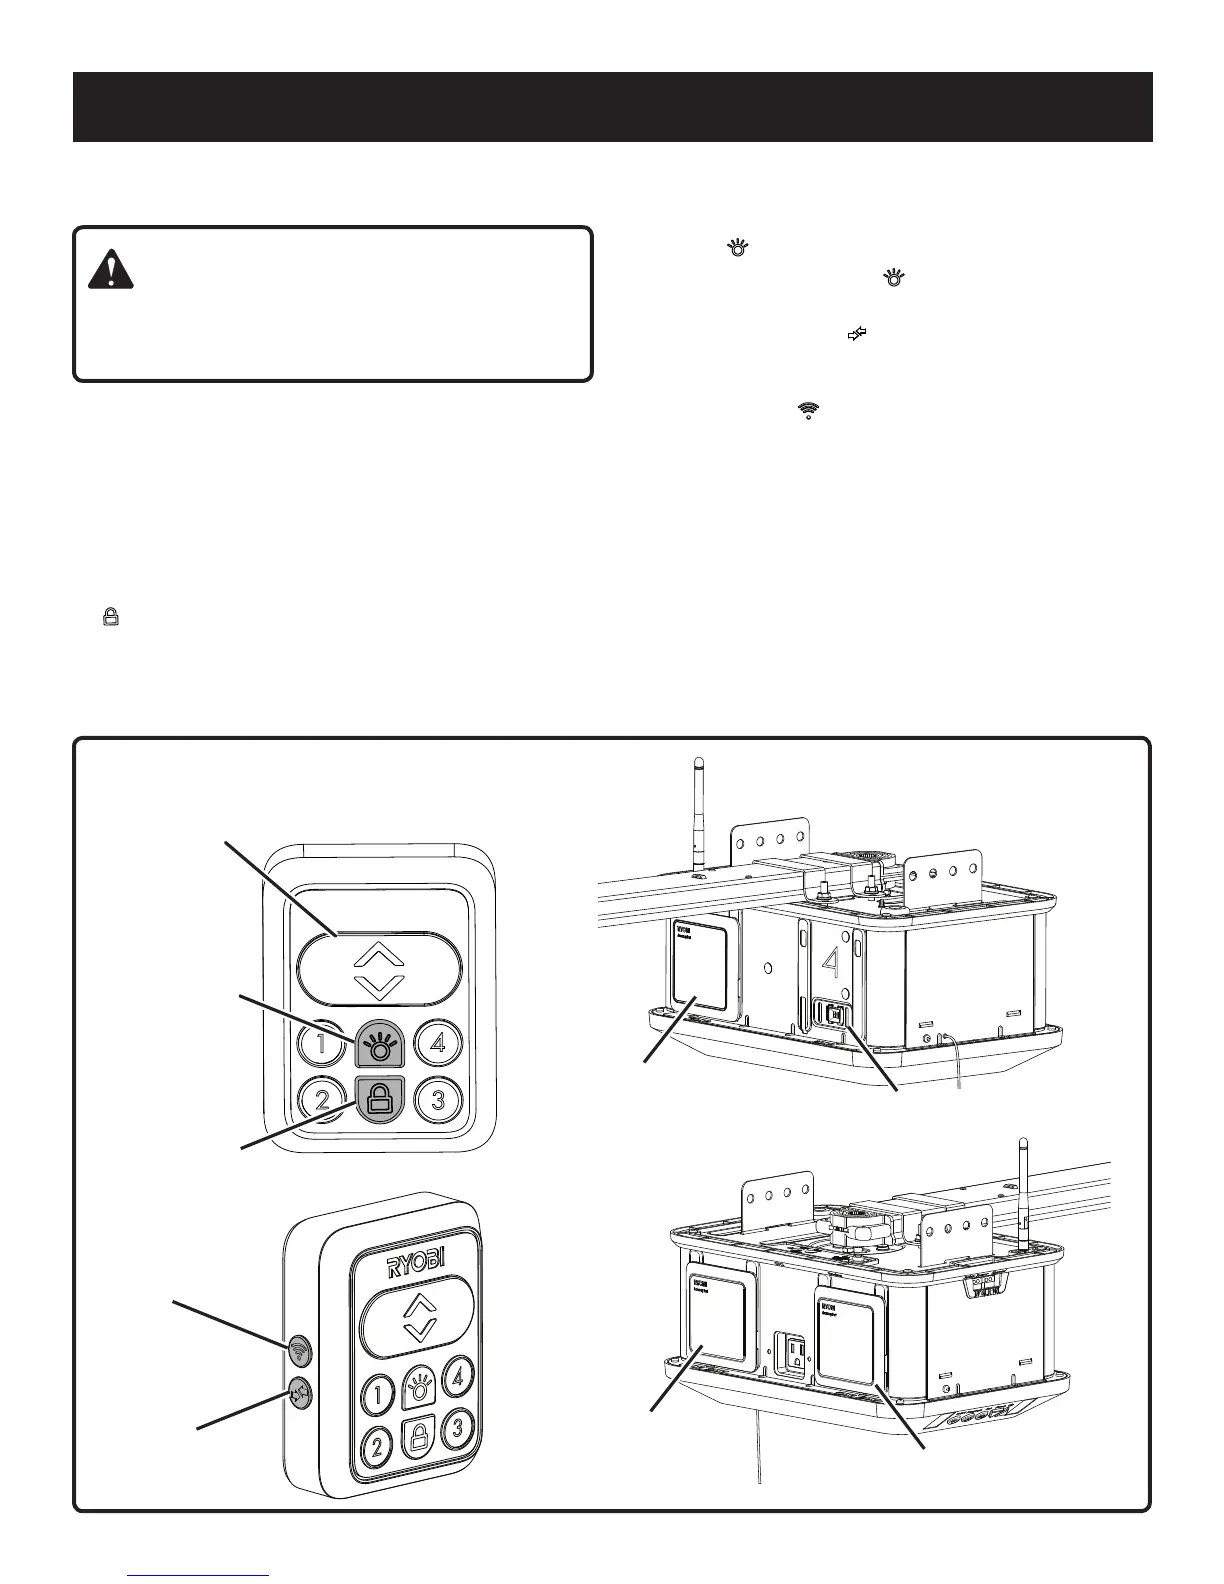
Fig. 76
USING THE INDOOR KEYPAD
See Figure 76.
WARNING:
Keep moving door in sight when using indoor keypad.
Contact with moving door can cause DEATH or serious
injury.
The indoor keypad has backlights that turn on when garage
door opener is connected to a power supply. When the
keypad is locked, the backlights will blink.
Install and wire the indoor keypad as described earlier in
the Installation section.
To raise or lower the garage door, press and release the
UP/DOWN button.
To enter and exit vacation mode, press and hold the LOCK
( ) button on the indoor keypad for one second. When the
unit is in vacation mode, it can only be controlled using
the indoor keypad and smartphone app. The unit will not
respond to car remotes.
Up/Down
Button
Light
Button
Lock
Button
Accessory
Port #3
Accessory
Port #1
Accessory
Port #4
Accessory
Port #2
NOTE: The LEDs in the indoor keypad will blink when the
unit is in vacation mode.
To turn the LED lights on and off, press and release the
LIGHT ( ) button.
NOTE: When the LIGHT ( ) button is pressed, the LED
light will illuminate for three minutes.
Use the PROGRAM ( ) button to connect car remotes
to the garage door opener. Refer to Programming the
Car Remotes later in this section.
Use the Wi-Fi ( ) button to connect the garage door
opener to a wireless network. Refer to Using the
Smartphone App later in this section.
Activating and deactivating accessory ports:
To activate a accessory port, press the number on the
indoor keypad corresponding with the desired port. For
example, to activate accessory port #2, press NUMBER 2
on your keypad.
NOTE: An active accessory port can be used to power
DC accessories. Multiple ports can be activated at once.
To deactivate a accessory port, press the number on the
indoor keypad corresponding with the port.
OPERATION
Wi-Fi
Button
Program
Button