10
UNPACKING
This product requires assembly.
n Carefully remove the tool and any accessories from the
box. Make sure that all items listed in the packing list are
included.
n Inspect the tool carefully to make sure no breakage or
damage occurred during shipping.
n Do not discard the packing material until you have care-
fully inspected and satisfactorily operated the tool.
n If any parts are damaged or missing, please call
1-800-525-2579 for assistance.
PACKING LIST
Orbital Jig Saw
Saw Blades (2)
Lanyard (not included in combo)
Operator’s Manual
Warranty Registration Card
WARNING:
If any parts are missing do not operate this tool until the
missing parts are replaced. Failure to do so could result
in possible serious personal injury.
WARNING:
Do not attempt to modify this tool or create accesso-
ries not recommended for use with this tool. Any such
alteration or modification is misuse and could result in a
hazardous condition leading to possible serious personal
injury.
WARNING:
To prevent accidental starting that could cause serious
personal injury, always remove the battery pack from the
tool when assembling parts.
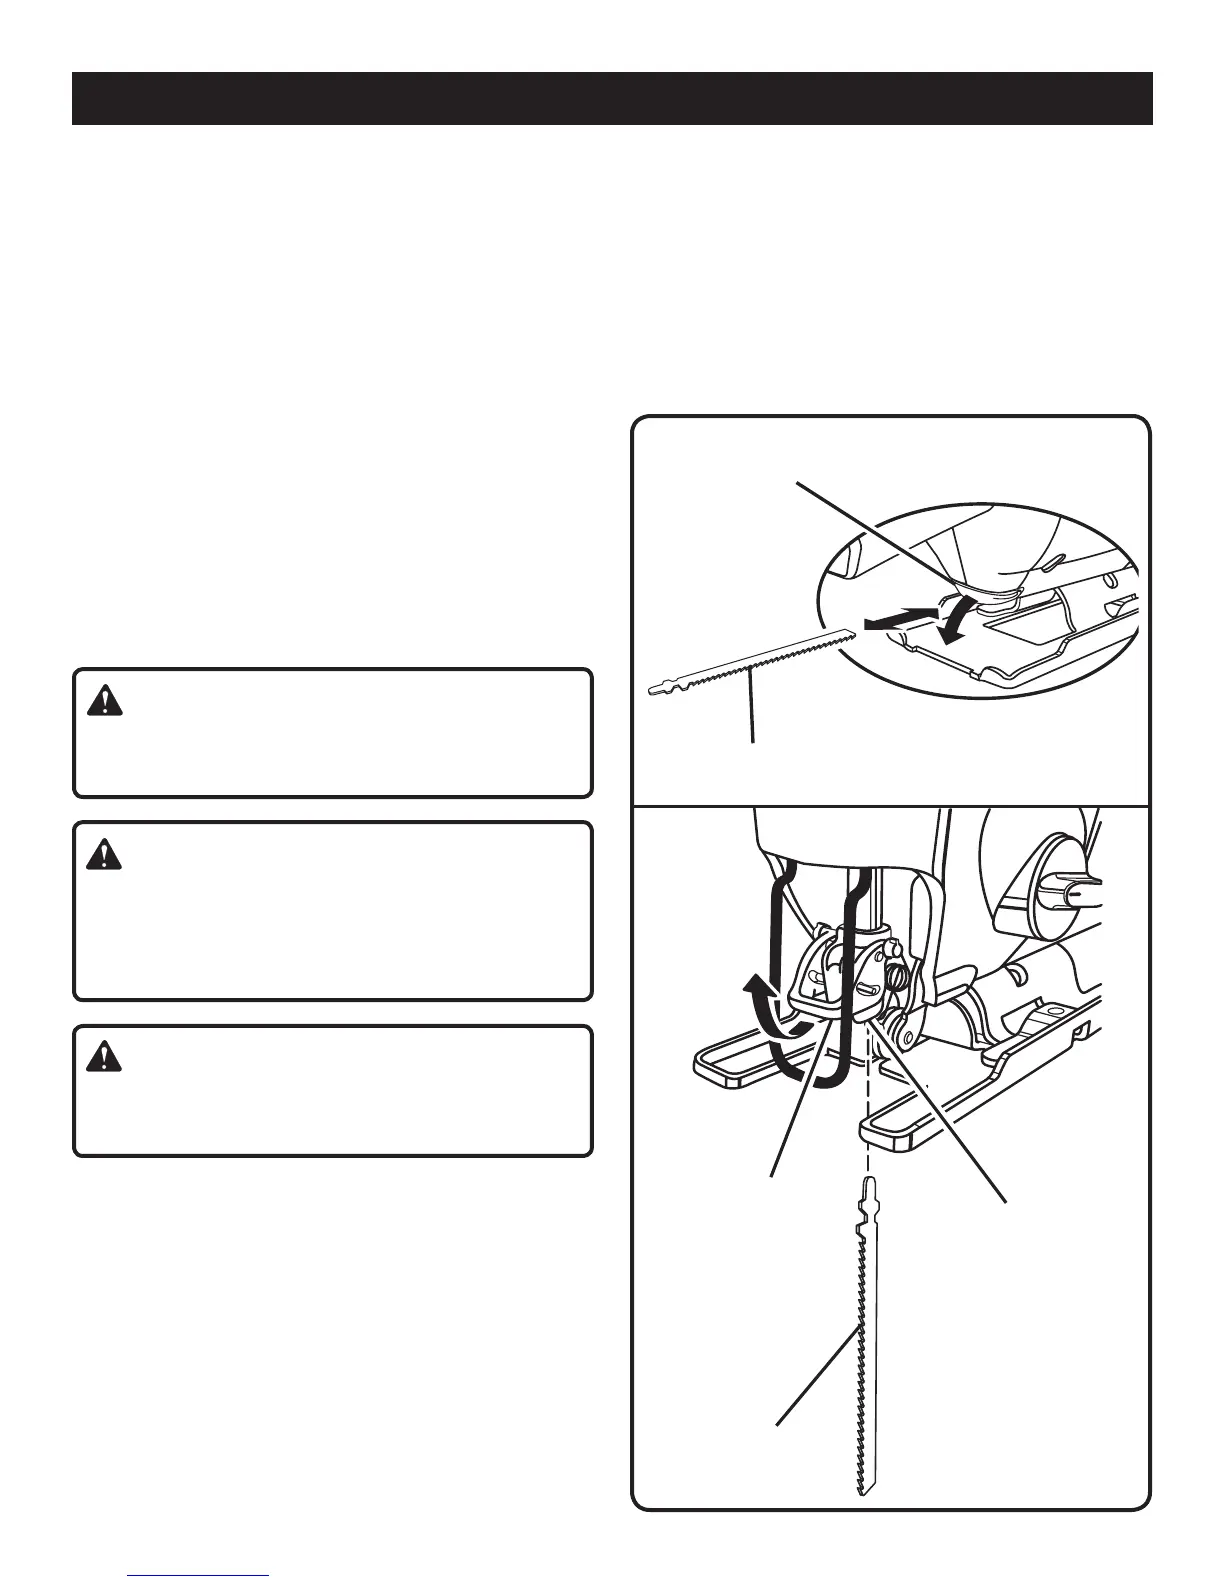
BLADE STORAGE
See Figure 2.
A convenient feature on your saw is the blade storage com-
partment. The blade storage compartment is located on the
back of the saw. It is convenient for storing extra blades and
storing blades when not in use.
n To open: Push the door down with your thumb or finger.
Place blades in blade storage compartment.
n To close: Push the door up with your thumb or finger.
ASSEMBLY
TO INSTALL BLADES
See Figure 3.
n Remove battery pack. See Figure 6.
n Lift blade clamp lock located on front of saw.
n Insert saw blade between blade clamp and saw bar.
n Close blade clamp lever.
n Replace battery pack.
Fig. 2
Fig. 3
BLADE STORAGE
SAW BLADE
SAW BLADE
BLADE CLAMP
BLADE CLAMP LOCK