6
WARNING:
If any parts are missing do not operate this tool until the
missing parts are replaced. Failure to do so could result
in possible serious personal injury.
WARNING:
Do not attempt to modify this tool or create accessories not
recommended for use with this tool. Any such alteration
or modification is misuse and could result in a hazardous
condition leading to possible serious personal injury.
NOTE: Read and remove all hang tags and store with your
Operator’s Manual.
WARNING:
Stop the engine and disconnect the spark plug wire before
installing parts, making adjustments, cleaning, or when
not in use. Failure to do so could result in possible seri-
ous personal injury.
ASSEMBLY
WARNING:
Beware of the revolving parts when open the zipper of
the bag.
UNPACKING
This product requires assembly.
n Carefully remove the tool and any accessories from
the box. Make sure that all items listed in the packing
list are included.
n Inspect the tool carefully to make sure no breakage or
damage occurred during shipping.
n Do not discard the packing material until you have
carefully inspected and satisfactorily operated the
tool.
n If any parts are damaged or missing, please call
customer service for assistance.
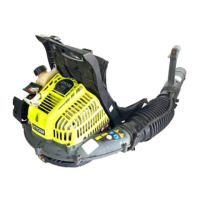
PACKING LIST
Blower
Blower Tube
Vacuum Bag
Harness
Screws
Bottle of 2-Stroke Lubricant
Operator’s Manual
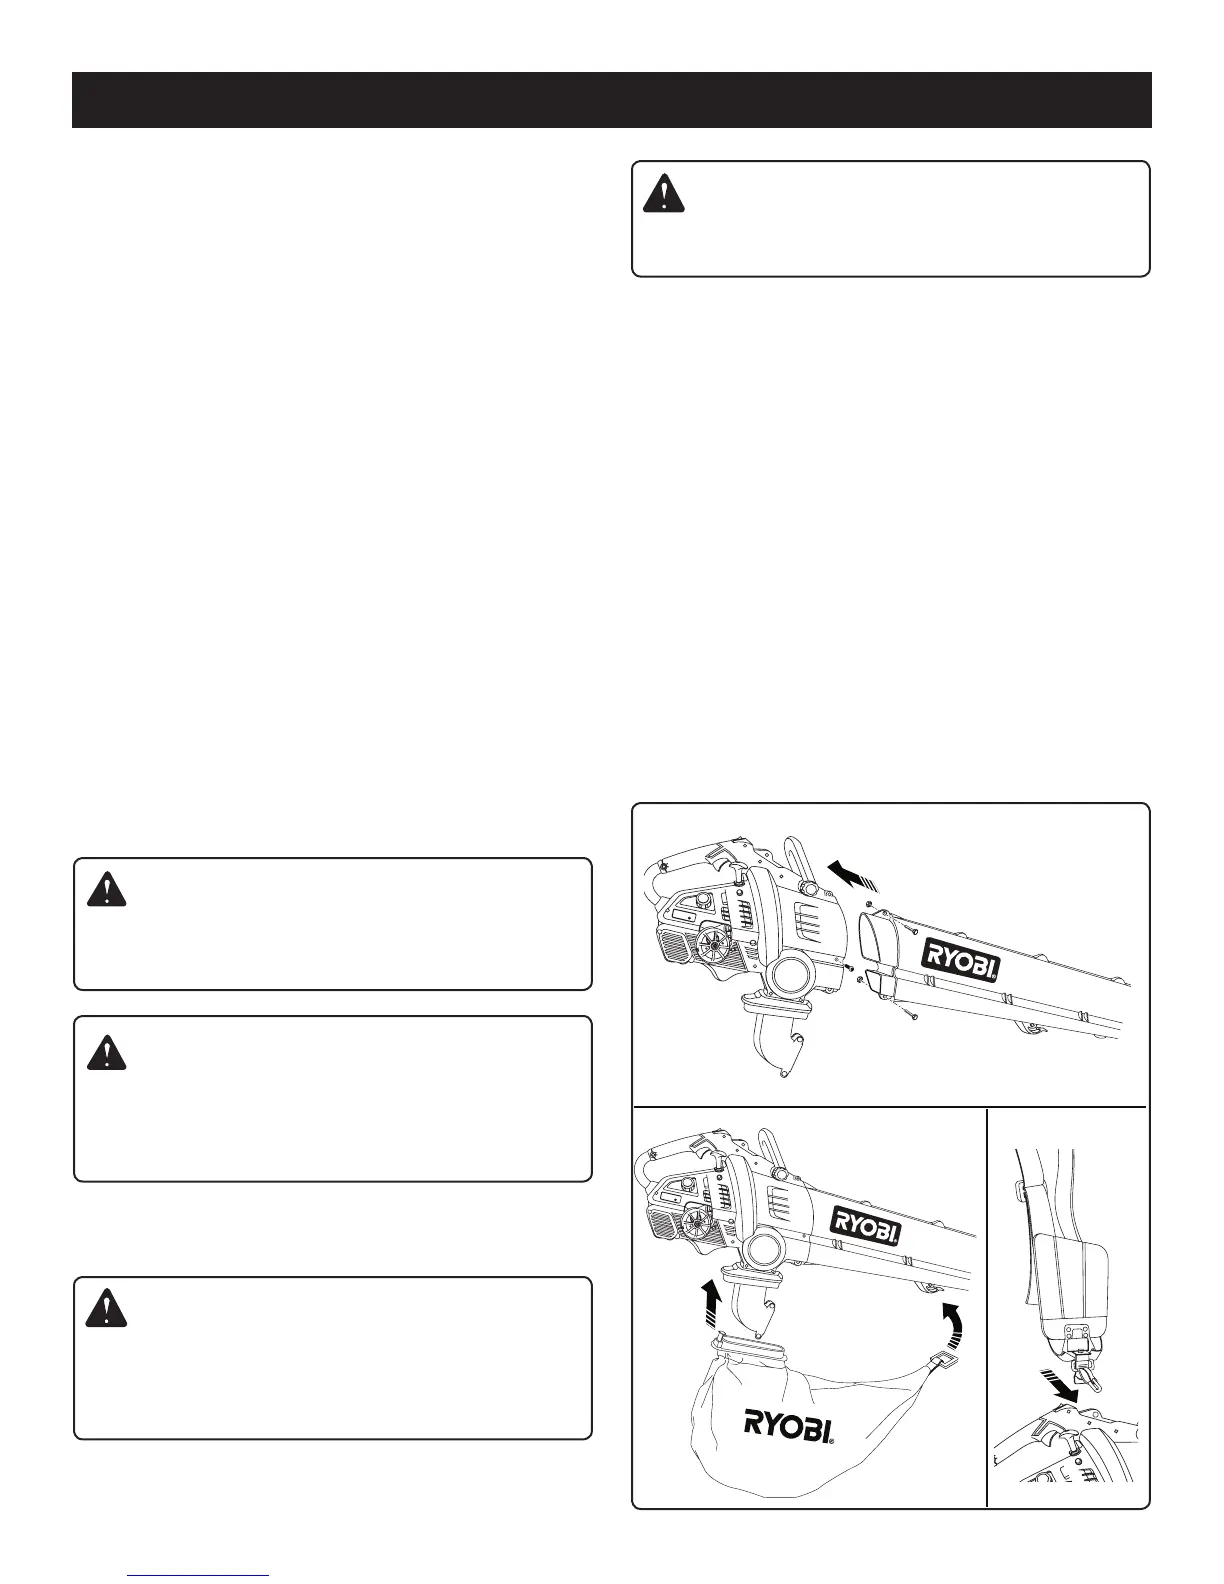
See Figure 2 – 4.
ASSEMBLE THE BLOWER TUBE
n Push blower tube into blower housing.
n Secure the tube by the screws provided.
ATTACHING THE VACUMM BAG
n Firstly attach the front of the bag to the hook on the
blower tube.
n Then attach the bag mount to the blower housing outlet
until the latch snaps into place.
ATTACHING THE SHOULDER HARNESS
n Connect the latch on the shoulder harness to the strap
hanger on the blower
n Adjust the strap to a comfortable position.
Fig. 2
Fig. 3 Fig.4