11
9
7 8
4
6
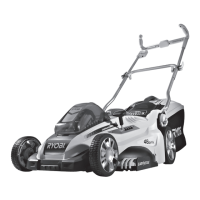
1
Wear full eye protection, ear protection, non-slip heavy-
duty gloves, substantial footwear, and long trousers at
all times while operating the product. Do not operate the
product when barefoot or wearing open sandals.
2
Align the handle with the brackets using the quick-release
fasteners as reference. Insert the bolt through the hole
located on the lower half of the handle, then add a
washer. Ensure that the washer is between the handle
and the bracket. Tighten the bolt to secure the handle
using the T40 wrench.
Refer to separate assembly instructions in the box.
3
Open the handle locks.
NOTE: Make sure that the handle is fully extended
so that the handle locks can properly secure the
handle.
Close the handle locks to secure the handle.
Adjust the operating angle of the handle to your preference. Pull the quick-release fastener and turn it 90°. Align the
handle to the preferred locking slot. Turn the knob 90°, and ensure that the fastener bolt is secured into the slot.
Raise the rear door. Install the grass catcher, hooking it to the mower. Ensure that the catcher is secured, then lower the
rear door.
NOTE: The grass catcher collects grass clippings preventing them from being discharged across the lawn while you mow.
Open the battery door. Insert the battery into the product.
Make sure that the latch on each side of the battery pack
clicks in place, and that the battery pack is secured to the
product before operating.
Insert the isolator key, and close the battery door.
Hold down the start button, then squeeze and hold either
side of the on/o lever to start the product.
NOTE: The on/o lever must be continuously held during
use. To turn the product o, release the on/o lever.
5
10
Pull up the handle until fully extended.
11
GETTING STARTED GETTING STARTED GETTING STARTEDGETTING STARTED