Do you have a question about the Ryobi RLM36BL and is the answer not in the manual?
The cordless lawnmower is intended for outdoor use only. The product is designed for domestic lawn mowing.
Failure to observe all safety instructions could result in serious injury or death.
Never use the product while people, especially children, or pets are within 15 m...
Read, understand, and always follow the safety instructions that came with your battery and charger.
Before use, always visually inspect the product to ensure that blades, blade bolts, and cutter assembly are not worn or damaged.
The product has an overload protection device. When overloading is detected, the product automatically limits the current rise.
For best performance, always cut off one-third or less of the total height of the grass. Do not cut wet grass.
Secure product in vehicles. Transport batteries according to regulations, protecting connectors.
Servicing requires extreme care and knowledge and should be performed only by a qualified service technician.
Turn off the product, remove the isolator key and the battery pack. Make sure that all moving parts have come to a complete stop.
Covers risks like vibration, noise, blade contact, thrown objects, and measures to reduce them.
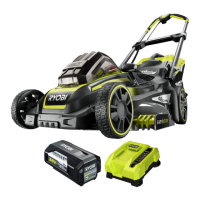
Lists items like Lawnmower, Bolts, Washers, Wrench, Grass catcher, Isolator key, Battery pack, Charger, Operator's manual.
Explains symbols for reading instructions, ear protection, eye protection, inclines, rain, sharp blades.
Explains symbols for parts/accessories, notes, warnings, and different risk levels (Danger, Warning, Caution).
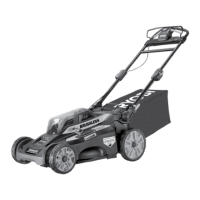
Illustrates the components included in the RLM36X46BL kit.
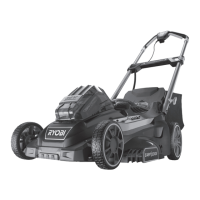
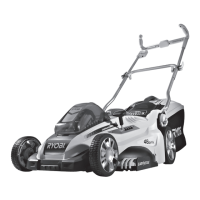
Illustrates the components included in the RLM36BL kit.
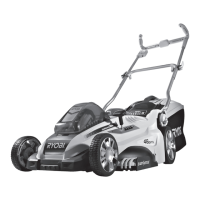
Diagram labeling key parts of the lawnmower such as start button, on/off lever, wheels, battery pack, and charger.
Align the handle with brackets, insert bolts and washers, and tighten using the T40 wrench.
Open the handle locks, pull up the handle until fully extended, and close the locks to secure it.
Insert battery pack and isolator key, then press start button and squeeze on/off lever to operate.
Raise the rear door, install the catcher ensuring alignment with hooks, and lower the rear door.
Allows cutting grass along walls or edges by pulling grass towards the blade.
Pull the adjustment lever, raise/lower the deck, and secure the lever in one of the five height slots.
Open battery door, remove key/pack, tilt mower, clean debris, loosen nut, and remove blade.
Install new blade, hand-tighten nut, then use a 15mm spanner to tighten to appropriate torque (35-40 Nm).
After each use, clean with a soft, dry cloth or cleaning brush. Do not use water.
Raise the rear door, remove the grass catcher, and empty grass clippings into a bin.
Loosen handle locking screws, fold down upper handle, pull lower handle knob, and turn 90°.
Fold lower handle, fold grass catcher, store in a cool, dry, well-ventilated place away from children and chemicals.
Details on model, cut width, height, speed, weight, vibration, and noise levels.
Information on compatible battery packs, chargers, and replacement parts like blades.
| Brand | Ryobi |
|---|---|
| Model | RLM36BL |
| Category | Lawn Mower |
| Language | English |