7
ASSEMBLY INSTRUCTIONS
Tools Required
1. Ratchet handle
2. 9/16” deep socket
3. 9/16” wrench
4. 1/2" socket or wrench
5. 1/2" concrete drill bit
6. 1/4" drill bit
7. Phillips screw driver
8. Power drill
9. Lint free rag
10. Pistol-grip clamp (optional)
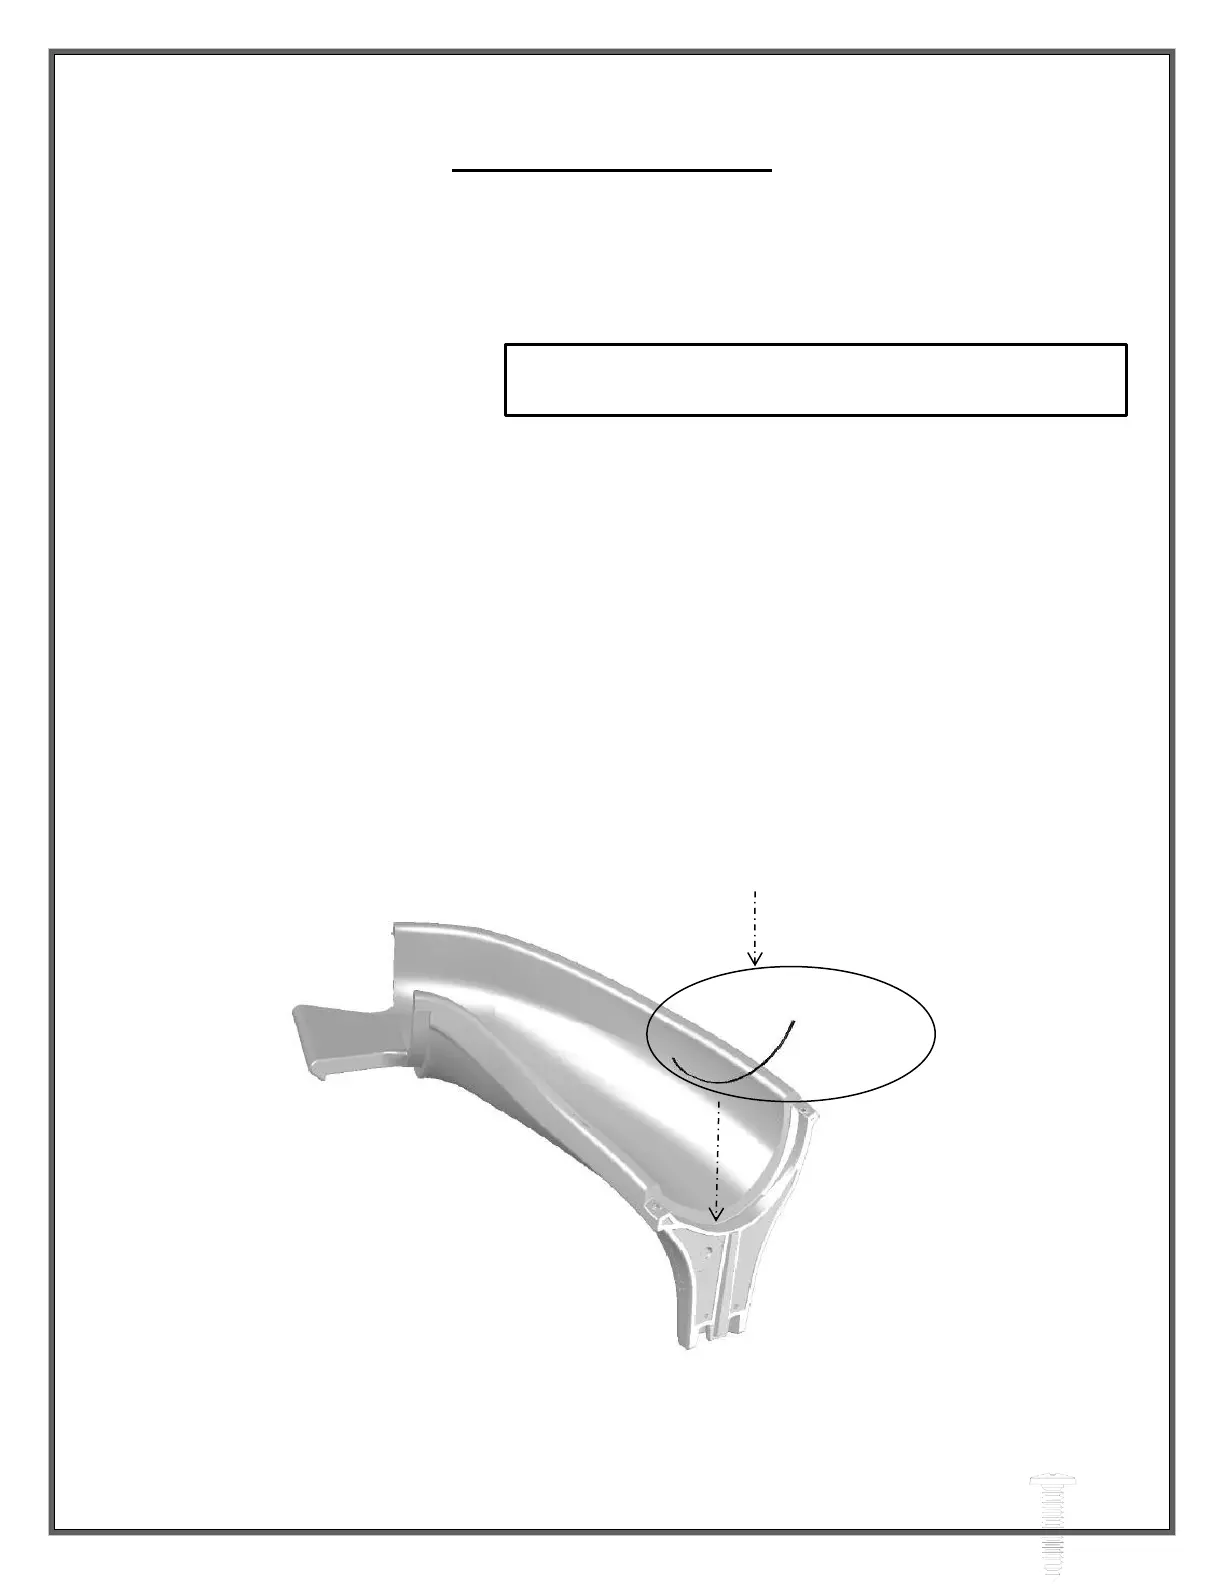
Gasket Installation
• Clean the groove of the top runway section, shown below, with a damp clean rag and dry
• Take the 2 feet of gasket provided with your kit and begin to peel back the paper. Make sure you
are not removing the adhesive itself from the gasket.
• Take the exposed gasket & adhesive and begin at a top edge of the runway section groove.
• While firmly pressing the gasket into the groove, intermittently press and remove more paper,
exposing adhesive, until you have used the entire gasket.
• Properly installed, the gasket will extend from one side of the slide to the other and be centered in
the groove, front to back.
• Continue to assemble your Cyclone as described on page 8, and ensure the gasket remains in
place as you handle the sections.
FIGURE B