This document provides a comprehensive guide for the SABA LVS10C42MINI-PLIX dishwasher, covering its functions, technical specifications, usage, and maintenance.
Function Description
The SABA LVS10C42MINI-PLIX is a household dishwasher designed to efficiently clean dishes and utensils. It features a water softener system to counteract hard water, a detergent dispenser for main wash and pre-wash cycles, and a rinse aid dispenser to prevent spots and streaks and improve drying. The appliance offers various wash programs tailored to different levels of food residue and cleaning needs, including Intensive, Universal, ECO, Glass, 90 minutes, Rapid, and Soak. The ECO program (EN 60436) is designated as the test cycle for comparability.
Key operational features include:
- Power Button: To turn the appliance on/off.
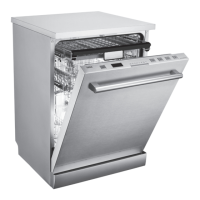
- Function Screen: Displays delay time, Extra Drying, Turbo Speed +, Alt indicators, Salt warning, and Rinse aid warning.
- Program Indicators: Show the selected wash program.
- Alt Button (Dual Zone Wash): Allows selection of either the upper or lower basket for washing, with corresponding indicators lighting up.
- Option Button: Activates Extra Drying or Express functions with the main program.
- Delay Button: Sets a delayed start time, up to 24 hours.
- Program Button: Selects the desired wash program.
- Washing Phase Indicators: Lights indicate the current phase of the wash cycle (Prewash, Mainwash, Rinse, Drying).
The dishwasher also includes an automatic door opening function after washing to enhance drying, though this feature is not available for Rapid and Soak programs. It has a memory function to resume a selected program after a power cut, if equipped.
Important Technical Specifications
- Capacity: 10 place settings.
- Dimensions:
- Height: 845 mm
- Width: 448 mm
- Depth: 600 mm (without the door handle)
- Water Supply Pressure: 0.04 - 1.0 MPa.
- Electrical Supply: 220-240 VAC / 50 HZ, requiring a 10A 250VAC socket.
- Drain Hose Connection: Minimum diameter of 40 mm, with the top of the hose less than 1000 mm from the floor.
- Energy Efficiency Index (EEI): 43.9
- Energy Efficiency Class: C
- Cleaning Performance Index: 1.13
- Drying Performance Index: 1.07
- Energy Consumption (Eco program, cold water fill): 0.593 kWh/cycle (actual consumption depends on usage conditions).
- Water Consumption (Eco program): 8.0 liters/cycle (actual consumption depends on usage conditions and water hardness).
- Program Duration (Eco program): 3:28 (h:min).
- Airborne Acoustical Noise Emissions: 42 dB(A) re 1 pW.
- Airborne Acoustical Noise Emission Class: B
- Off-mode Power (W): 0.49
- Standby Mode Power (W): N/A
- Delay Start Power (W) (if applicable): 1.00
- Networked Standby Power (W) (if applicable): N/A
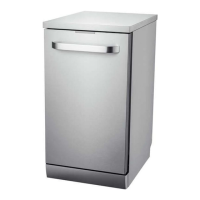
- Type: Free standing.
Usage Features
- First-time Use: Before first use, the water softener must be set, 1.5 kg of dishwasher salt added, the salt container filled with water, the rinse aid dispenser filled, and detergent added.
- Water Softener Adjustment: The water softener can be manually adjusted based on local water hardness. This involves entering a setup mode by pressing the Program button for more than 5 seconds within 60 seconds of powering on, then selecting the appropriate hardness level (H1-H6).
- Salt Refill: The salt container should be refilled when the salt warning light illuminates. A short wash program should be run immediately after refilling to prevent corrosion from spilled salt.
- Rinse Aid Refill: The rinse aid dispenser should be refilled when the Low Rinse Aid indicator lights up. The consumption can be adjusted (D1-D5) to optimize drying performance.
- Detergent Filling: Detergent is added to the larger cavity for the main wash and a small amount can be added to the door for pre-wash, especially for heavily soiled items. Only detergents specifically designed for dishwashers should be used.
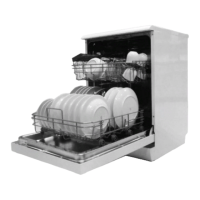
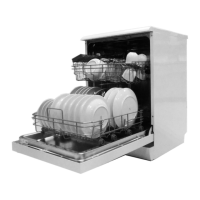
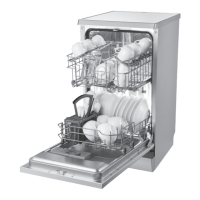
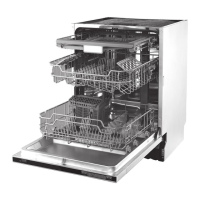
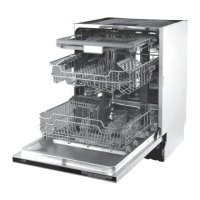
- Loading Baskets:
- Scrape off large food residues and soften burnt food.
- Items like cups, glasses, pots/pans should be faced downwards.
- Curved or recessed items should be loaded at an angle for water drainage.
- Utensils should be stacked securely without tipping over or obstructing spray arms.
- Hollow items should face downwards to prevent water collection.
- Dishes and cutlery should not overlap.
- Delicate and lighter items (glasses, coffee/tea cups) go in the upper basket.
- Large and difficult-to-clean items (pots, pans, serving dishes) go in the lower basket.
- Long-bladed knives and sharp cutlery should be placed horizontally in the upper basket or with points down in the cutlery basket.
- The dishwasher should not be overloaded to ensure good results and reasonable energy consumption.
- Basket Adjustment: The height of the upper basket can be adjusted to accommodate larger utensils in either the upper or lower basket. The cup shelves can be folded back or removed, and the spikes in the lower basket can be lowered for larger items.
- Cutlery Basket: Ensure no items extend through the bottom and sharp utensils are loaded with the sharp point down.
- Changing Program: A running program can only be modified if it has been running for a short time. Otherwise, the detergent dispenser may need refilling. To change, open the door slightly, press the Program button for more than 3 seconds to cancel, then select a new program and close the door.
- Adding Forgotten Dishes: Dishes can be added before the detergent dispenser opens. Open the door slightly, wait for spray arms to stop, open fully, add dishes, and close the door.
- End of Cycle: The dishwasher sounds 8 times and stops. Turn off the appliance and water tap. Wait about 15 minutes before unloading to allow dishes to cool and dry better, starting with the lower basket.
Maintenance Features
- Filtering System: The filter system (coarse, main, and fine filters) prevents food remnants and other objects from entering the pump. Filters should be cleaned regularly, ideally after each wash cycle, by rinsing under running water. The entire filter assembly should be cleaned once a week.
- To remove: Turn the filter anti-clockwise and lift it up.
- To clean: Use a cleaning brush for coarse and fine filters.
- To reinstall: Place the assembly in its seat and press downwards.
- Warning: Never use the dishwasher without filters. Improper replacement can reduce performance and damage dishes. Do not knock filters during cleaning.
- Cleaning the Door: The control panel can be cleaned with a lightly dampened cloth and dried thoroughly. The door edge should be cleaned with a soft, warm, damp cloth. Avoid spray cleaners near the door lock and electrical components. Abrasive agents or paper towels should not be used on stainless steel surfaces.
- Protect Against Freezing: In winter, after each wash, cut off electrical power, turn off water supply, disconnect and drain the water inlet pipe, reconnect the pipe, and remove water from the tub sump with a sponge.
- Cleaning the Spray Arms: Spray arms should be cleaned regularly to prevent hard water chemicals from clogging jets and bearings.
- To remove upper spray arm: Hold the nut and rotate clockwise.
- To remove lower spray arm: Pull upward.
- To clean: Wash in soapy, warm water and use a soft brush for jets. Rinse thoroughly before replacing.
- After Every Wash: Turn off the water supply and leave the door slightly ajar to prevent moisture and odors.
- Remove the Plug: Always unplug the appliance before cleaning or maintenance.
- No Solvents or Abrasive Cleaning: Do not use solvents or abrasive products on the exterior or rubber parts. Use a cloth with warm soapy water. For interior spots/stains, use a cloth dampened with water and vinegar, or a dishwasher-specific cleaning product.
- Long Periods of Disuse: Run an empty wash cycle, unplug, turn off water, and leave the door slightly open to prolong door seal life and prevent odors.
- Moving the Appliance: Keep the appliance in a vertical position if possible. If necessary, it can be positioned on its back.
- Seals: Clean door seals periodically with a damp sponge to prevent food accumulation and odors.