9
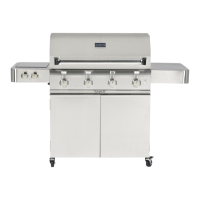
Procedure - Replacing your Side Burner - Side Burner Removal
• Loosen the top two Bolts under the Side Shelf with
your 7/16” Socket Tool. Do not remove them.
• Remove the bottom two Bolts. Place these two
Bolts in a secure location - you will need them for
installing your new Side Shelf.
2
TOP BOLT - LOOSEN ONLY
BOTTOM BOLT - REMOVE
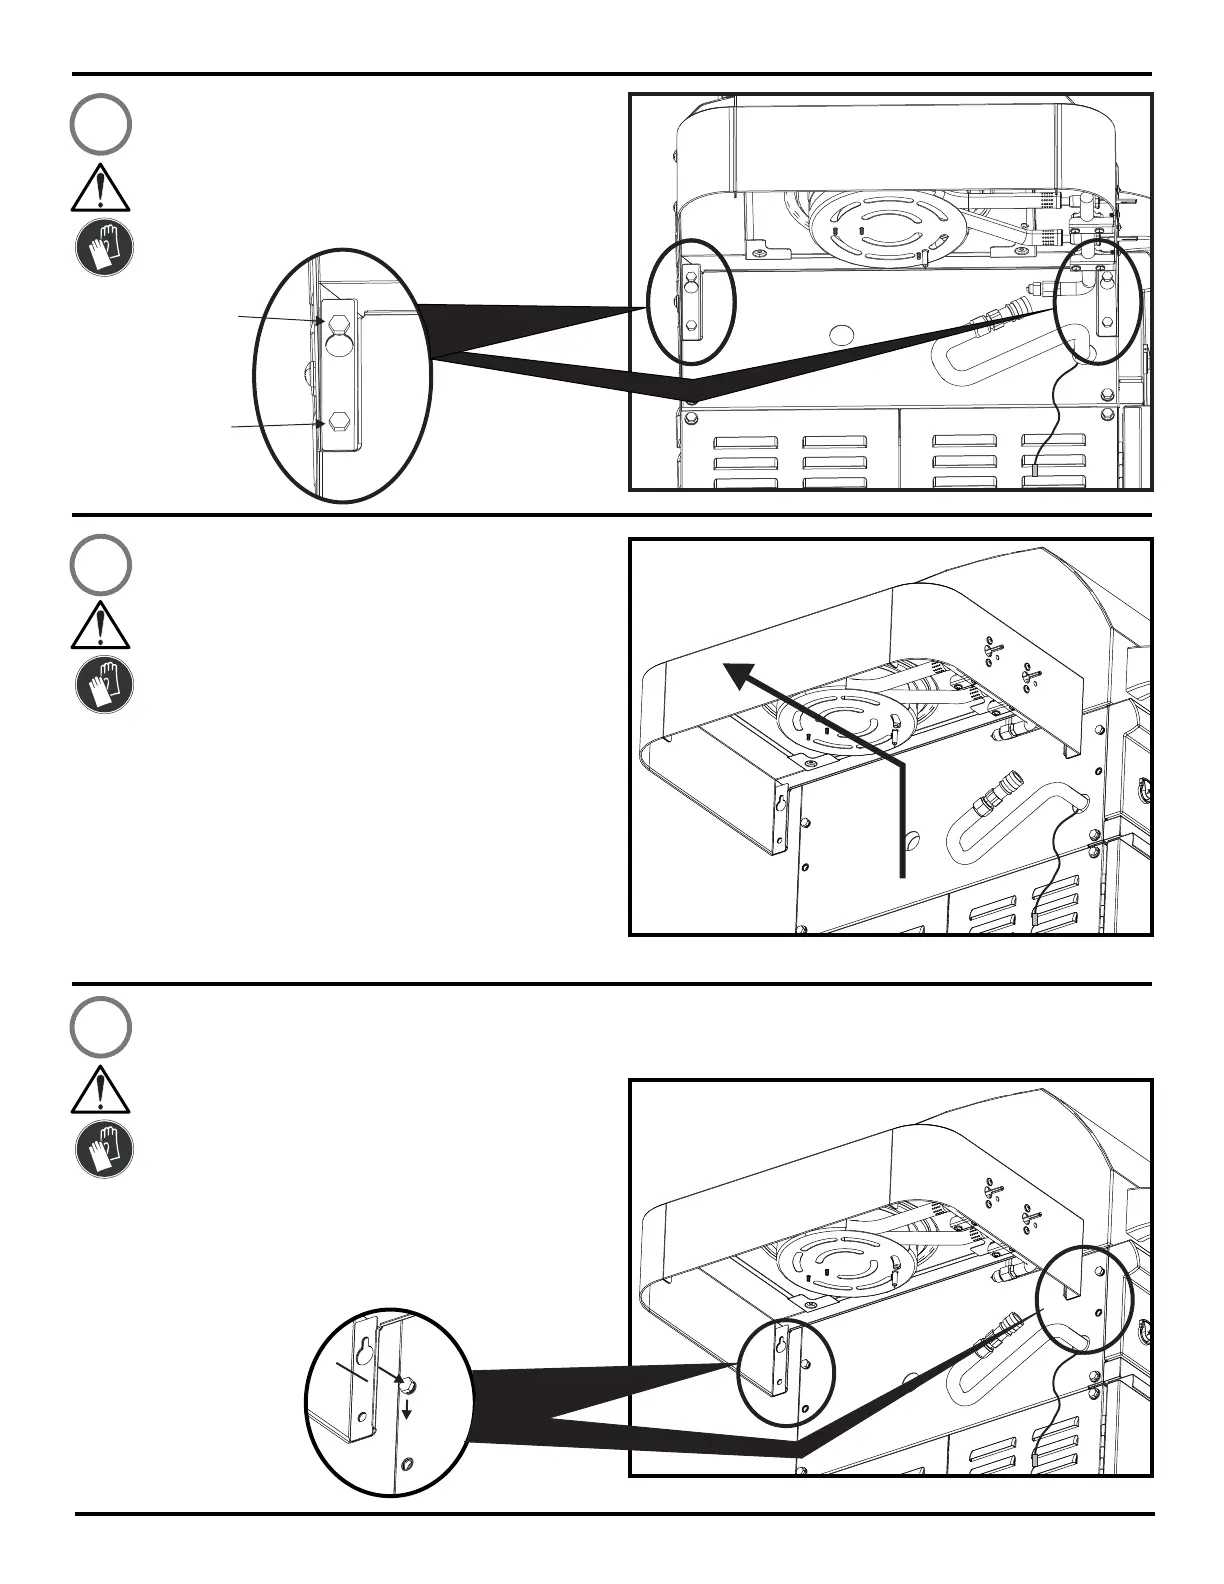
• Remove the Side Burner Shelf lifting it with both
hands
• Place one hand in front under the Control Valve
stems and the other on the back of the Side Burner
Shelf.
• Lift the Shelf straight up a small distance and then
pull it away from the Grill.
• Be careful not to damage any Wires or Hoses while
pulling the Shelf away from the Grill.
3
LIFT HERE
LIFT HERE
• Hold the new Side Burner with both hands, in the
same manner as when you removed the old one.
• Align the key slots in the Shelf with top Bolts that
we previously loosened.
• Once the key slots are aligned over the Bolts, gently
press the Shelf unit down to engage the Bolts.
• The Shelf will now support itself and you can let go
of it.
4
You will begin installing your new Side Burner Side Shelf now. Carefully remove it from the shipping carton. Use
this carton and any packing material to re-pack the old Side Burner. Remove new Side Burner Grate and any
internal packaging materials from the new Side Burner assembly.
Procedure - Replacing your Side Burner - New Side Burner Installation
© Saber Grills, LLC
Printed in U.S.A.
sabergrills.com
80028080 ● 09/13/17 ● Revision 03
 Loading...