30 31
NOTE:
For more information on the disposal of used oil, consult your dealer.
Change the oil more often when operating the engine under adverse cond-
itions such as extended trolling.
Checking wiring and connectors
Check that each grounding wire is properly secured.
Check that each connector is engaged securely.
Exhaust leakage
Start the engine and check that no exhaust leaks from the joints between the
exhaust cover, cylinder head, and body cylinder.
Water leakage
Start the engine and check that so water leaks from the joints between the
exhaust cover, cylinder head, and body cylinder.
Engine oil leakage
Check for oil leads on the around the engine.
NOTE:
If any leaks are found, consult your dealer.
Checking propeller
You could be seriously injured if the engine accidentally starts when you
are near the propeller.
Before inspecting, removing, or installing the propeller, remove the spark
plug caps from the spark plugs. Also, place the shift control in neutral, t-
urn the main switch to "OFF" (off) and remove the key, and remove the l-
anyard from the engine stop switch. Turn off the battery cut-off switch if
your boat has one.
Do not use your hand to hold the propeller when loosening or tightening
the propeller nut. Put a wood block between the anti-cavitation plate and
the propeller to prevent the propeller from turning.
Checkpoints
Check each of the propeller blades for wear, erosion from cavitation or ve-
ntilation, or other damage.
Check the propeller shaft for damage.
Check the splines / shear pin for wear or damage.
Check for fish line tangled around the propeller shaft.
Check the propeller shaft oil seal for damage.
NOTE:
If the shear pin equipped: it is designed to break if the propeller hits a hard underwat-
er obstacle to help protect the propeller and drive mechanism. The propeller will then
spin freely on the shaft. If this happens, the shear pin must be replaced.
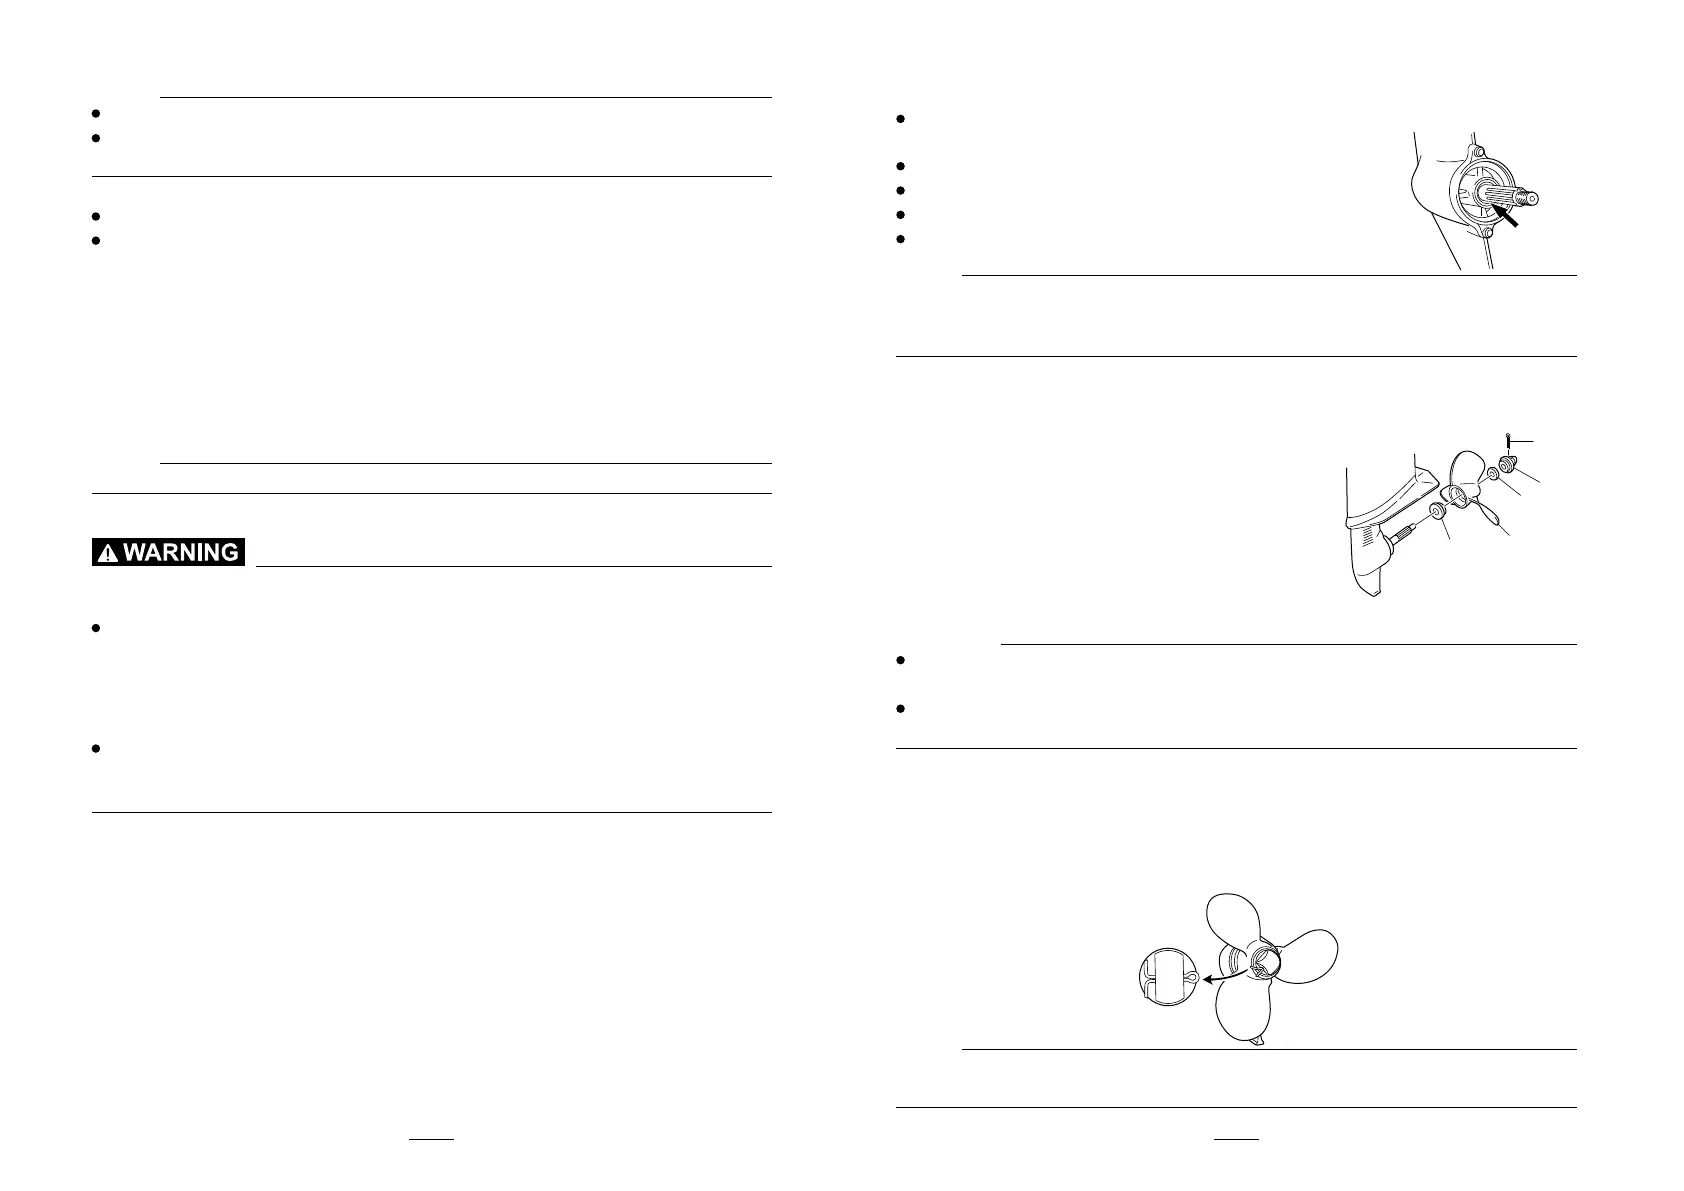
Removing the propeller
1. Straighten the cotter pin and pull it out using a pair of pliers.
2. Remove the propeller nut, washer, and sapcer (if equipped).
1. Cotter pin
2. Propeller nut
3. Washer
4. Propeller
5. Thrust washer
3. Remove the propeller and thrust washer.
Installing the propeller
CAUTION:
Be sure to install the thrust washer before installing the propeller, oth-
erwise the lower case and propeller boss could be damaged.
Be sure to use a new cotter pin and bend the ends over securely. Oth-
erwise the propeller could come off during operation and be lost.
1. Apply marine grease or a corrosion resistant grease to the propeller shaft.
2. Install the spacer (if equipped), thrust washer, and propeller on the propeller shaft.
3. Install the spacer (if equipped) and the washer. Tighten the propeller nut until
there is no forward-backward movement.
4. Align the propeller nut with the propeller shaft hole. Insert a new cotter pin
in the hole and bend the cotter pin ends.
NOTE:
If the propeller nut does not align with the propeller shaft hole after tightening
it, loosen the nut until it aligns with the hole.
1
2
3
4
5