12
840 801 R. 11/11
Samoa Industrial, S.A. · Box 103 Alto Pumarín · 33211 Gijón - Asturias Spain · Tel.: +34 985 381 488 · Fax.: + 34 985 384 163
2011_11_11-13:30
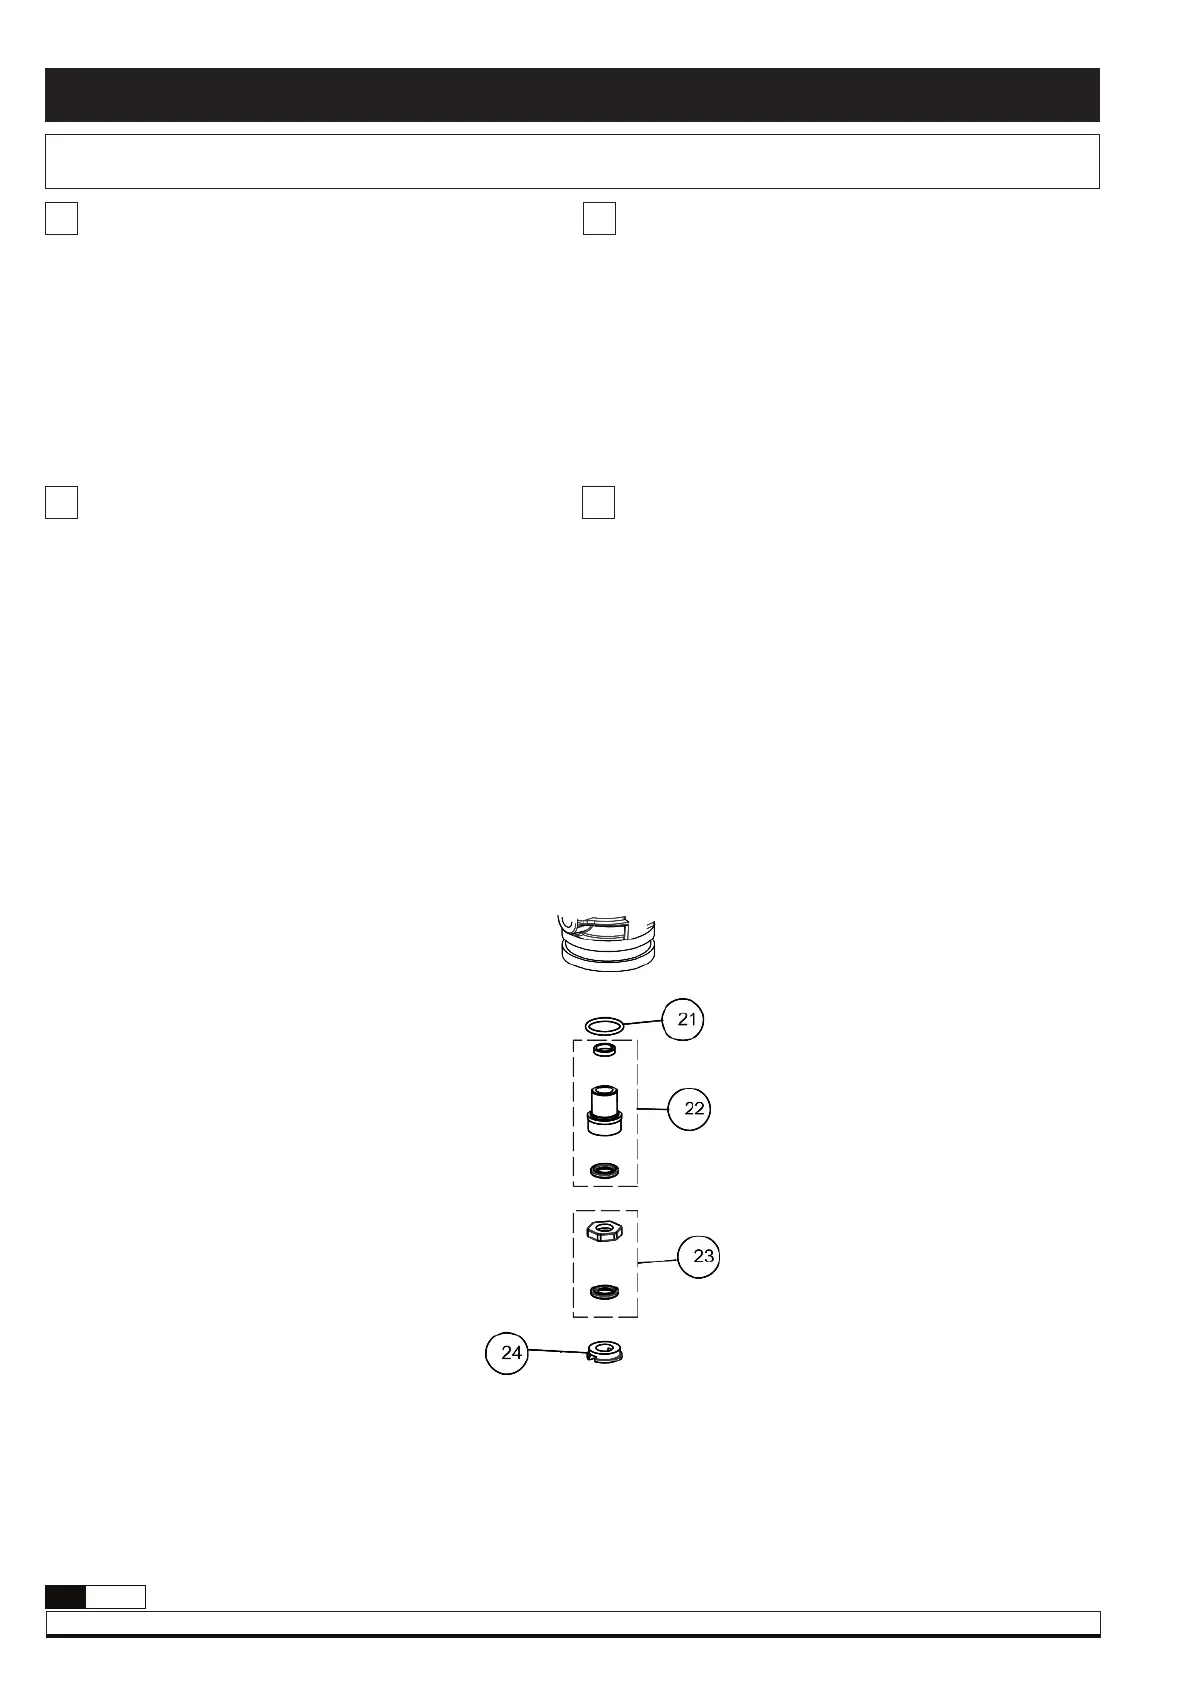
Packing set and O-ring / Conjunto empaquetadura y junta tórica /
Ensemble porte-joints et joint torique / Dichtungssatz und O-Ring
1. Follow the procedure for the air motor until the air piston rod
is outside the air motor body.
2. Remove the packing set (22-24) and the O ring (21). Replace
these parts and clean the seat of the O ring.
NOTE: It is important that these parts are mounted in correct
order: Place first the O ring in its correct position inside the motor
body. Introduce thereafter the big and the small packing set.
GB
Repair and cleaning procedure / Procedimientos de reparación y limpieza /
Instructions de réparation et de nettoyage / Reparatur- und Reinigungs-Anleitung
1. Seguir el procedimiento del motor de aire hasta haber
extraido el eje piston de aire del cuerpo motor.
2. Quitar el conjunto empaquetadura (22-24) y la junta tórica
(21). Sustituir estas piezas y limpiar el asiento de la junta
tórica.
NOTA: Al volver a montar, es importante respetar el orden de
montaje de las piezas: Primero alojar la junta tórica en su lugar
dentro del cuerpo motor y posteriormente introducir el conjunto
empaquetadura grande y luego el conjunto empaquetadura
pequeño.
E
1. Suivre les instructions qui concernent le moteur d’air jusqu’à
avoir sorti l’axe du piston d’air du corps de moteur.
2. Retirer l’ensemble du porte-joints (22-24) ainsi que le joint
torique (21). Remplacer ces pièces et nettoyer le siège du
joint torique.
NOTE: Lorsqu’il sera nécessaire de monter à nouveau les pièces,
il sera primordial de suivre l’ordre de montage des pièces : loger
tout d’abord le joint torique à sa place initiale à l’intérieur du
corps du moteur. Introduire ensuite l’ensemble du grand porte-
joints suivi de l’ensemble du petit porte-joints.
F
1. Nach der Anleitung “Reparatursatz und Druckluftmotor”,
Punkte 1 - 3 verfahren
2. Den Dichtungssatz (22-24) und O-Ring (21) entfernen. Diese
Teile ersetzen und den Sitz des O-Ringes gründlich reinigen.
BITTE BEACHTEN: Es ist sehr wichtig, dass alle Teile wieder in der
richtigen Reihenfolge montiert werden. Zuerst den O-Ring exakt
in seine Position im Motorgehäuse bringen. Danach die grossen
und kleinen Dichtungssätze einsetzen.
D
Fig. 15
 Loading...