4-10 Samsung Electronics
Disassembly and Reassembly
No Parts Procedure Remark
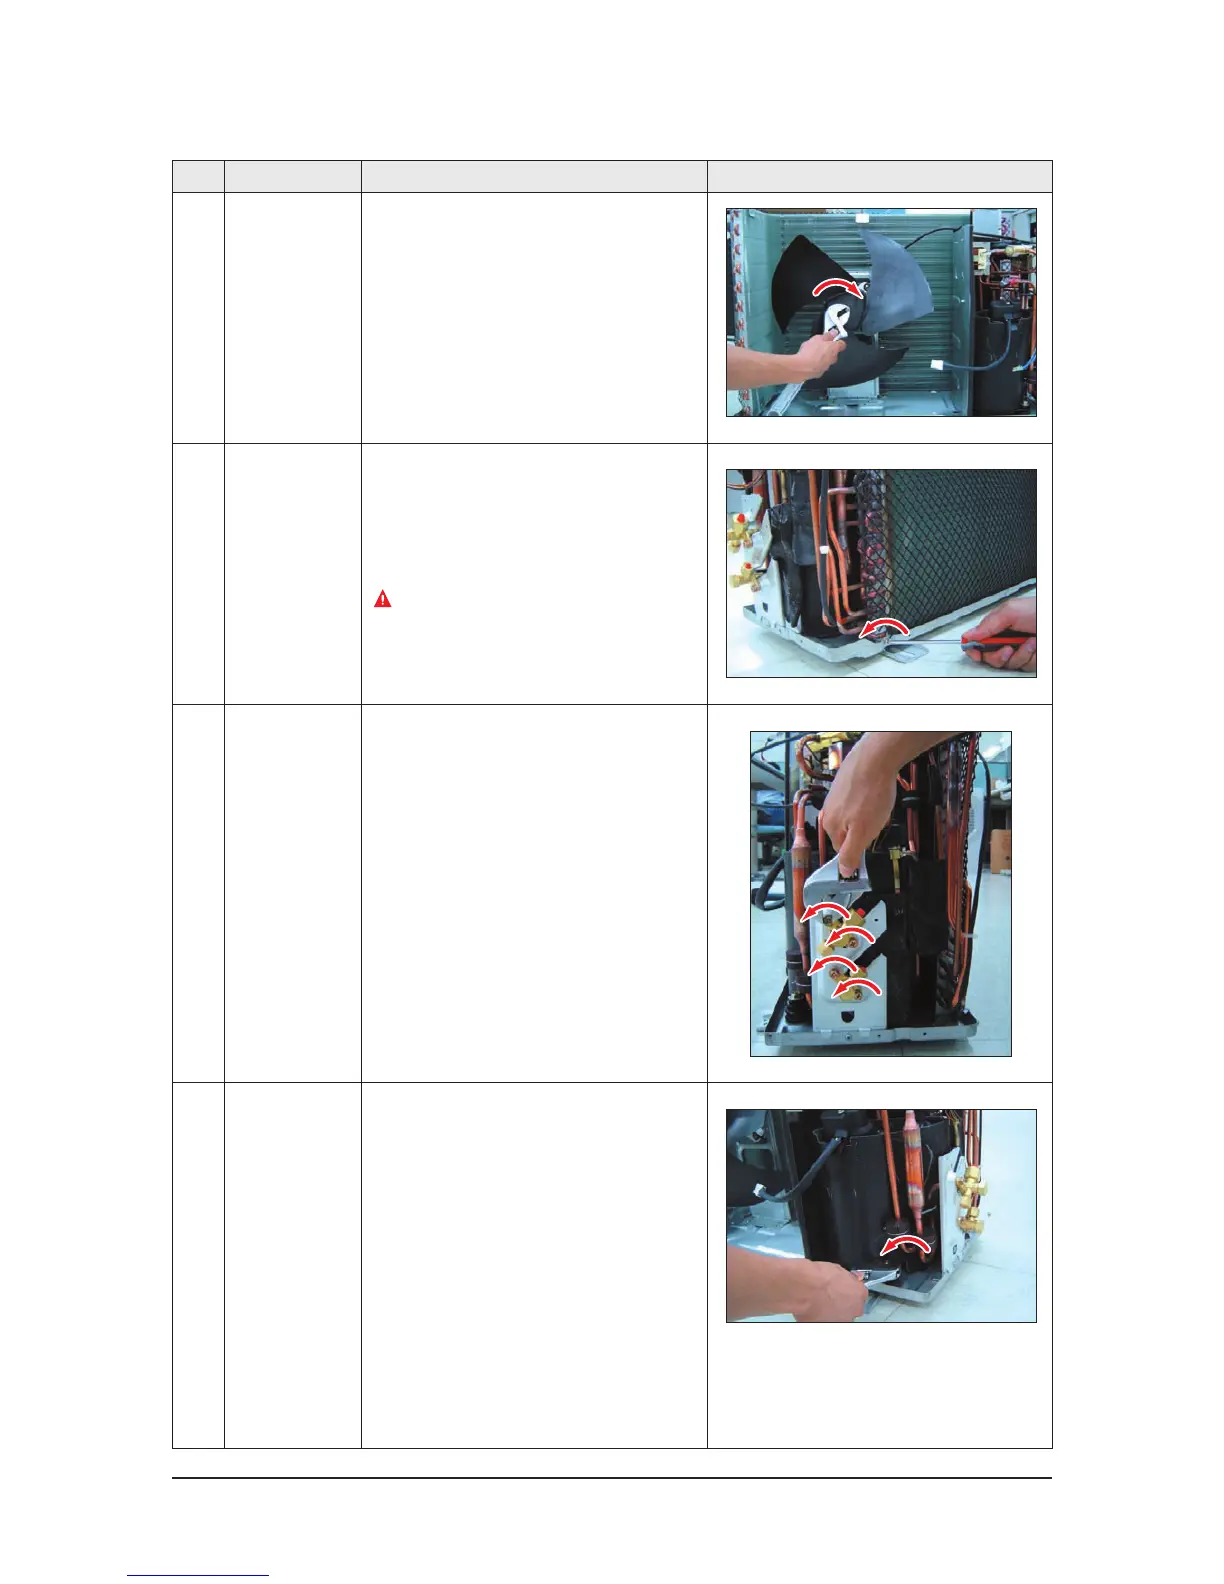
3 F
an
&
M
otor
1) Release the refrigerant at first.
2
) Loosen fixing screw(CW).
(
Use Monkey Spanner.)
3) Disassemble the pipes in both inlet and outlet
with welding torch.
4) Detach the Heat Exchanger.
4 H
eat Exchanger 1) Loosen 2 fixing screws(CCW) on both sides.
(Use +Screw Driver.)
2) Disassemble the pipes in both inlet and outlet
with welding torch.
3) Detach the Heat Exchanger.
Before you disassemble the pipes and
Co
ndenser, be sure that there should be
no refrigerant remained in the unit.
5 A
ss'y Valve 4-Way
&
A
ss'y Valve EEV
1)
Loosen 4 bolts(CCW) fixed to assemble Valve
Service with Bracket Valve like the picture on
the right side. (
Use Monkey Spanner.)
2) Disassemble the pipes assembled the suction
and discharge sides of the Compressor with
welding torch.
6 C
ompressor 1) Loosen the Nut(CCW) of Terminal Cover.
(Use Monkey Spanner.)
2) Detach the Terminal Cover and detach
the Connect Comp Wire from Compressor.
3) Disassemble the Felt Comp Sound.
4) Loosen the 3 bolts(CCW) at the bottom of
Compressor like the picture on the right side.
(
Use Monkey Spanner.)
 Loading...