This document is an owner's manual for a Samsung window-type room air conditioner, covering several models including AW07F2SBA, AW09F2SBA, AW10F2JBA, AW12F2JBA, AW14F2MBA, AW18F2MBA, AWT18F2MDA, AW22F2MBA, AW22F2MBB, AW24F2MBA, and AW24F2MBB, as well as their 'A(G)' variants. The manual provides instructions for installation, operation, and maintenance in English, Spanish, French, Portuguese, and Italian.
Function Description
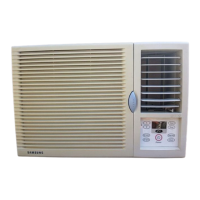
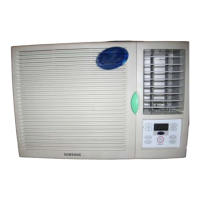
The Samsung window-type room air conditioner is designed to cool a room. It operates in "Cool" mode to lower the ambient temperature. Users can adjust the desired temperature within a range of 18°C to 29°C. The unit also features a timer function, allowing users to set a specific operating duration after which the air conditioner will automatically switch off. The fan speed can be adjusted to either rapid or slow settings, and the air flow direction can be controlled both horizontally and vertically to optimize cooling efficiency and comfort. A ventilation lever is included to exhaust stale air from the room, ensuring fresh air circulation.
Important Technical Specifications
The manual lists several models with varying power supply specifications:
- Models ending in BA/BB/BC: 220V~, 60Hz
- Models ending in DA: 200-220V~, 50Hz
- Models ending in EA: 220-240V~, 50Hz
The maximum permissible system impedance at the power junction box for AW18** models is 0.24 ohms. The manual advises that this impedance will usually not be exceeded if the branch to the power outlet is fed from a junction box with a rated current of 32A.
The operating temperature and humidity ranges are specified as follows:
- Indoor Temperature: 21°C to 32°C approx.
- Outdoor Temperature: 21°C to 43°C approx.
- Indoor Humidity: 80% or less
The physical dimensions for installation vary by model, specifically the "A" dimension (depth from the front panel to the rear of the unit):
- ****S models: 180mm
- ****J models: 220mm
- ****M models: 240mm
Minimum clearance requirements for installation include:
- 75mm minimum clearance at the top.
- 300mm clearance at the rear (under an awning).
- 500mm clearance on the sides.
- 150mm minimum clearance at the bottom.
- If the wall is greater than 150mm thick, it is recommended to cut the wall back on a 45° angle.
- An outdoor side clearance of 100mm or more is required.
Usage Features
Cooling Your Room:
- Set the timer control dial to the "CON." position to start in Cool mode.
- Turn the temperature control dial to the desired position (18°C to 29°C).
- Adjust the FAN SPEED switch for rapid or slow fan operation.
- Control air flow direction as needed.
Setting the Off Timer:
- Set the timer control dial to the desired operating duration (e.g., "4" for four hours).
- Set other desired operating conditions (e.g., temperature, fan speed).
Minor errors may occur depending on power supply and timer position.
Cancelling the Off Timer:
- Set the timer control dial to the "CON." or "OFF" position.
Switching the Air Conditioner Off:
- Set the timer control dial to the "OFF" position. The unit will stop operating.
Adjusting Air Flow Direction Horizontally:
- Set the air flow blade swing switch to the "小" position for automatic left and right swing.
- To stop the blades at a specific position, set the switch to the "Ⅲ" position when the blades are in the desired orientation.
Adjusting Air Flow Direction Vertically:
- Manually push the outer air flow blades upwards or downwards to the desired position.
- For cooling, it is recommended to adjust the blades to face upwards.
- Important Note: If blades are oriented downwards during prolonged cooling, dew may form and drip from the blades.
Using the Ventilation Lever:
- To exhaust stale air, push the ventilation lever on the front of the unit to the right (open position " ").
- To circulate air within the room without exhausting, push the lever to the left (closed position " ").
Operating Recommendations:
- In case of a power failure, the unit will switch off and automatically restart when power returns.
- Using the air conditioner outside recommended temperature/humidity ranges may trigger automatic protection, cause water leakage, or lead to freezing of the heat exchanger.
Maintenance Features
Cleaning Your Air Conditioner:
- Important: Always turn off the unit and unplug the power plug before cleaning.
- *Air Filter Cleaning (for F2 models):
- Hold the air filter handle, pull slightly to the left, and open the front grille. Opening the grille as much as possible makes cleaning easier.
- For user safety, a safety clip is installed in the front grille. Grasp the lower part of the front grille and the air filter handle, then open the grille. Remove the safety clip and the front grille. Reinstall the safety clip when reassembling.
- Pull the air filter to the right side.
- Remove dust from the air filter with a vacuum cleaner or brush.
- Insert the air filter back into its original position.
- Wipe the unit's surface with a neutral detergent and then with a dry cloth. Do not use benzene, solvent, or other chemical products.
- *Air Filter Cleaning (for A2/G2 models):
- Open the front grille by pulling on the tabs. After opening, lift it up and pull down to release it.
- Grasp the handle on the air filter, lift it slightly, and pull it out to the front.
- Remove dust from the air filter with a vacuum cleaner or brush.
- Slide the air filter back into position.
- Clean outer surfaces with a damp cloth and mild detergent (no benzene, solvents, etc.). Wipe dry with a clean, soft cloth.
- Periodic Cleaning: The air filter should be cleaned regularly (every two weeks) to maintain optimal performance.
Storage and Restart After Long Periods:
- Before storing for a long period:
- Set the timer control dial to "CON." and the temperature control dial to "2" or less.
- Let the unit run for a few hours to thoroughly dry the inside.
- Switch off the air conditioner and unplug it from the wall socket.
- Clean the filter and outer surfaces.
- Before restarting after a long period:
- Set the timer control dial to "CON." and the temperature control dial to "2" or less.
- Let the unit run for a few hours to thoroughly dry the inside.
Solving Common Problems:
- Unit does not operate: Check circuit breaker, power cable connection, and selected operating mode.
- Unit does not cool: Set temperature control dial to desired position, check if room temperature is too low, check for blocked air filter (clean if necessary), and ensure no obstacles block air flow.
- Air flow direction does not change: Check if the air conditioner is switched on; turn the timer control dial if necessary.
- Odours in the room: Air out the room.
Installation
Checkpoints Prior to Installation:
- Inspect the cabinet and front grille for any defects.
- Verify power supply specifications on the unit's label.
Installation Conditions:
- The installation area (wall or window) must be strong enough to support the unit and prevent vibration/noise. Reinforcement may be needed.
- Install on the north or west side to avoid direct sunlight. If installed on the south or east side, use a sunshade, ensuring it doesn't hinder outside air flow.
- Ensure sufficient space at the rear for smooth air flow (refer to illustration for specific clearances). Operating in closed areas without proper air flow can cause issues.
Installation of the Drain Tube (if supplied):
- Fix the drain tube as shown in the figure (rear, with rubber cap, gasket, and screws).
Installation of the Drain Pan (if supplied):
- For high storage or areas where the drain pan cannot be directly installed on the rear after unit installation:
- Open the front grille (refer to cleaning instructions).
- Remove the screw at the lower section of the front grille.
- Remove the front panel by pressing cabinet sides, pulling the lower part forward, and lifting upward. (Caution: excessive force may damage tabs).
- Remove two screws on the lower right and left sides of the unit.
- Remove the chassis from the cabinet.
- Remove the rubber cap from the basepan.
- Fix the drain pan as shown and connect a commercially-available drain hose.
- Install the cabinet and reassemble the unit, securing the front panel with the removed screw or a supplied screw.
- For areas where the drain pan can be directly installed on the rear after unit installation:
- Follow steps 6 and 7 only from the above procedure.