E-21
ENGLISH
COMPLETING THE INSTALLATION
To complete the installation, perform the following checks and tests
to ensure that the air conditioner is operating correctly.
Step 1 Review all the following elements in the installation:
◆ Installation site strength
◆ Piping connection tightness to detect any gas leakage
◆ Connection wiring
◆ Heat-resistant insulation of the piping
◆ Drainage
◆ Earthing wire connection
Step 2 Check the room select switch in the indoor unit and in the outdoor unit.
Set the switch properly as below. (For example: 4Rooms)
◆ The liquid and gas refrigerant pipes should not be crossed with each other.
◆ The switch for the indoor unit address setting is in each indoor unit PCB.
◆ The manual addressing number of the indoor unit must be set as above.
(A unit
➝
0, B unit
➝
1, C unit
➝
2, D unit
➝
3)
◆ It could take more time depending on the indoor and outdoor temperature.
◆ If the checking is finished, outdoor unit stops automatically.
◆ [DIS 02] shows the indoor unit under searching.
◆ Function of Step 3
Step 3 Automated checking of pipe connection (Auto addressing option)
◆ Apply the power to the outdoor unit.
◆ Push the [K2] button 4 times in the outdoor PCB display.
A unitIndoor unit
Manual Addressing
(For example: 4 Rooms)
Auto Addressing
(For example: 4 Rooms)
B unit C unit D unit
SW 01Outdoor unit
Manual Addressing
(For example: 4 Rooms)
Auto Addressing
(For example: 4 Rooms)
SW 02
Button [K2] 4 times
Display
Time duration
DIS 01
15°C or more
(Cool mode)
5 min ~ 10 min
(Heat mode)
20 min ~ 50 min
Less than 15°C
Outdoor Temperature
[DIS 01] is flickering on the setting time.
DIS 02
FunctionMode
Auto Addressing
Manual Addressing
Checking the connection & addressing
Checking the connection only
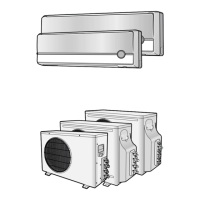
◆ MH068FXEA4 / MH080FXEA4
 Loading...