ENGLISH
9
Cutting/Flaring the pipes
1. Make sure that you have the required tools available. (pipe cutter, reamer, aring tool and pipe holder)
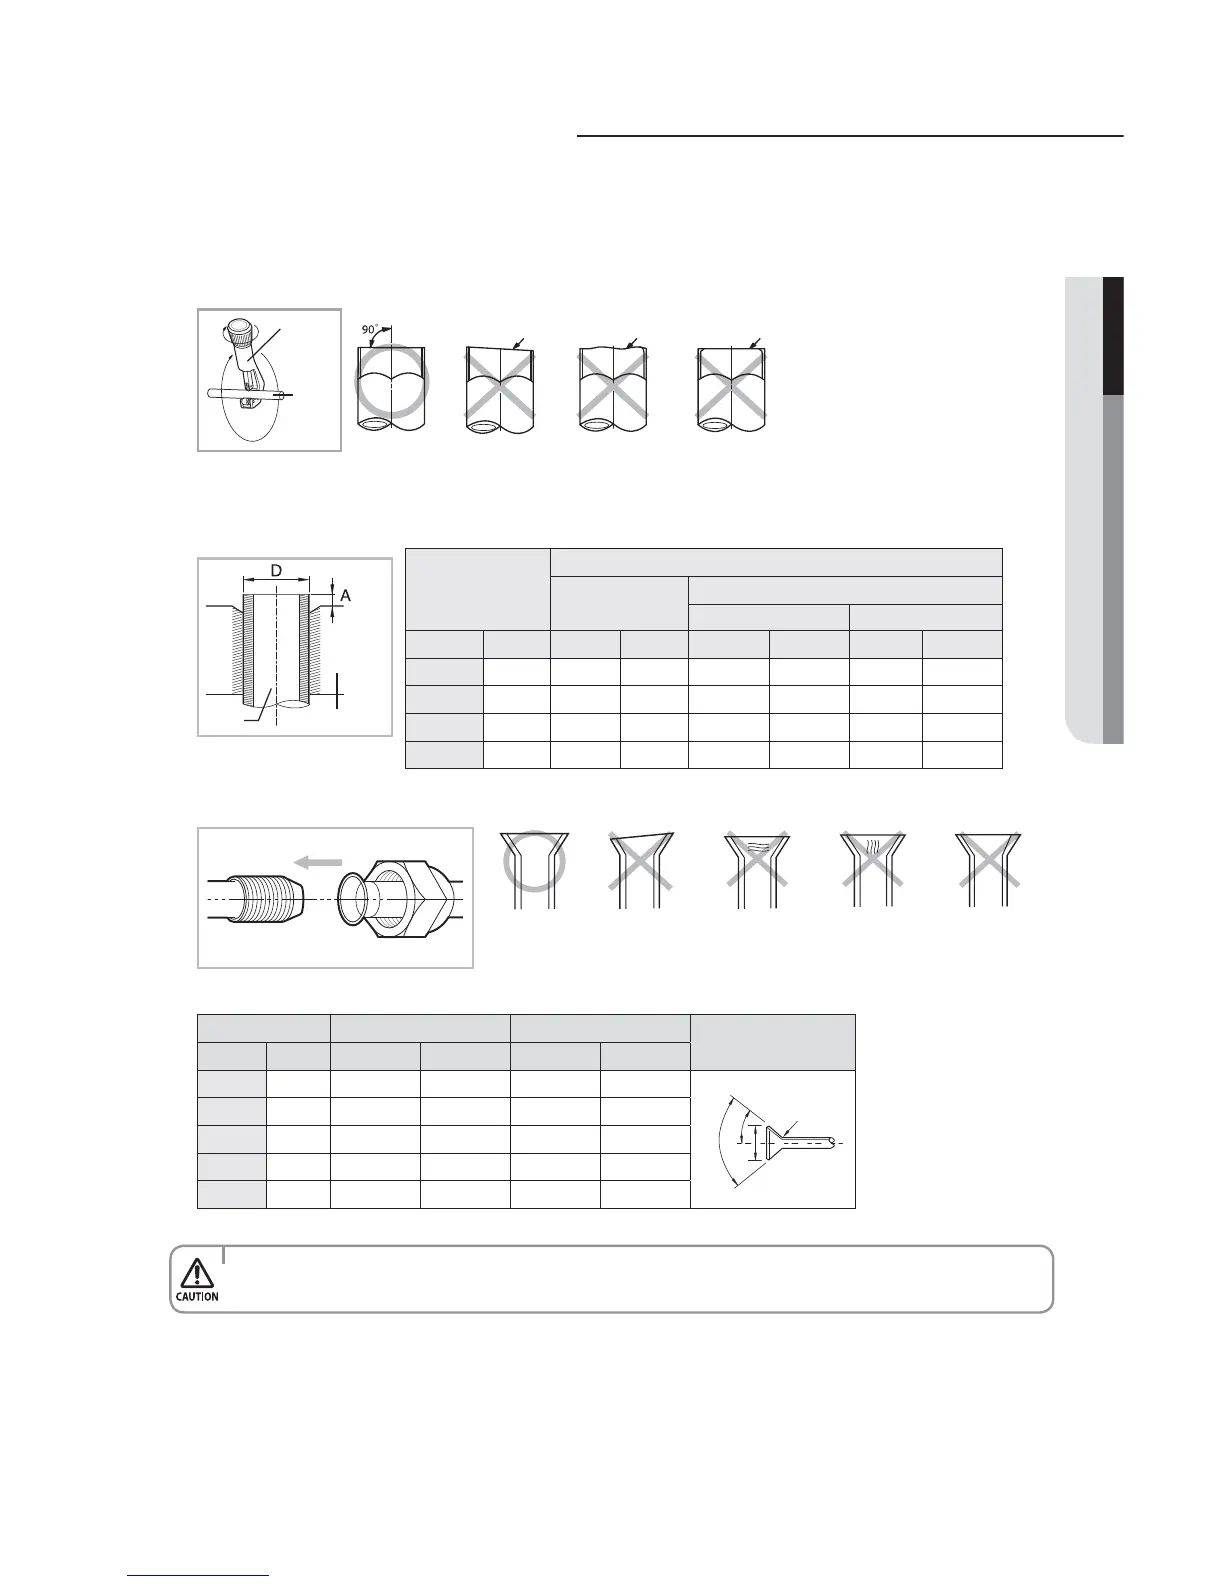
2. If you wish to shorten the pipes, cut it with a pipe cutter, taking care to ensure that the cut edge remains at a 90° angle
with the side of the pipe. Refer to the illustrations below for examples of edges cut correctly and incorrectly.
3. To prevent any gas from leaking out, remove all burrs at the cut edge of the pipe, using a reamer.
4. Slide a are nut on to the pipe and modify the are.
5. Check that the aring is correct, referring to the illustrations below for examples of incorrect aring.
6. Align the pipes and tighten the are nuts rst manually and then with a torque wrench, applying the following torque.
t *GUIFQJQFTSFRVJSFCSB[JOHFOTVSFUIBU0'/0YZHFO'SFF/JUSPHFOJTøPXJOHUISPVHIUIFTZTUFN
t /JUSPHFOCMPXJOHQSFTTVSFSBOHFJT_.1B
Oblique Rough
Burr
Pipe
cutter
Pipe
Pipe
Flare
6OFWFO
Thickness
CrackedDamaged
Surface
InclinedCorrect
Outer diameter (D)
Depth of aring part (A)
Using aring tool
for R-410A
Using conventional aring tool
Clutch type Wing nut type
mm inch mm inch mm inch mm inch
1/4 _ _ _ _ _ _
3/8 _ _ _ _ _ _
12.70 1/2 _ _ _ _ _ _
_ _ _ _ _ _
Outer diameter Connection Torque Flare dimension
Flare shape
[mm(inch)]
mm inch N·m Ibf·ft mm inch
1/4 _ _ _ _
90° ±2°
45°
±2°
3_
_
3/8 _ _ _ _
12.70 1/2 _ _ _ _
_ _ _ _
3/4 _ _ _ _