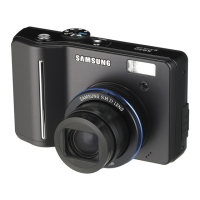
Do you have a question about the Samsung S1050 and is the answer not in the manual?
Guides on installing the camera driver before PC connection.
Basic steps for capturing an image with the camera.
Instructions for connecting the camera to a PC using the USB cable.
Procedure to ensure the camera is powered on before use.
How to verify the camera is recognized as a removable disk on a PC.
Outlines the included and optional accessories for the camera.
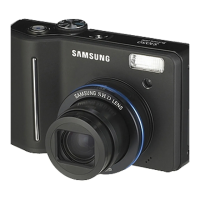
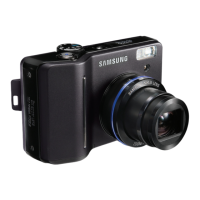
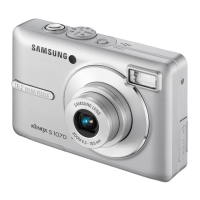
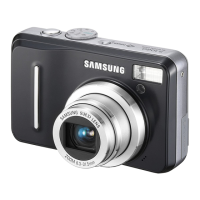
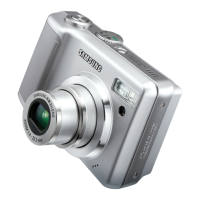
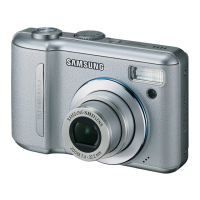
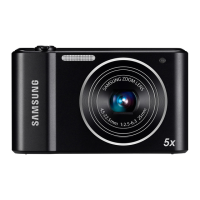
Introduces the identification of camera parts and functions.
Details on how to connect the camera to a power source.
Instructions on how to correctly insert the memory card.
Guidelines and precautions for using the memory card.
Initial setup steps for the camera upon first use.
Identifies external components of the camera's front and top.
Identifies external components on the camera's back and bottom.
Details the bottom and 5-function button layout and operation.
Explains the function and status indicators of the self-timer lamp.
Details the different states and meanings of the camera status lamp.
Explains icons for various shooting modes like AUTO, PROGRAM, SCENE.
Provides important safety and usage information regarding camera batteries.
Instructions on how to correctly insert the camera battery.
Instructions on how to correctly insert the memory card.
Explains the importance and process of formatting a new memory card.
Safety instruction to turn off the camera before handling the memory card.
Warns about performance degradation from repeated memory card use.
Advises careful handling of the memory card to prevent damage.
Precautions for storing memory cards away from magnetic fields.
Advice on avoiding extreme temperatures for memory card storage.
Cautionary advice regarding keeping the memory card clean and dry.
Recommendation to store the memory card in its case when not in use.
Notes that memory cards may become warm during extended use.
Advises formatting cards from other cameras before use.
Warns against using cards formatted by other devices.
Lists conditions that can lead to memory card data corruption.
Disclaimer regarding responsibility for lost data on memory cards.
Recommendation to back up important data from memory cards.
Explains the "Memory Full!" message and how to optimize memory.
Details shooting capacity for a 256MB MMC based on image size and quality.
Explains the function of the SD/SDHC memory card's write protect switch.
Warning against removing the memory card during blinking status lamp.
Instruction to fully charge the battery before initial camera use.
Explains the initial setup menu for date, language, and battery type.
Guides the user through selecting the camera's display language.
Instructions for setting the camera's date, time, and format.
Guide to selecting the correct battery type for camera optimization.
Guides on using the AUTO mode for quick and easy picture taking.
Guides on using the PROGRAM mode for automatic settings with manual options.
Instructions on setting aperture priority for controlling depth of field.
Explains how to set shutter speed for capturing motion effects.
Guides on manually setting aperture and shutter speed for full control.
Details the ASR mode for reducing camera shake in low light.
Provides precautions and tips for optimal use of the ASR mode.
Explains the Wise Shot feature which takes two images simultaneously.
Guides on selecting optimal settings for various shooting situations.
Describes how the camera automatically detects and focuses on faces.
Instructions for recording movie clips with available recording time.
How to record movie clips silently without audio.
Explains how to pause and resume movie recording for continuous clips.
Guides on recording voice memos or audio clips.
Explains the function and auto power-off setting of the power button.
Details the usage of the shutter button for images and voice recording.
Explains how to use the TELE zoom for magnifying the subject.
Explains how to use the WIDE zoom for a wider field of view.
Step-by-step guide to record a voice memo with a still image.
Details different focus modes and their corresponding range specifications.
Instructions on how to manually adjust focus for specific situations.
Explains how to lock focus on a subject for recomposing shots.
Provides a table detailing flash range in meters for different modes.
Guides on choosing appropriate flash modes for various lighting conditions.
Explains various flash mode icons and their descriptions.
Shows compatibility of flash modes across different recording modes.
Instructions for setting up the self-timer for group shots.
Explains how to access and navigate camera menus using the MENU button.
Details the function of the OK button for confirming selections and data.
Explains how to use the LCD monitor to set various recording functions.
Details how to adjust sound settings like volume and shutter sound via LCD.
Guides on configuring initial camera settings such as language and date.
Details advanced setup options like quick view and auto power off.
Explains how to access and adjust recording settings like sharpness and contrast.
Instructions on adjusting image sharpness for desired picture quality.
Guides on adjusting image contrast for vivid or soft effects.
Explains how to select preferred auto-focus types based on shooting conditions.
Details how to view shooting status information on the LCD monitor.
Guides on setting camera sound volumes like startup, shutter, and AF sounds.
How to select the sound activated when the camera turns on.
How to select the camera's shutter sound.
Explains how to enable beep sounds for camera operation awareness.
How to enable AF sound to confirm focus lock.
Explains options for naming image files, including reset and series modes.
Guides on selecting the camera's display language from a list.
Instructions for changing the date, time, and date format for images.
How to embed date and time information directly onto still images.
Guides on adjusting the brightness of the camera's LCD monitor.
How to turn the AF assist lamp on or off for low-light focusing.
How to select a custom image to display when the camera powers on.
Explains the Quick View feature to instantly review captured images.
How to set the camera to automatically turn off to save battery.
Guides on setting the LCD monitor to turn off automatically when idle.
How to select the video output signal (NTSC or PAL) for external monitors.
Explains how images display on an external monitor when connected.
Instructions on how to format memory cards, erasing all data.
Restores camera settings to default values, excluding date/time and language.
How to select battery type for camera optimization.
Shows which effects are selectable for different camera recording modes.
Explains the 'No effect' option in the Color Special Effect menu.
How to capture images in black and white using the Color effect.
How to capture images in sepia tone using the Color effect.
How to capture images in a red tone using the Color effect.
How to capture images in a green tone using the Color effect.
How to capture images in a blue tone using the Color effect.
How to save images in negative mode using the Color effect.
How to save images with custom RGB tone settings using the Color effect.
Guides on changing R, G, B values of an image for custom color effects.
Instructions on how to change the saturation of an image.
How to remove red-eye effects from captured images.
Guides on adjusting the brightness of an image.
Instructions on how to change the contrast of an image.
How to adjust the saturation level of an image.
How to add noise to an image to create an old-photo effect.
How to make the subject stand out by applying preset focus frames.
Guides on adjusting the position of focus frames within preset areas.
How to combine multiple shots into a single still image.
How to modify or delete parts of a composite shot before final capture.
How to edit or delete frames of a composite shot after initial capture.
How to add decorative frame-like borders to still images.
Explains how to navigate and use the menu accessed via the +/- button.
Guides on selecting image resolution based on intended use and memory.
Explains how to choose compression ratios affecting image quality and file size.
How to adjust metering methods for optimal exposure in different lighting.
Explains options for continuous shooting and auto exposure bracketing.
Guides on selecting ISO sensitivity for varying light conditions and noise levels.
How to adjust white balance for accurate color reproduction under different lighting.
Guides on setting a custom white balance for specific lighting environments.
Explains automatic exposure adjustment and manual selection via +/- button.
How to use the movie clip frame stabilizer to reduce motion blur.
Explains how camera functions operate with and without a memory card inserted.
Guides on selecting and viewing still images from the memory card.
Instructions for playing back recorded movie clips.
Steps to capture still images from a movie clip during playback.
How to trim and extract desired segments from movie clips.
Guides on playing back recorded voice files.
How to view multiple images or enlarge a selected image.
Guides on enlarging images and checking zoom status indicators.
Details the maximum zoom rates available for different image sizes.
How to extract and save a portion of an image as a new file.
Step-by-step guide to add voice memos to still images.
Explains the DOWN button's function for menu navigation.
Details the Play & Pause button functions for playback modes.
Guides on resizing images to change resolution and save as startup images.
A table showing which image sizes are supported for resizing.
How to rotate stored images by 90°, 180°, or horizontally.
How to save images in black and white using the Color effect.
How to capture images in sepia tone using the Color effect.
How to capture images in a red tone using the Color effect.
How to capture images in a green tone using the Color effect.
How to capture images in a blue tone using the Color effect.
How to save images in negative mode using the Color effect.
How to save images with custom RGB tone settings using the Color effect.
Guides on changing R, G, B values of an image for custom color effects.
How to convert image colors to black and white using the Special Colour menu.
How to select a part of an image to remain colored while the rest is B&W.
Guides on adjusting the brightness of an image.
Instructions on how to change the contrast of an image.
How to adjust the saturation level of an image.
How to add noise to an image to create an old-photo effect.
How to remove red-eye effects from captured images.
How to add a text box to an image to give it a cartoon-like appearance.
How to delete and reselect images before saving a cartoon effect.
How to make the subject stand out by applying preset focus frames.
Guides on adjusting the position of focus frames within preset areas.
How to combine multiple shots into a single still image.
How to delete and reselect images within a composite shot before finalization.
How to add decorative frame-like borders to still images.
How to add various stickers to an image for decoration.
Guides on deleting single or multiple images from the camera's memory.
How to delete a single image currently displayed on the LCD.
How to select and delete multiple images at once.
How to delete images when viewed in thumbnail mode.
How to print images directly from the camera using a PictBridge printer.
Explains the LEFT button's function for menu navigation and image selection.
Explains the RIGHT button's function for menu navigation and image selection.
Details how to open and exit camera menus using the MENU button.
Explains the OK button's role in confirming selections and data.
Guides on customizing playback functions via the LCD monitor menu.
Explains playback settings when connected to a PictBridge printer.
How to view images as a continuous slide show with adjustable intervals.
Guides on initiating the slide show feature from the menu.
How to apply unique screen effects to the slide show presentation.
How to set background music for the slide show presentation.
How to protect specific images from accidental deletion (Lock/Unlock).
How to protect specific images from accidental deletion (Lock/Unlock).
Guides on deleting single or multiple images from the camera's memory.
Explains Digital Print Order Format for embedding print information on memory cards.
How to embed printing quantity information for images using DPOF.
How to print images in an index format using DPOF.
How to specify the print size for images when using DPOF.
How to copy files from internal memory to the memory card.
How to check shooting information about displayed images on the LCD.
Steps to connect the camera to a printer for direct image printing.
Guides on connecting the camera and printer via USB cable.
How to easily print images directly from playback mode.
How to select specific images or all images for printing.
Guides on setting the number of copies for selected or all images.
How to configure various print settings like paper size, quality, and date.
How to reset camera configurations to default print settings.
Precautions regarding storing the camera in certain environments.
Advice on handling and storing the camera to prevent damage.
Warnings about sand and its potential to damage the camera.
General guidelines for safely handling the camera and its components.
Precautions regarding temperature fluctuations and condensation.
Warnings about direct sunlight and keeping the lens clean.
Advice on battery and memory card removal for long-term storage.
Information on how electronic interference affects camera operation.
Instructions for cleaning the camera lens, LCD, and body.
Warning against tampering with the camera's internal components.
Notes on static electricity affecting the flash unit.
Precautions regarding static electricity during data transfer.
Recommendations for checking camera condition before important events.
Explains the "Memory Error!" warning and troubleshooting steps.
Explains the "Card Locked!" warning and how to resolve it.
Explains the "No Card!" warning and how to resolve it.
Explains the "No Image!" warning and how to resolve it.
Explains the "File Error!" warning and troubleshooting steps.
Explains the "Low Battery!" warning and how to resolve it.
Explains the "Low Light!" warning and suggested shooting modes.
Troubleshooting steps when the camera fails to power on.
Troubleshooting steps when the camera unexpectedly turns off.
Explains the automatic power-off function and how to restart.
Troubleshooting steps for rapid battery drain.
Troubleshooting steps when the shutter button doesn't capture images.
Troubleshooting steps for unclear or blurry images.
Troubleshooting steps when the flash fails to activate.
Troubleshooting steps for incorrect date/time display.
Troubleshooting steps when camera buttons are unresponsive.
Troubleshooting steps for memory card errors.
Troubleshooting steps when images fail to play back.
Troubleshooting for color issues, suggesting white balance/effect checks.
Troubleshooting steps for overexposed images.
Troubleshooting steps when no image appears on an external monitor.
Troubleshooting steps when the removable disk isn't recognized by PC.
Details the camera's image sensor specifications (type, pixels).
Provides details about the camera's lens (focal length, aperture, zoom).
Specifies the LCD monitor's size and resolution.
Details the focusing system type and range.
Provides specifications for the shutter speed.
Details exposure control, metering, and ISO equivalent specifications.
Lists flash modes, range, and recharging time specifications.
Lists available sharpness settings (Soft+, Soft, Normal, Vivid, Vivid+).
Lists available color effect settings (Normal, B&W, Sepia, etc.).
Lists available white balance settings (Auto, Daylight, Cloudy, etc.).
Specifies voice recording capabilities (max duration, voice memo).
Lists options for date/time imprinting on images.
Details shooting modes, scene modes, self-timer, and movie clip specs.
Specifies storage media (internal/external memory) and file formats.
Lists available image resolutions for still and movie modes.
Provides estimated shot capacities for a 256MB MMC card.
Lists effects and editing functions accessible via the 'E' button.
Details playback options like single image, thumbnails, and slide show.
Specifies digital output connectors (USB, Audio, Video).
Lists available power sources (batteries, charger).
Provides the physical dimensions of the camera.
States the camera's weight without batteries and card.
Specifies the camera's operational temperature range.
Specifies the camera's operational humidity range.
Lists included software (Digimax Master, Adobe Reader).
Emphasizes the importance of reading the manual before using the software.
Describes the included software for Windows (driver, editor).
Copyright notice regarding reproduction of software and manual.
States that software copyrights are for camera use only.
Details warranty coverage for manufacturing faults.
Clarifies warranty limitations for non-guaranteed PCs and OS.
Recommends basic computer knowledge for using the manual.
Instructs to insert the CD-ROM and run the automatic setup.
Emphasizes installing the camera driver before connecting to a PC.
Explains the role of the camera driver for image transfer and PC connection.
Describes Digimax Master as an all-in-one multimedia software solution.
Provides tips on system requirements and running the setup program.
Guides on installing the application software for PC use.
Provides website addresses for camera support and information.
Details the installation process for drivers and software via the monitor.
Instructs to connect the PC and camera after software installation.
Steps for powering on the camera after connecting to the PC.
Provides notes on driver installation and PDF manual access.
Guides on configuring camera settings for PC connection.
Illustrates connecting the camera to a PC using a USB cable.
Refers to page 89 for instructions on safely disconnecting the camera.
Guides on downloading still images from the camera to a PC.
Provides steps for safely removing the camera's removable disk from a PC.
Specific instructions for removing the device on Windows 98SE.
Specific instructions for removing the device on Windows 2000/ME/XP/Vista.
A caution note regarding the removal process.
Notes that MAC OS supports the driver, so it's not on the CD.
Guides on checking MAC OS version for camera compatibility.
Steps for connecting the camera to a Macintosh computer.
Informs about the appearance of a new desktop icon after connection.
How to access memory contents on MAC via the desktop icon.
How to copy or move image files on a MAC.
A caution for MAC OS 10.0+ regarding uploading and removing disks.
Guides on removing the USB driver for Windows 98SE.
Confirmation message upon successful driver uninstallation.
Overview of Digimax Master's capabilities for managing media files.
Instructions on how to launch the Digimax Master program.
Guides on downloading images from the camera using Digimax Master.
How to select a destination and create folders for downloaded files.
Instructs to click the Next button to proceed in the download process.
Describes the window for selecting download destination and starting the process.
Indicates that downloaded images will be shown after the process.
Explains the functions of the image viewer within Digimax Master.
Details the functions for editing still images within Digimax Master.
Explains how to edit movie clips by adding narration, music, and effects.
Troubleshooting guide for common USB connection problems.
Addresses issues with the USB cable connection.
Troubleshooting for when the camera is not recognized by the PC.
Troubleshooting for unexpected errors during file transfer.
Troubleshooting when using a USB hub with the camera.
Troubleshooting for multiple USB cables connected to the PC.
Troubleshooting unrecognized devices in Device Manager.
Troubleshooting when security programs prevent PC recognition.
Troubleshooting connection issues related to PC USB port location.
Instructions for installing DirectX 9.0 or later for software compatibility.
Troubleshooting for PC freezes related to camera connection on Win 98SE.
Troubleshooting for PC freezes during Windows startup with camera connected.
Troubleshooting for issues with movie clips, disk extraction, or file transfer errors.
Guidelines for the proper disposal of electronic waste according to regulations.
Provides FCC compliance information for Class B digital devices.
Warns that unauthorized modifications could void the user's authority.
Details company and product information for regulatory compliance.
| Megapixel | 10.1 MP |
|---|---|
| Sensor type | CCD |
| Image sensor size | 1/1.8 \ |
| Maximum image resolution | 3648 x 2736 pixels |
| Digital zoom | 5 x |
| Focal length range | 7.8 - 39 mm |
| Interface | USB 2.0 |
| Digital SLR | No |
| Minimum RAM | 128 MB |
| Built-in flash | Yes |
| Minimum processor | Pentium II 450MHz / PowerMac G3 |
| Camera shutter speed | 1 - 1/2000 s |
| Minimum storage drive space | 200 MB |
| Minimum system requirements | CD-ROM |
| Compatible operating systems | Windows 98/98SE/2000/ME/XP Mac OS 9.2-10.3 |
| Focal length (35mm film equivalent) | 38 - 190 mm |
| Focus | TTL |
| Normal focusing range | 0.8 - ∞ m |
| Super Macro focusing range | 0.01 - 0.1 m |
| Macro focusing range (tele) | 0.5 - 0.8 m |
| Macro focusing range (wide) | 0.1 - 0.8 m |
| Manual focusing range (wide) | 0.01 - ∞ m |
| Auto Mode focusing range (tele) | 0.5 - ∞ m |
| Auto Mode focusing range (wide) | 0.1 - ∞ m |
| Light metering | Spot |
| ISO sensitivity | 80, 100, 200, 400, 800, 1600, Auto |
| Light exposure modes | Auto |
| Flash modes | fill-in, Flash off, Red-eye reduction, Slow synchronization |
| Flash range (tele) | 0.5 - 3 m |
| Flash range (wide) | 0.2 - 5 m |
| Flash recharging time | 4 s |
| Internal memory | 45 MB |
| Compatible memory cards | mmc, sd |
| Display diagonal | 3 \ |
| Display resolution (numeric) | 230000 pixels |
| USB version | 2.0 |
| Scene modes | Backlight, beach, Children, Close-up (macro), Documents, dusk, Fireworks, Night, Portrait, Sunset, Landscape (scenery) |
| Image editing | resizing, rotating, trimming |
| Photo effects | black&white, Negative film, Sepia |
| White balance | auto, Cloudy, custom modes, daylight, Fluorescent, Tungsten |
| Camera playback | movie, single image, slide show, thumbnails |
| Self-timer delay | 2 s |
| Playback zoom (max) | 1 x |
| Product color | Black |
| Battery type | AA |
| Battery technology | Alkaline |
| Number of batteries supported | 2 |
| Bundled software | Digimax Master |
| Operating temperature (T-T) | 0 - 40 °C |
| Operating relative humidity (H-H) | 5 - 85 % |
| Camera shutter type | electronic, mechanical |
| Depth | 25.5 mm |
|---|---|
| Width | 98.9 mm |
| Height | 63.5 mm |