
M
Melanie LangJul 29, 2025
What to do if Samsung SCD103 tape has reached the end?
- BBonnie ParkerJul 30, 2025
If the tape in your Samsung Camcorder has reached the end, replace it with a new one.
What to do if Samsung SCD103 tape has reached the end?
If the tape in your Samsung Camcorder has reached the end, replace it with a new one.
What to do if moisture has condensed in Samsung SCD103 Camcorder?
If moisture has condensed in your Samsung Camcorder, follow these steps: 1. Remove the tape. 2. Turn off the camcorder. 3. Remove the battery. 4. Reinstall the battery. If the issue persists, further assistance is needed.
How to disable write protection on Samsung Camcorder tape?
If your Samsung Camcorder tape is write-protected, disengage the protection if you want to record.
What to do if Samsung SCD103 battery is low?
If your Samsung Camcorder battery is low, replace it with a fully charged one.
What to do if there is no tape in Samsung SCD103?
If there is no tape in the Samsung Camcorder, insert a tape.
What to do if Samsung Camcorder recording time is low?
If the remaining recording time on your Samsung Camcorder is about two minutes, prepare a new tape.
Advises on preventing and handling condensation inside the camcorder due to temperature changes.
Provides warnings about high temperatures and water exposure to prevent damage.
Details precautions for handling, charging, and using the battery pack for optimal performance.
Explains cleaning video heads to maintain recording quality and troubleshoot playback issues.
Warns against pointing the lens or viewfinder at the sun to prevent damage.
Details function, replacement, and safety warnings for the lithium battery.
Advises against self-servicing and recommends professional repair for safety and hazard avoidance.
Specifies using manufacturer-approved parts for replacements to avoid hazards like fire or electric shock.
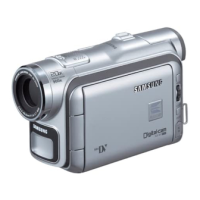
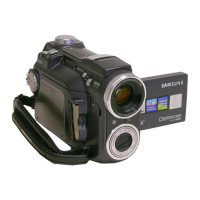
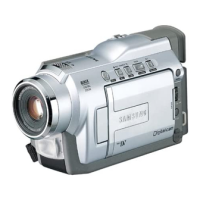
Lists and briefly describes the main features and functionalities of the camcorder.
Lists all basic and optional accessories included with the camcorder for setup and use.
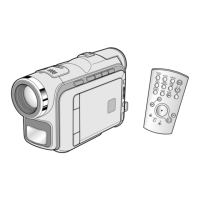
Provides a diagram and list of buttons on the remote control for operating the camcorder.
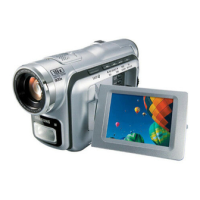
Explains the various indicators and information displayed on the screen during camera and player modes.
Guides users on correctly installing the lithium battery, including safety precautions.
Explains how to connect the camcorder to AC power or battery for operation.
Discusses continuous recording time based on battery type and usage, recommending multiple batteries.
Provides instructions on how to charge the lithium-ion battery pack, including indicator meanings.
Presents a table of continuous recording times based on model and battery type, with notes on battery care.
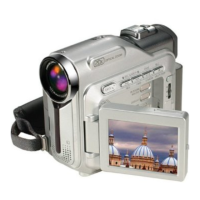
Provides instructions for inserting and ejecting Mini DV cassettes, including tape protection and storage tips.
Guides beginners through the initial steps of connecting power, inserting a cassette, and starting a first recording.
Guides users through setting the camcorder's internal clock and date, essential for accurate recording information.
Explains the Program AE function, which adjusts shutter speed and aperture for optimal recording conditions.
Provides step-by-step instructions on how to select and configure different Program AE modes for recording.
Explains how to adjust the white balance to ensure accurate color reproduction under various lighting conditions.
Explains the Digital Image Stabilizer function, its benefits for steady shots, and when to deactivate it.
Details how to set shutter speed and exposure values, including recommended settings for various shooting scenarios.
Introduces the EASY mode, simplifying operation for beginners by applying basic automatic settings.
Explains the automatic and manual focus functions, recommending AF for beginners and manual for specific conditions.
Describes the BLC function, which compensates for backlighting to improve subject visibility.
Introduces the NITE PIX function for recording in very low light conditions using infrared light.
Explains the POWER NITE PIX function, which enhances low-light recording brightness and provides a slow-motion effect.
Provides instructions for inserting and ejecting memory cards, including notes on proper handling and potential data loss.
Explains how to protect important images from accidental deletion, noting that formatting erases all images.
Provides instructions on how to format the memory card to erase all data and restore it to its initial state.
Explains how to record moving pictures with audio onto a memory card in MPEG4 format.
Explains how to play back MPEG4 video files from the memory card on a PC, noting audio output and potential playback issues.
Provides general guidance on cleaning the camcorder and storing it properly to prevent dust and damage.
Explains how to clean the video heads using a dry cassette cleaner to resolve playback issues like noise or distortion.
Explains how to interpret error messages and codes displayed by the camcorder's self-diagnosis system.
Addresses issues related to moisture condensation inside the camcorder and how to resolve them.
Details specific self-diagnosis messages and solutions relevant to memory card operations and camera modes.
Lists common problems, their possible causes, and solutions, covering issues like power, recording, playback, and focus.
| Recording Media | MiniDV |
|---|---|
| Sensor Type | CCD |
| Optical Zoom | 10x |
| Digital Zoom | 800x |
| Video Resolution | 720 x 480 |
| Type | Digital |
| Display | LCD |
| LCD Screen | 2.5 inch |
| Viewfinder | Color |
| Video Recording Format | DV |
| Interface | IEEE 1394 |