Do you have a question about the Samsung SDR-5100 and is the answer not in the manual?
Illustrates front and rear connections for the 4CH DVR, detailing component placement for setup.
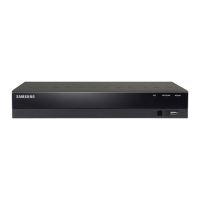
Shows front and rear views of the 8CH DVR, highlighting connection points for peripherals.
Details the rear connections for the 16CH DVR, illustrating how to connect cameras and power.
Guides the user through connecting the DVR to a monitor, router, and power for initial operation.
Explains how to display and interact with the DVR's launcher menu for accessing functions.
Guides users through setting the date, time, and language for optimal system operation.
Details network settings, including connection mode (Dynamic/Static IP) and protocol configuration.
Guides PC setup for creating an iPolis account and registering the DVR for remote access.
Details DVR-side DDNS configuration, including selecting the iPolis site and entering product ID.
Guides remote monitoring setup using Windows Internet Explorer and ActiveX plug-in.
Details installing and configuring the Samsung iPOLIS mobile app on Android devices.
Guides installing and configuring the Samsung iPOLIS mobile app on iPhones.
Explains how to set up recording schedules, including selecting recording types and timeframes.
Covers changing recording resolution and quality settings, and their impact on storage.
Details how to search for recorded video by time or event, and play back the footage.
This document serves as a Quick Start Guide for the Samsung All-in-One Security System, covering various DVR models including SDR-3100, SDR-4100, SDR-4101, and SDR-5100, and corresponding kit models SDS-P3040, SDS-V4040, SDS-P4080, SDS-P5080, SDS-P5100, and SDS-P5101. It provides a comprehensive walkthrough for setting up, configuring, and operating the security system, from initial physical installation to remote monitoring and playback.
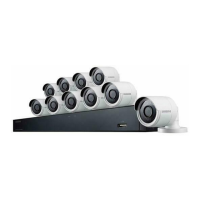
The Samsung All-in-One Security System is a digital video recorder (DVR) based surveillance solution designed for monitoring and recording video footage. It supports various channel configurations, including 4-channel, 8-channel, and 16-channel DVRs, allowing users to connect multiple cameras for comprehensive coverage. The system's primary function is to capture, store, and allow playback of video, providing security and surveillance capabilities for homes or businesses. It integrates with network infrastructure for remote access and monitoring, and offers features such as motion detection, scheduled recording, and event-triggered recording. The DVR acts as the central hub, managing video inputs from cameras, processing and storing the data, and providing interfaces for local and remote viewing.
The guide begins with a straightforward installation process. For 4-channel DVRs, users connect a mouse, cameras, a monitor, DC adaptors, and a network router to the respective ports on the front and rear panels. Similar steps are outlined for 8-channel and 16-channel DVRs, emphasizing the connection of cameras, monitor, mouse, router, and power. Visual diagrams clearly illustrate the connection points, making the physical setup intuitive.
Once physically connected, the DVR can be set up for live monitoring. This involves connecting the DVR to a monitor and mouse, then connecting the DVR to a router, and finally connecting the power cord to the DVR. These steps ensure the system is powered on and networked for initial configuration and viewing.
The Launcher menu is the primary interface for accessing DVR functions. It appears at the bottom of the live screen when in Live mode. Users right-click to display the context menu and select "Show Launcher." Moving the cursor to the bottom and clicking a desired item activates specific functions. The menu includes options for Date/Time, Screen Mode, Menu Expansion, Audio, Zoom, PTZ, Alarm, Freeze, Play, and Record. The menu automatically disappears after 10 seconds of inactivity, and its availability is mouse-dependent.
To configure the system, users right-click on the mouse and select "Main Menu." A login window appears, requiring an administrator ID and password. The initial administrator ID is "admin," and users are prompted to set a password upon first login. This step is crucial for security, with recommendations to change passwords every three months and to secure wireless networks if the product is used with a wireless router. After logging in, users can access "Date/Time/Language" to set the system's time and date.
Network configuration is essential for remote access. Users navigate to "Network" and select "Connection Mode." The default connection mode is "Dynamic IP." If the connection is successful, a "Connected successfully" message appears. For users with static IP information from their router, the option to select "Static IP" is available, requiring manual input of IP address, Gateway, Subnet Mask, and DNS. The guide also advises consulting the Router Guide for static IP setup.
Under the "Protocol" tab, users can view and note down the IP address, Port (TCP), and Webviewer Port. These details are critical for remote access and configuration. After making any changes, users click "OK" to save the settings.
For remote access via a PC, users need to set up a Samsung iPOLIS DDNS account. This involves opening a web browser, going to http://www.samsungipolis.com, and logging in. New users must first "SIGN UP" and create an account. After registration, users log in and add their DVR to their account by clicking "PRODUCT REGISTRATION." They create a unique Product ID (4 to 20 alphanumeric characters without spaces), select the classification and model number of their DVR, and click "REGISTRATION." Once registered, the product appears in a list, and users should note down the Product ID. Finally, they log out of the web page.
Back on the DVR, users navigate to the "Network" tab and click "DDNS." They select "iPOLIS" as the DDNS Site. Under "Product ID," they enter the Product ID created on the iPOLIS website. They then select "Use" under "Quick Connect" and click "OK." The DDNS Host Address should be noted. If the connection fails, it might indicate that the router does not support UPNP, and users are advised to consult the user manual for UPNP enablement.
To monitor remotely from a Windows PC, users open Internet Explorer, go to http://www.samsungipolis.com, and log in with their registered user ID and password. They then click on the designated icon to access the DVR. The system will prompt for an ActiveX plug-in installation, which must be completed. After installation, users enter the DVR's user ID and password to view the live camera feeds. If the screen does not appear, users are advised to check the DVR's IP address and connection. Once connected, cameras can be installed and positioned as needed.
For Android phone users, the process involves downloading the "iPOLIS mobile" app from the Play Store. After installation, users launch the app, tap the menu icon, and select "Add Device." They then register the DVR by providing a Name, selecting the Model (DVR), entering the Host (DDNS Host Address), HTTP Port, RTSP Port, and the DVR's ID (default "admin"). The guide reiterates the importance of setting a strong password for the DVR and securing wireless networks.
iPhone users follow a similar process, downloading the "iPOLIS mobile" app from the App Store. After launching the app and tapping "Add Device," they register the DVR by entering the Name, Model, Host, HTTP Port, RTSP Port, and ID. The guide refers to the "For Android Phone" section for more detailed information on each item.
To manage recording, users press the [MENU] button on the remote control, navigate to "Record," and then to "Recording Schedule." Here, they can set recording schedules for each channel, selecting specific times and dates. The recording type can be cycled through "No Recording," "Continuous," "Event," and "Both (Cont&Evnt)." To play back recorded video, users enter Live mode, right-click, and select "Search." They can choose "Time Search" to select a date and time on a timeline, then press "Play." The colored lines on the timeline indicate different types of recording data. For event-triggered recordings, users can select "Event Search" from the "Search" menu, choose a date, and then select an event from the listed table to play back. During playback, users can adjust the play speed, change channels, or stop playback using the onscreen button bar. The guide also covers adjusting recording quality and resolution under "REC Quality & Resolution." Users can modify the resolution and remaining rate, and the system displays the available resolutions.
The guide strongly emphasizes the importance of password security. Users are instructed to set a password upon first login and to change it every three months to protect personal information and prevent information theft. This is a critical maintenance feature for data security.
Users are advised to set a password for their wireless network if the product is used with a wireless router. An unprotected network or using the default router password can expose video data to potential threats. This highlights the need for ongoing network security maintenance.
The guide provides a "HELP" section, directing users to contact technical support or visit http://www.samsungsecurehome.eu/ for assistance with installation or any questions. This indicates a support system for troubleshooting and maintaining the device's functionality.
For static IP configuration, users are referred to the "Router Guide in provided CD." This suggests that the system comes with resources for advanced network configuration, which can be considered a maintenance tool for network stability.
If the DDNS connection is unsuccessful due to the router not supporting UPNP, users are advised to consult the user manual for information on enabling UPNP. This points to a troubleshooting and maintenance step for ensuring remote access functionality.
In summary, the Samsung All-in-One Security System is a versatile surveillance solution with user-friendly installation, comprehensive monitoring and recording capabilities, and robust remote access features. Its usage and maintenance are guided by clear instructions, emphasizing security and providing resources for troubleshooting.
| Brand | Samsung |
|---|---|
| Model | SDR-5100 |
| Hard Drive Support | Yes |
| Compression | H.264 |
| Type | Digital Video Recorder |
| Video Output | 1 BNC, 1 VGA |
| Audio Output | 1 RCA |
| Remote Access | Yes |
| PTZ Control | Yes |
| USB Ports | 2 |
| Network Interface | 10/100 Ethernet |
| Operating Temperature | 0°C to 40°C |