This document serves as a Quick Start Guide for the Samsung All-in-One Security System, covering Kit Models SDH-C5100, SDH-B3040, SDH-B3020, and DVR Models SDR-C5300, SDR-B3300. It provides instructions for setting up the system, configuring network settings, and utilizing remote monitoring features via PC and smartphone.
Function Description
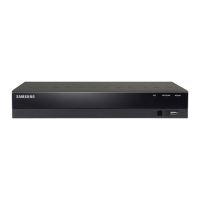
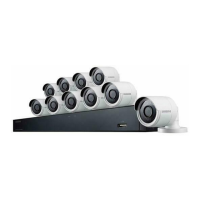
The Samsung All-in-One Security System is designed to provide comprehensive surveillance and recording capabilities. At its core is a Digital Video Recorder (DVR) available in both 4-channel and 16-channel configurations, allowing users to connect multiple cameras for extensive coverage. The system facilitates live monitoring, recording, and playback of video footage, making it suitable for home or business security.
Key functions include:
- Video Recording: The DVR continuously records video from connected cameras, storing it for later review. Users can configure recording schedules (continuous, event-based, or both) and adjust recording quality and resolution to optimize storage and video clarity.
- Live Monitoring: Users can view live video feeds from all connected cameras simultaneously on a monitor connected directly to the DVR, or remotely via a PC or smartphone.
- Playback and Search: The system allows for easy playback of recorded footage. Users can search for specific events or timeframes, facilitating quick retrieval of relevant video.
- Remote Access: A crucial feature is the ability to access the DVR remotely. This is achieved through Samsung iPOLIS DDNS (Dynamic Domain Name System), which allows users to connect to their DVR from anywhere with an internet connection using a PC or a dedicated smartphone application.
- Network Connectivity: The DVR can be connected to a local network, enabling remote access and integration with other network devices. It supports both DHCP for automatic IP address assignment and static IP configuration for more controlled network setups.
- User Management: The system includes basic user management, with an initial administrator ID ("admin") and a requirement to set a password upon first login, ensuring secure access.
Usage Features
The system is designed for user-friendly operation, both locally and remotely.
Local Operation:
- Physical Connections: Setting up the DVR involves connecting essential peripherals: a mouse for navigation, cameras (BNC type), a monitor (VGA), DC adaptors for power, and a network router for internet connectivity. The guide provides clear diagrams for both 4-channel and 16-channel DVR models.
- Launcher Menu: When operating the DVR directly with a mouse and monitor, a "Launcher Menu" appears at the bottom of the live screen. This menu provides quick access to functions such as Date/Time, Screen Mode, Zoom, PTZ (Pan-Tilt-Zoom) control (if supported by cameras), Alarm, Freeze, Play, and Record. The menu is context-sensitive and disappears after 10 seconds of inactivity.
- System Settings: The "Main Menu" (accessed by right-clicking) allows users to configure various system parameters, including time and date, network settings, and user permissions.
- Time Setting: Users can set the system's date, time, time zone, and DST (Daylight Saving Time) settings.
- Network Setting: The DVR's network configuration is critical for remote access. Users can choose between DHCP (default) or Static IP. For Static IP, users need to manually enter the IP address, Gateway, Subnet Mask, and DNS server details. The guide emphasizes recording the Device Port and HTTP Port for remote access.
- Recording Schedule: Users can define recording schedules for each channel, choosing between "No Recording," "Continuous," "Event," or "Both (Cont&Evnt)." Recording quality and resolution can also be adjusted (e.g., CIF, 2CIF, 4CIF, WD1, 720p at various FPS).
- Playback and Search: Recorded footage can be accessed via "Time Search" (selecting a date and timeline) or "Event Search" (for event-triggered recordings). The interface displays colored lines indicating different types of recording data. Playback controls allow users to change speed and navigate through channels.
Remote Operation (PC and Smartphone):
- Samsung iPOLIS DDNS Setup: To enable remote access, users must register their DVR with the Samsung iPOLIS DDNS service via a PC. This involves creating an account on the samsungipolis.com website, logging in, and "Product Registration." Users create a unique "Product ID" for their DVR and select its model and classification. The guide stresses the importance of noting down the User ID, Password, and Product ID.
- DVR DDNS Configuration: After setting up DDNS on the PC, the DVR itself needs to be configured. In the DVR's network settings, users select "DDNS" and "iPOLIS," then enter the Product ID created earlier. Upon successful connection, the DVR will display its "DDNS Host Address," which is crucial for remote access.
- PC Remote Monitoring: From a Windows computer, users open Internet Explorer, navigate to samsungipolis.com, and log in. They then click on the "View" icon next to their registered product. The system will prompt for an ActiveX plug-in installation, which is necessary for viewing. After installation, users enter the DVR's user ID and password to access live camera feeds.
- Smartphone Remote Monitoring (Android/iPhone):
- App Download: Users download the "iPOLIS mobile" app from the Play Store (Android) or App Store (iPhone).
- DVR Registration in App: Within the app, users tap "Add Device" and enter the DVR's details: a custom "Name," "Model" (DVR), "Host" (the DDNS Host Address from the DVR's configuration), "HTTP Port," "RTSP Port," "ID" (admin by default), and "Password."
- Live Viewing: Once registered, users can view live feeds from their cameras on their smartphone.
Maintenance Features
The guide highlights several aspects related to system maintenance and security:
- Password Management: Upon first login, users are required to set a strong password for the "admin" account. The guide strongly recommends changing passwords every three months to protect personal information and prevent information theft. It also warns against using default wireless router passwords if the product is used with a wireless router, as this can expose video data.
- Technical Support: For any questions or installation assistance, users are directed to contact free technical support via telephone (1-877-349-3149, 9am-9pm EST, Monday-Friday) or the internet (http://www.samsungsv.com).
- Troubleshooting Network Issues: If connection problems occur with "Connection Mode," users are advised to re-check the "Installing your system" section. If issues persist, contacting the service center is recommended. For static IP configuration, users are referred to the Router Guide provided on the CD. If DDNS connection is unsuccessful, it might indicate that the router does not support UPNP, and users are advised to consult their router's manual for enabling UPNP.
- Software Updates: While not explicitly detailed in this quick start guide, security systems often receive firmware updates to enhance features, improve stability, and patch vulnerabilities. Users should regularly check the manufacturer's website for such updates.
- Data Security Responsibility: The guide explicitly states that it is the user's responsibility for the security of their system and any problems caused by mismanaging passwords. This underscores the importance of adhering to security best practices.