Do you have a question about the Samsung SE200 SERIES and is the answer not in the manual?
Ensure adequate space around the product for proper ventilation and to prevent overheating.
Crucial safety warnings including risks of electric shock and handling the product.
Essential safety guidelines related to power cords, sockets, and electrical connections.
Warnings and precautions regarding the product's installation environment and placement.
Critical warnings and precautions for safe operation, including electrical hazards and product handling.
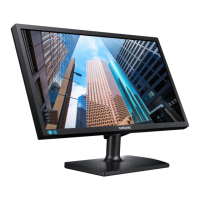
Identification and function of buttons located on the front of the monitor.
Instructions for adjusting basic picture quality settings like brightness, contrast, and sharpness.
Instructions and precautions for installing a wall mount or desktop stand.
Step-by-step guide for attaching the stand to the SE200 series monitor.
Step-by-step guide for attaching the stand to the SE450 and SE650 series monitors.
Guidance on selecting and implementing suitable connection methods for PCs.
Instructions for connecting the monitor to a PC using a D-SUB analog cable.
Instructions for connecting the monitor to a PC using a DVI cable.
Instructions for connecting the monitor to a PC using a DVI-HDMI cable.
Instructions for connecting the monitor to a PC using a DisplayPort cable.
Instructions on connecting the monitor's power cable to the outlet and product.
Instructions for connecting USB devices directly to the monitor's USB ports.
Instructions on installing necessary drivers for optimal product performance.
Guidance on setting the monitor's resolution to the optimal level for display quality.
Adjusts the overall brightness of the picture. Higher values make the picture brighter.
Adjusts the contrast between objects and background for clearer details.
Procedure for testing the product's functionality to diagnose issues.
Guidance on verifying and adjusting screen resolution and frequency for optimal display.
Troubleshooting steps for no sound or low volume issues.
| Resolution | 1600 x 900 |
|---|---|
| Panel Type | TN |
| Aspect Ratio | 16:9 |
| Response Time | 5 ms |
| Color Support | 16.7 Million |