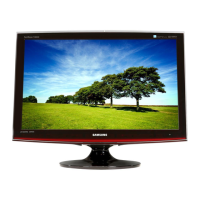
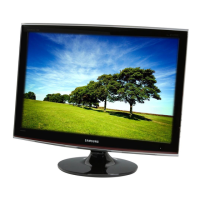
Do you have a question about the Samsung T260 and is the answer not in the manual?
Explains the 14-digit structure of the model code.
Identifies the main board within the LCD monitor.
Identifies the IP-Board within the LCD monitor.
Identifies the LCD panel within the LCD monitor.
Location of the power input connector.
Location of HDMI, DVI, and RGB input connectors.
Location of Analog Audio OUT/Optical AUDIO OUT.
Location of USB ports and locking parts.
Overview of the buttons used for OSD menu navigation.
Describes the function of the MENU switch for OSD operations.
Describes the UP switch for brightness and volume control.
Describes the DOWN switch for customized keys like MagicBright.
Describes the SOURCE/ENTER switch for input selection.
Describes the AUTO switch for image control.
Illustrates connecting the power cord.
Describes connecting D-Sub, DVI, and HDMI cables.
Describes Audio OUT/Digital Audio Out functionality.
Explains the USB Up/Down and hub functions.
Lists key features like response time, contrast, USB, DVI with HDCP, and camera mode.
Provides detailed specs like resolution, colors, brightness, frequency, viewing angle, and power consumption.
Details size, stand, tilt, swivel, power supply, and mounting options.
Details display area, element, and model number for the LCD panel.
Lists included items like Quick Setup Guide, User's Guide, software, power cord, cables.
Instructions for connecting the power cord.
Instructions for connecting D-sub (Analog) cables.
Instructions for connecting DVI (Digital) cables.
Instructions for connecting to a Macintosh via D-sub.
Steps to turn on PC and monitor for image verification.
Explains HDMI as a digital interface for video and audio.
Highlights ease of use, system control, and copyright protection via HDCP.
Defines HDCP as a copy-protection system for HD content.
Compares features across different HDMI revisions (1.0 to 1.3a/1.3b).
Shows the main categories within the OSD menu.
Details settings for Brightness, Contrast, and MagicBright.
Details settings for MagicColor, Color Tone, Color Control, Color Effect, and Gamma.
Details settings for Coarse, Fine, Sharpness, H/V-Position.
Details settings for Language, Position, Transparency, and Display Time.
Covers Auto Source, Reset, Off Timer, Customized Key, Image Size, HDMI Black Level, AV mode.
Explains the functionality and behavior of Just Scan mode.
Describes what information is displayed in the Information menu.
How to lock and unlock the OSD settings.
How to enter Factory Mode and view service information.
Compares picture settings like Screen Size, Brightness, Contrast, DCR, Magic Pivot, Magic Tune, Magic Bright, Gamma.
Details the pin assignments for the 15-pin D-sub connector.
Details the pin assignments for the DVI-D connector.
Lists supported display modes with Horizontal/Vertical Frequency, Pixel Clock, and Sync Polarity.
Shows the main components on the AD board, including LVDS, Scaler, Flash Memory, AMP.
Illustrates connections on the Function Board (Bottom View).
Details the connections for the panel and LVDS interface.
Shows power input connector and main assembly connections.
Details HDMI, DVI, PC Input, and USB connectors.
Automatic resolution adjustment on first power-on.
Automatic source checking and switching.
Support for 3-Step Fine Adjustment.
Support for 7 different brightness modes.
Details on MagicColor modes: Off, Demo, Full, Intelligent.
Features like Tilt, HDMI support for consoles and multimedia.
Support for camera mode and USB 2.0 Hub (1 Up, 2 Down).
Functionality for Optical Sound Jack.
Steps to access the Service Function OSD via button combinations.
Details displayed in the Service Function OSD: On Time, Version, Checksum.
How to move between menu items and adjust sub-menus.
Procedure for updating panel information after replacement.
Explains HDCP Hotplug and its time duration control.
Procedure for PC analog auto color adjustment using OSD.
Explains the purpose of the self-test feature.
Instructions on how to perform a self-test and interpret results.
Recommended PC display settings before troubleshooting.
Checks for no picture, including power cord and circuit checks.
Flowchart for diagnosing power and video issues.
Describes the symptom of no power and major checkpoints.
Step-by-step checks for power issues related to specific ICs and boards.
Symptom of blank screen with D-SUB cable.
Diagnostic steps for analog video issues involving signal cables and ICs.
Symptom of blank screen with DVI cable.
Diagnostic steps for digital video issues involving signal cables and ICs.
Schematic for the DVI input section.
Schematic for the DVI input section.
Schematic for the HDMI input section.
Logic diagram of the HDMI/DVI switch.
Schematic focusing on the main scaler IC and memory block.
Integration of memory components with the scaler.
Schematic for the IP board's power input section.
Schematic for audio and function-related circuits.
Schematic for the USB interface circuitry.
Identification of the main controller IC (MST97889CLD-LF).
Identification of various input connectors like HDMI, DVI, Digital, Analog.
Location of the Flash Memory component.
Describes the scaler's role in ADC, TMDS, and control.
Explains the role of flash memory for scaler data and firmware updates.
Describes the receiver IC for DVI/HDMI signal processing.
Overview of Feedback Block and Invertor Trans.
Overview of Hybrid Sub-Block and Rectification Part.
Overview of Switching Block, Feedback Circuit, C-AL, Rectifier Diode, Input Filter.
Details the Inverter Controller (OZ960SN) and Transformer.
Describes the connectors for the back light lamps.
Identifies the protection blocks for the back light system.
Explains the Dimming Control Block and Feed-Back Block.
Explains protection activated by lamp connector issues or high voltage output.
Details OVP/OCP operation in Auto Recovery Mode and Thermal Protection.
Describes the LVDS input and timing controller block.
Describes the DC/DC converter and reference voltage block.
Describes the scan driver and data driver ICs.
Describes the backlight unit.
Instructions to turn off the monitor and place it on a soft cloth.
Step to remove the screws securing the stand.
Instructions for removing the rear cover using a jig.
Instructions for removing internal cables.
Instructions for removing the shield lamp and lamp wires.
Instructions for removing IP board cable and function wire.
Instructions for disconnecting LVDS cable from panel.
Instructions for removing the chassis assembly and tape on the function assembly.
Instructions for removing the LED cable and screws.
Instructions for removing the LED and function power components.
Instructions for removing screws from the chassis.
Instructions for removing screws and bracket support for the main board.
Note that reassembly is in reverse order of disassembly.
Process after main board exchange using DDC manager for downloading.
Procedure for updating MICOM using DDC manager.
Steps to execute the winDDC software.
Steps to select Manufacture, Device Type, Communication Port, and External Memory.
Steps to load the firmware file and program the device.
Explains that EDID can be updated using DDC Manager JIG.
Steps to connect the DDC Manager Jig for D-Sub, DVI, and HDMI.
Steps to execute WinDDC.exe and open the EDID file.
Steps to select ports and load DDC files for Analog and Digital connections.
Procedure for entering DVI DDC, including file naming conventions.
Steps for selecting ports and loading DDC files for Digital and HDMI connections.
Steps to execute the 'service' menu for HDCP operations.
Procedure to load and write the HDCP key using the software.
Steps for EDID input and firmware/MICOM S/W installation.
Steps for HDCP Key installation and PC Auto Color Adjust.
Steps for performing a factory reset by adjusting settings and pressing the menu button.
| Display diagonal | 25.5 \ |
|---|---|
| Separate H/V sync | Yes |
| Display resolution | 1920 x 1200 pixels |
| Viewing angle, vertical | 160 ° |
| Contrast ratio (typical) | 1000:1 |
| Viewing angle, horizontal | 170 ° |
| Display brightness (typical) | 300 cd/m² |
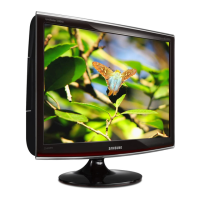
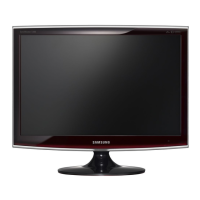
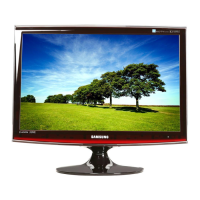
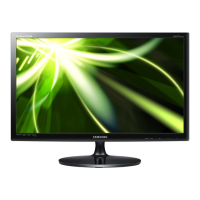
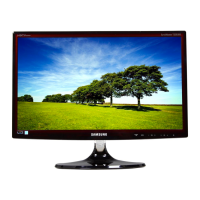
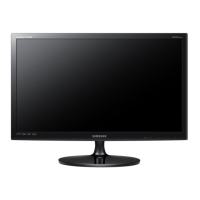
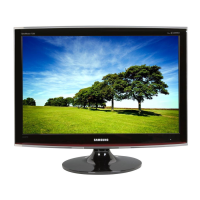
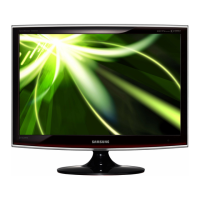
| Product color | Black |
| Market positioning | - |
| Special features | Low power consumption(0.3 W power off, 60 W operating power, energy saving mode, off timer) LED brightness control, MagicBright3, image size, color effect, customized key, MagicWizard & MagicTune, Windows Vista Premium, DVI with HDCP, safe mode |
| Weight (imperial) | 17.9 lbs |
| Package weight (imperial) | 23.1 lbs |
| Set depth (with stand) (inch) | 9.6 \ |
| Set width (with stand) (inch) | 24 \ |
| Set height (with stand) (inch) | 19.8 \ |
| Package depth | 185.4 mm |
| Package width | 701 mm |
| Package height | 566.4 mm |
| Package weight | 10475.8 g |
| Power consumption (typical) | 60 W |
| Depth (with stand) | 243.8 mm |
|---|---|
| Width (with stand) | 609.6 mm |
| Height (with stand) | 502.9 mm |
| Weight (without stand) | 8117.6 g |