EasyManua.ls Logo

Samsung WF206BNW/XAA - User Manual

Samsung WF206BNW/XAA
7 pages
Print Icon
To Next Page IconTo Next Page
Loading...
# tsWF206 RevD 03/21/2011 1
Fast Track Troubleshooting
Model:
WF206BNW/XAA
WF206ANS/XAA
WF206ANW/XAA
Quick Test Mode
Note: This test erases all faults and memory:
To enter press Spin, Soil, & Power
simultaneously with the power off.
1. All LED’s light up and the washer beeps as it
enters the Quick Test Mode.
2. The unit displays the software version for a
second then clears the EEprom.
3. After the displaying the software version, LCD
will display Model information. If EEEE is displayed
the PCB ass’y is defective.
4. When the version is displayed. Press the follow-
ing keys to test the various components
Press Temp Key to cycle through the Water Valves in
this order: Cold Main, Bleach, Cold Main & Bleach for
Fabric Softener, Hot, then off.
Press Spin Key to test Motor circuit.
Press Signal Key to test Drain Pump
Press Soil to test door lock - unlock circuit
Service Mode:
This mode allows more detailed operation tests and
troubleshooting, to enter press Signal & Extra
Rinse simultaneously with the power on.
While in Service Mode the following tests can be
performed:
Quick Spin Test = Delay Start & Spin: This accel
erates the drum motor from 0 to maximum RPM
over a few minutes. Note: Stay with the washer
during this test, out of balance detection is by
passed and the door may not lock.
Press the Start/Pause button during the test to hold its
spinning speed for 10 minutes before going back to
Quick Spin Test Mode.
Cycle Count = Press the Signal button to see how
many times the unit was used.
Soft Ware # = Press Soil button shows software version
Fast Time Down = Press Temp button to advance to next cycle
Fault Code Test = Press the Spin button to view the stored fault
codes then turn Dial to view error codes (Push Start/Pause
while the code is displayed to view the number of cycles since the
error occurred)
Peripheral (Main PCB) input Tests
1. Extra Wash. Then turn the Dial so that the Normal is turned on.
Next, press the Start/Pause Key. The Water Temperature will be
displayed in Fahrenheit.
2. Extra Wash. Then turn the Dial so that the Whites is turned on.
Next, press the Start/Pause Key. The door status will be displayed
(OP if open, CL if closed).
3. Extra Wash. Then turn the Dial so that the Perm Press is
turned on. Next, press the Start/Pause Key. The door lock Switch
status will be displayed (UL if unlocked, Lo if locked).
4. Extra Wash. Then turn the Dial so that the Delicate/Hand
Wash is turned on. Next, press the Start/Pause Key. ― ‾0 ‖ will illu-
minate if below level, ― ‾1 ‖ if above level (Overflow).
5. Extra Wash. Then turn the Dial so that the Wool is turned on.
Next, press the Start/Pause Key. -0‖ will illuminate if below level,
-1‖ if above level (Heater-On).
6. Extra Wash. Then turn the Dial so that the Quick Wash is
turned on. Next, press the Start/Pause Key. ―_0‖ will illuminate if
below level (Reset), ―_1‖ if above level.
7. Extra Wash. Then turn the Dial so that the Towels is turned on.
Next, press the Start/Pause Key. The Water Frequency will be
displayed.
8. Extra Wash. Then turn the Dial so that the Spin Only is turned
on. Next, press the Start/Pause Key. Then, it will display the
MEMS Sensor Kit status after displaying ―00‖ for 3 seconds:
- -‖ if MEMS Sensor kit is operated properly. ―8E‖ if MEMS Sensor
kit is out of order (check wire harness & PCB)
IMPORTANT SAFETY NOTICE “For Technicians Only” This service data sheet is
intended for use by persons having electrical, electronic, and mechanical experience
and knowledge at a level generally considered acceptable in the appliance repair trade.
Any attempt to repair a major appliance may result in personal injury and property
damage. The manufacturer or seller cannot be responsible, nor assume any liability for
injury or damage of any kind arising from the use of this data sheet.
EEPROM Clear Check
Power off, Press Delay Start, Signal and Power Key at the same
time. Good = Good Fail = FAiL
All memory will be cleared, including Fault Codes
This should be done when a new Main PCB is installed
SUPPORT INFORMATION
Training Plus One http://my.plus1solutions.net/clientPortals/samsung/
Help GSPN http://service.samsungportal.com/
Samsung Product Support TV http://support-us.samsung.com/spstv/howto.jsp
Customer information videos and chat programs. Programs for Fridges, Laundry, Ranges & D/W
Publication # tsWF206 Revision Date 03/21/2011
Question and Answer IconNeed help?

Do you have a question about the Samsung WF206BNW/XAA and is the answer not in the manual?

Summary

Diagnostic Modes

Quick Test Mode

Enter and test washer components by following specific key presses.

Service Mode

Access advanced tests, cycle count, and specific component diagnostics.

System Schematics and Wiring

Main Control Board Schematic

Diagram illustrating the main control board and its connections to components.

Connector Pin Assignments

Detailed list of pin assignments for various PCB connectors.

Component Testing Procedures

Water Temperature and Level Sensor Tests

Procedures for checking water temperature and level sensor functionality.

Door Switch and Motor Tests

Testing procedures for the door switch, lock, and motor circuits.

Power and Hall Sensor Checks

Verifying AC power input and Hall sensor operation.

Water Valve and Heater Relay Tests

Testing procedures for water inlet valves and the heater relay.

Door Lock and Drain Motor Tests

Procedures for testing the door lock mechanism and drain pump motor.

Error Code Troubleshooting

Water Level and Motor Drive Errors

Details and checks for Water Level (LE), Motor Drive (3E), and Hall Sensor (E3) errors.

Water Supply and System Errors

Troubleshooting for Water Supply (nF) and System (SF) errors.

Drain, Power, and Communication Errors

Analysis of Drain (nD), Power (2E/91/92), and Communication (AE) errors.

Switch and Door Operation Errors

Troubleshooting for Switch (E2/SR) and Door Lock/Unlock (dS/dL/LO/FL) errors.

Heater and Load Errors

Details on Heater (Hr), Overflow (OE), Temperature Sensor (29), and Unbalance (dC) errors.

Overview

This document provides comprehensive information for the Samsung WF206BNW/XAA, WF206ANS/XAA, and WF206ANW/XAA washing machine models, focusing on fast track troubleshooting, support, and maintenance. It is primarily intended for technicians, offering detailed diagnostic procedures and error code explanations.

Function Description

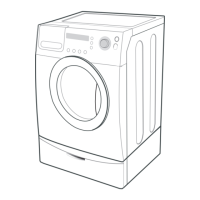
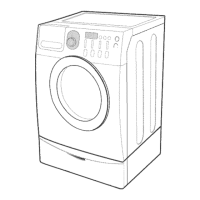
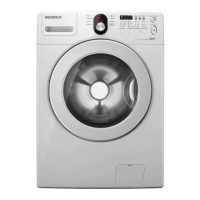
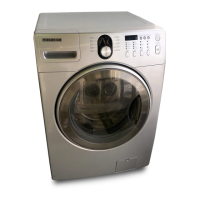
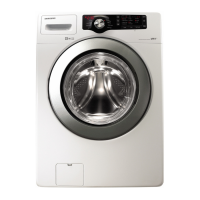
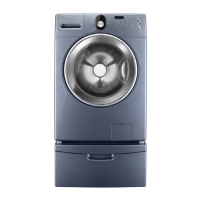
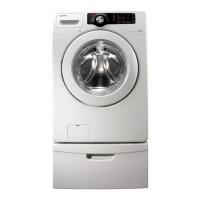
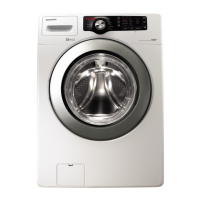
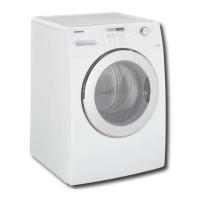
The Samsung WF206 series washing machine is designed to efficiently clean laundry with various cycle options and temperature controls. It incorporates advanced sensors to monitor water temperature, water level, door status, motor operation, and foaming, ensuring optimal washing performance and safety. The machine features a user-friendly interface with an LCD display and tactile buttons for cycle selection and operation.

Usage Features

The washing machine offers a range of cycle options and customizable settings to accommodate different types of laundry and soil levels.

  • Cycle Selection: Users can choose from various cycles such as Heavy Duty, Normal, Whites, Bedding, Perm Press, Delicates/Hand Wash, Wool, Quick Wash, Towels, and Rinse+Spin.
  • Temperature Control: Temperature settings include Extra Hot/Cold, Hot/Cold, Warm/Warm, Warm/Cold, and Cold/Cold, allowing users to select the appropriate water temperature for their laundry.
  • Soil Level: Adjustable soil level settings (Extra High, High, Medium, Low) help tailor the wash intensity to the dirtiness of the clothes.
  • Spin Speed: Users can select different spin speeds (Extra High, High, Medium, Low, No Spin) to control moisture removal and fabric care.
  • Additional Options: The machine includes options like Delay Start, Pre Wash, Extra Wash, Extra Rinse, Garment+, Child Lock, and Signal (Louder, Softer, Off) for enhanced convenience and customization.
  • Detergent Drawer: The detergent drawer is designed with separate compartments for main wash, pre wash, softener, and bleach, ensuring proper dispensing of laundry additives. It is normal for a small amount of water to remain in the detergent drawer after washing, and bleach is typically flushed out at the beginning of the wash cycle, with its compartment being washed again during the rinse cycle.
  • Non-HE Detergent Warning: The manual explicitly warns against using non-HE detergents or excessive detergent for the water hardness and soil level, as this can lead to over-sudsing and leaks from the detergent drawer and door. Proper detergent usage is emphasized.

Maintenance Features

The document provides extensive information for diagnosing and resolving issues, primarily through Quick Test Mode and Service Mode, along with detailed error code explanations.

  • Quick Test Mode:
    • Activation: To enter Quick Test Mode, press the Spin, Soil, and Power buttons simultaneously when the power is off.
    • Functionality: This mode erases all faults and memory. Upon entry, all LEDs light up, the washer beeps, and the software version is displayed for a second before clearing the EEPROM. The LCD then shows model information. If "EEEE" is displayed, the PCB assembly is defective.
    • Component Testing:
      • Temp Key: Cycles through water valves (Cold Main, Bleach, Cold Main & Bleach for Fabric Softener, Hot, then off).
      • Spin Key: Tests the motor circuit.
      • Signal Key: Tests the drain pump.
      • Soil Key: Tests the door lock and unlock circuit.
  • Service Mode:
    • Activation: To enter Service Mode, press the Signal and Extra Rinse buttons simultaneously with the power on.
    • Functionality: This mode allows for more detailed operation tests and troubleshooting.
    • Tests within Service Mode:
      • Quick Spin Test (Delay Start & Spin): Accelerates the drum motor from 0 to maximum RPM over a few minutes. During this test, out-of-balance detection is bypassed, and the door may not lock. Pressing Start/Pause during the test holds the spinning speed for 10 minutes before returning to Quick Spin Test Mode.
      • Cycle Count (Signal button): Displays how many times the unit has been used.
      • Software Version (Soil button): Shows the software version.
      • Fast Time Down (Temp button): Advances to the next cycle.
      • Fault Code Test (Spin button): Views stored fault codes. Turning the Dial views error codes, and pushing Start/Pause while a code is displayed shows the number of cycles since the error occurred.
  • Peripheral (Main PCB) Input Tests: These tests are performed by pressing "Extra Wash" and then turning the dial to specific cycles, followed by pressing Start/Pause to display sensor readings.
    • Normal: Displays water temperature in Fahrenheit.
    • Whites: Displays door status (OP if open, CL if closed).
    • Perm Press: Displays door lock switch status (UL if unlocked, Lo if locked).
    • Delicate/Hand Wash: Displays water level ("0" if below level, "1" if above level/overflow).
    • Wool: Displays water level for heater-on ("-0" if below level, "-1" if above level).
    • Quick Wash: Displays water level for reset ("_0" if below level, "_1" if above level).
    • Towels: Displays water frequency.
    • Spin Only: Displays MEMS Sensor Kit status ("- -" if operating properly, "8E" if out of order).
  • EEPROM Clear Check:
    • Activation: Power off, then press Delay Start, Signal, and Power Key simultaneously.
    • Functionality: Clears all memory, including fault codes. This procedure should be performed when a new Main PCB is installed.
  • Error Codes and Troubleshooting: The document lists various error types (LED and LCD displays) with detailed explanations and troubleshooting steps.
    • Water Level Sensor (LE8): Check hose for looseness, pinching, damage, or clogging. Check sensor for disconnection or defect. Main PCB may also be defective.
    • Motor Drive/Hall Sensor (3E, E3, bE25): Check motor drive connector, hall sensor, foreign objects in motor, motor damage, stator, and drum overload. Relays or PCB may be defective.
    • Water Supply (nF3): Check water valve wiring, supply valve clogging, proper water supply, and reversed fill hoses. Check water temperature for Wool or Lingerie cycles. Check relays.
    • Fill Hoses Reversed (nF1): Correct hot/cold hose connections.
    • System Error (SF1, SF2, SF3): Replace PCB.
    • Drain Error (nD1): Check for foreign material in pump/hoses, wiring harness, water pump terminal, and freezing.
    • Power Error (2E, 91, 92, PF): Check operating voltage (under/over voltage), plug receptacle, extension cord use, and main PBA fault. PF indicates momentary power failure.
    • Communication Error (AE): Check wire connections and terminal contacts between sub and main PBAs, disconnected wires, and sub PCB short circuit due to moisture. Replace main PCB if communication circuit is faulty.
    • EEPROM Fault (11): If display shows "FAiL" after EEPROM Clear Mode, replace Machine Control Board.
    • Switch Error (E2, 15, SR): Check for stuck power or tact switches, service PBA holding screws, and main PBA switching IC. SR indicates power interruption or incorrect main relay connections.
    • Door Error (dS22, dL18, LO2, FL4): Check door switch and latch alignment, latch damage, wiring harness, door switch, main PBA door sensing circuit. Verify main PCB operation.
    • Heater Error (Hr36, 9E1): Check for shorted/disconnected heater circuit, tub contacting heater, frozen/no water, temperatures above 145C, and PBA relay malfunction. 9E1 indicates EMC filter issue or noise spike.
    • Overflow Error (OE, E): Verify drain operation, water level detection, and water valves shut off fully. Check water level sensor.
    • Temperature Sensor Error (29, LE): Check connections for washing heater temperature sensor connector.
    • Unbalance Error (dC10): Check laundry type for unbalance. Reposition load or remove items, then press start to continue.
    • Silver Care Kit Failure (7E): Check Silver Care PCB, Main PCB, and wire harness.
    • MEMS or Harness Failure (8E): Check MEMS PCB, Main PCB, and wire harness.
    • Foaming Detected (SUdS, Sd): This is a normal operation when excessive foaming is detected; the cycle proceeds once foaming is removed.
  • Leveling and Vibration: The document emphasizes the importance of leveling the washing machine to the floor to prevent redo calls and customer dissatisfaction, as vibrations can shorten product lifetime. It also mentions foot pads for walking washers and advises against exceeding leg adjustment height for stability when installing on upper floors.
  • Location Considerations: Do not install the washer in areas where water may freeze, as the machine always retains some water in its valve, pump, and hose areas, which can cause damage to components.
  • Touch Up Paints: A list of touch-up paint codes is provided for various colors (Blue Onyx, Imperial Silver, Neat White, Stratus Gray, Tango Red).
  • Packed Items: A list of items packed with the washer is provided, including a bolt spanner, water hoses, manual, cap fixer, and hose hanger.

Samsung WF206BNW/XAA Specifications

General IconGeneral
BrandSamsung
ModelWF206BNW/XAA
TypeFront Load Washer
Energy Star CertifiedYes
ColorWhite
Steam FunctionYes
Voltage120V
Spin Speed1200 RPM

Related product manuals