Fast Track Troubleshooting
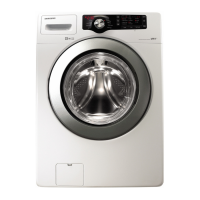
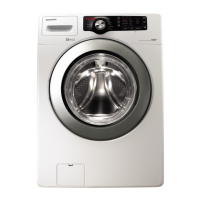
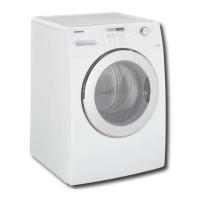
Model: WF210ANW/XAA
Publication # tsWF210 Revision Date 06/16/2011
Quick Test Mode:
To enter press Spin, Soil, & Power
simultaneously with the power off.
1. All LED’s light up and the washer beeps as it
enters the Quick Test Mode.
2. The unit displays the software version.
3. After the displaying the software version, turn
Jog dial CCW until version disappears.
Press Spin to test Door Lock/Unlock circuit.
Press Temp Key (with door locked) to cycle through
the Water Valves circuit test in this order: Cold Main,
Bleach, Hot, then off.
Press Soil Key to test the Heater
Press Signal Key to test the Pump
Service Mode:
This mode allows more detailed operation tests and trou-
bleshooting, to enter press Signal & Extra Rinse simulta-
neously for three seconds with the power on, the display
will change to 000
While in Service Mode (the Service Mode can be entered
while the unit is in a wash cycle) the following tests can
be performed:
Quick Spin Test = Delay Start & Temp: This accelerates
the drum motor from 0 to maximum RPM over a few min-
utes. Press the Start/Pause button during the test to hold its
spinning speed up to 10 min. before going back to Quick Spin
Test Mode, return to spin with Delay Start & Temp.Cycle
Count = Press the Signal button to see how many times the
unit was used.
Software Version # = Press the Soil Level button to see the
software version information
Fault Code Test = Press the Spin button to view the stored
fault codes – then turn Dial to view error codes (Push Start/
Pause while the code is displayed to view the number of cy-
cles since the error occurred, push Start/Pause again to get
back to faults)
Peripheral (Main PCB) input Tests, enter Service Mode,
press the Extra Rinse key until the display shows (ln) .
1. Turn the Dial CCW to Normal, Temperature will be dis-
played in Celsius.
2. Turn the Dial CCW to Heavy Duty, Temperature will be dis-
played in Fahrenheit .
3. Turn the Dial CCW to Perm Press, The door switch status
will be displayed (CL if Closed, OP if Open).
4. Turn the Dial CCW to Rinse + Spin The door lock Switch
status will be displayed (UL if unlocked, LO if locked).
5. Turn the Dial CCW to Quick Wash, the water level fre-
quency will be displayed, the frequency will change as the unit
IMPORTANT SAFETY NOTICE – “For Technicians Only” This service data sheet is
intended for use by persons having electrical, electronic, and mechanical experience
and knowledge at a level generally considered acceptable in the appliance repair trade.
Any attempt to repair a major appliance may result in personal injury and property
damage. The manufacturer or seller cannot be responsible, nor assume any liability for
injury or damage of any kind arising from the use of this data sheet.
Spin Only option:
Power on, Press and hold Spin until display changes.
Press Spin to select spin time.
Press Start/Pause to start cycle, Normal Cycle 10/12
minutes, Heavy Duty Cycle 11/13 minutes, Delicate
Cycle 8 minute. Spin speed varies with cycle.
EEPROM Clear Check
Power On, Press Delay Start, Signal and Power Key at
the same time. Good = Goo Fail = FAI
All memory will be cleared, including Fault Codes
This should be done after a new Main PCB is installed
Fabric Softener Dispenser Test:
Start Rinse and Spin Cycle. After fill is completed
remove detergent drawer, place towel below opening
and within 3 minutes the dispenser will activate
Please Note: There are
Serial # changes on this
model, verify you are order-
ing the correct parts for the
Serial # you are servicing
by reviewing Bulletins.



 Loading...