This document is a service manual for a Samsung Washing Machine, specifically models WW8A*****, WW7A*****, and WW65A******, with the model name WW5100A Project. The manual provides comprehensive information for servicing and maintaining the device.
Function Description
The Samsung Washing Machine is designed to clean clothes efficiently. It operates by agitating clothes in water and detergent, then rinsing and spinning them to remove water. The machine incorporates various features to enhance washing performance and user convenience.
Important Technical Specifications
The manual details specifications for the WW70AA626AE/LE model, which serves as a representative example.
General Specifications:
- Model Name: WW70AA626AE/LE
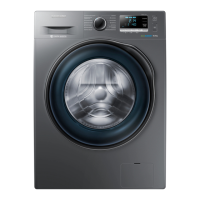
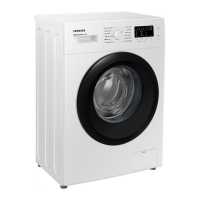
- Model Type: Front Loading Type
- Dimensions (W x H x D): 600 x 850 x 450 mm
- Water Pressure: 50 kPa - 800 kPa
- Drum Volume: 48L
- NET Weight: 48L
- Wash and Spin Capacity: 7 kg
- Power Consumption: 1900 - 2300W
- Spin Revolutions (RPM): 1200 rpm
Physical Dimensions:
- Width (A): 600 mm
- Height-Overall (B): 850 mm
- Depth (C): 450 mm
- Depth with door open 90° (D): 965 mm
Comparing Specifications with Existing Models (WW70AA626AE/LE):
- Capacity: 7 kg
- Drum Volume: 48L
- Max RPM: 1200
- Motor: DIT
- Water Supply: Cold only
- Drainage: Pump
- ECO BUBBLE: Included
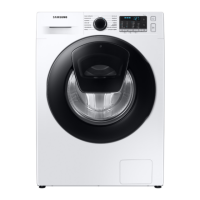
- Add Wash: Included
- Steam: Included
- AOW/AD: Not applicable (X)
- Super Speed: Not applicable (X)
- Wifi: Not applicable (X)
- Q-Drive: Not applicable (X)
- DOOR: Basic
- Drum: Swirl
- DISPLAY: G. LED
Usage Features
While primarily a service manual, some usage features can be inferred from the specifications and troubleshooting sections.
- Front Loading Design: The machine features a front-loading design, which is generally more water and energy-efficient than top-loading machines.
- 7 kg Capacity: Suitable for medium-sized laundry loads.
- 1200 RPM Spin Speed: High spin speed helps to extract more water from clothes, reducing drying time.
- ECO BUBBLE Technology: This feature likely enhances washing performance by generating bubbles that penetrate fabrics faster, even in cold water.
- Add Wash Feature: Allows users to add forgotten laundry items during a wash cycle.
- Steam Function: Likely offers steam cycles for sanitization or wrinkle reduction.
- Cold Water Supply: The machine is designed for cold water input only, which can be energy-saving.
- Pump Drainage: Standard drainage method.
- G. LED Display: Provides clear visual feedback on the machine's status and settings.
Maintenance Features
The manual provides extensive details on safety, disassembly, reassembly, and troubleshooting, which are crucial for maintenance.
Safety Instructions:
- General Safety: Emphasizes observing instructions to operate the product safely and prevent accidents and hazards while servicing.
- Warning and Caution Symbols: Explains the meaning of warning and caution symbols used in the safety instructions.
- Before Servicing:
- Always disconnect the power plug before servicing to prevent electric shock.
- Avoid connecting several appliances to a single power outlet to prevent fire due to overheating.
- Do not pull the plug by the power cord when removing it from the outlet.
- Ensure the washing machine is not being used and disconnect power before servicing.
- Do not use flammable substances near the washing machine.
- While Servicing:
- Check if the power plug and outlet are damaged; if faulty, replace immediately.
- Completely remove any dust or foreign material from the housing, wiring, and connection parts to prevent fire due to tracking and shorts.
- Ensure proper connection of relevant connectors and check for fire due to tracking.
- Discharge PBA power terminals before starting service to prevent high voltage electric shock.
- Fasten the nut after ensuring the heater is inserted into the bracket-heater to prevent noise and electric leakage.
- Do not repair the washing machine without safety gloves.
- After Servicing:
- Check the wiring to ensure it is not damaged by sharp edges or moving parts.
- Perform a test run for water leakage using the standard course.
- Advise consumers not to repair or service any part of the washing machine themselves.
Disassembly and Reassembly:
The manual provides detailed, step-by-step instructions with figures for disassembling and reassembling various components, including:
- Assy Cover Top: Removing screws and lifting the cover.
- Assy Drawer: Opening the drawer, holding down the release lever, and pulling up the Cap Rinse.
- Assy Panel Control (LED): Removing screws, grabbing the panel, and disconnecting the terminal.
- Assy Housing-Drawer: Removing band-rings, separating the water valve hose, and separating the housing drawer.
- Frame Front: Disconnecting the diaphragm, removing screws for the door-lock switch, disconnecting terminals, pressing the cover filter place, and removing screws from the bottom.
- Cover-Back: Unfastening screws and sliding the cover back.
- Assy Door: Removing hooks, disconnecting the terminal, and removing screws.
- Door-Lock S/W: Opening the door, removing screws, removing the cover door switch, and disassembling terminals.
- Diaphragm: Removing the hose and clamp, and pulling the diaphragm.
Tools for Disassembly and Reassembly:
Specific tools are listed for various tasks:
- Box driver (10mm, 13mm, 19mm): For heater, tub, fixer screws, motor, balance, shock absorber, damper, and pulley.
- Double-ended spanner (10mm, 13mm, 19mm): Replaced by box driver and leg.
- Vice pliers: For protecting empty turning of bolt or abrasion from using box driver, and for disassembly of spin drum.
- Others (screwdriver, nipper, long nose pliers): Common tools for servicing.
- Torque wrench: For assembly of heater and tub.
Troubleshooting:
The manual includes a comprehensive troubleshooting guide with information on common problems, their causes, and corrective actions. This section is invaluable for diagnosing and resolving issues.
- Information Code: Provides specific codes for various issues (e.g., 1C for Water Level, 3C for Motor, 4C for Water Supply, 5C for Drain, AC for Communication, BC2 for Switch, CC for Cooling, dC/dC1/dC2 for Door, HC1/HC2 for Heater, LC1 for Water Leakage, OC for Over Flow, TC1/TC2/TC3 for Temperature Sensor, UB for Unbalance, UC/9C for Power, 8C for Mems PBA, DDC/DC3 for Add Door, 6C/6C1-6C7 for Detergent Drawer Motor/Auto Dispense).
- Causes: Lists potential reasons for each information code or problem (e.g., clogged hose, faulty sensor, motor overload, communication errors, heater engagement fault, water leakage, power condition fault).
- Corrective Actions: Suggests steps to resolve the problem (e.g., check water level sensor, replace PCB, check motor, check wiring, clean filter, check temperature sensor, replace drain pump, check power supply).
- Problem Check Point: Offers solutions for general problems like the washing machine not starting, water supply issues, vibrations, drainage problems, door not opening, and button check failures.
Wiring Diagram:
A detailed schematic diagram of the main PCB and sub PCB is provided, showing connections for various components like the water pressure sensor, heater, drain pump, door lock, and motor. This is essential for electrical diagnosis and repair.
Terminology:
Key terms related to the washing machine's operation are defined:
- Drain Pump: Pumps water from the machine during operation.
- Heater: Heats water inside the tub to increase wash efficiency.
- Door Lock Switch: Detects if the door is open or closed and stops the cycle if open.