This document is an instruction manual for the Sanctuary Diamond series of security safes, specifically covering models SA-DIA1-BIO, SA-DIA2-BIO, SA-DIA3-BIO, SA-DIA1-BIO-DP, SA-DIA2-BIO-DP, and SA-DIA3-BIO-DP. The safes are equipped with a biometric scanner for access.
Function Description:
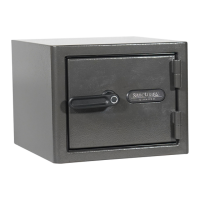
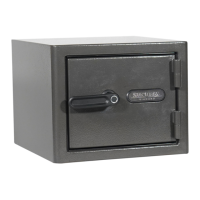
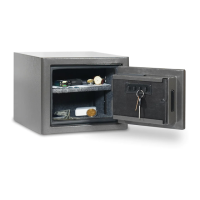
The Sanctuary Diamond safes are designed to secure valuables, important documents, and keepsakes. They feature a biometric scanner for primary access, allowing users to open the safe with a programmed fingerprint. In case of issues or forgotten fingerprints, backup keys are provided for emergency entry. The safes also incorporate internal lighting for visibility of contents and various security features such as lockout modes and tamper protection.
Important Technical Specifications:
- Access Method: Biometric fingerprint scanner (primary), backup keys (secondary).
- Fingerprint Capacity: The scanner can store up to 100 different fingerprints.
- Power Source: 4xAA batteries.
- Low Battery Warning: The indicator ring flashes purple after an accepted fingerprint scan, accompanied by a 3-second beep, to signal low battery.
- Lockout Modes:
- Basic Lockout: Three consecutive rejected scans deactivate the Bio Scanner for 30 seconds.
- Severe Lockout: Six consecutive rejected scans deactivate the Bio Scanner for 5 minutes.
- Tamper Protection: After entering a lockout mode, a tamper indicator will signal (indicator ring flashes red 3 times with a 3-second beep) upon the next successful fingerprint acceptance, warning of unsuccessful access attempts.
- Internal Lighting: Activates for 30 seconds when the door is opened. Can be extended by pressing the light activation button.
- Shelves: Model SA-DIA1-BIO has one adjustable shelf; other models may have more.
- Locking Mechanism: Features dead locking plates and active locking plates.
- Construction: Designed for securing to the floor or wall using bolt-down holes.
Usage Features:
Initial Entry:
- Locate backup keys inside the plastic bag on the safe's front.
- Insert the key and turn clockwise from 12 to 3 o'clock.
- Turn the handle counter-clockwise to unlock and open the door. Turn the handle back to extend locking plates, then remove the key.
- Locate the magnetic key cover inside the safe. Remove the backup key from the safe's front and install the magnetic key cover in its place. The cover can be removed by pressing its left or right side.
- Install 4xAA batteries into the battery compartment on the door panel. The unit will beep upon successful installation. Replace the battery cover.
Programming Fingerprints:
- Unscrew and remove the red plastic cap on the inside of the safe door to access the reset button.
- Press the reset button. A single beep will sound, and the indicator ring on the front will illuminate white, signaling programming mode.
- Place and hold a finger pad on the scanner until the indicator ring flashes green once and beeps once.
- Repeat step 3 at least three more times until two consecutive beeps and two green flashes occur, indicating success. If unsuccessful (red flashes/beeps 5 times), repeat the process.
- Inactivity Timeout: If programming is not completed within 10 seconds, the indicator ring will flash red 5 times and beep 5 times. Restart from step 2.
- Additional Fingerprints: To ensure reliable access, it's recommended to program multiple areas (tip, top, middle, left, right) of your finger. Each programming sequence (four successful scans of the same area) counts as one programmed fingerprint. The scanner can store up to 100 fingerprints.
Opening Safe with Programmed Fingerprint:
- Close and lock the door.
- Place and hold a programmed finger pad on the scanner. The indicator ring will flash white once and beep once to alert the scanner is activated.
- If accepted, the indicator ring will illuminate green, granting access. If rejected, it will flash red 5 times and beep 5 times.
- After successful programming, re-install the magnetic branding badge and store backup keys in a secure secondary location.
Silent Entry Mode:
- To Activate: Hold a programmed finger on the scanner for 5 seconds after it has been accepted. The green indicator ring will turn off and back on without beeping, indicating silent mode is active.
- To Deactivate: Hold a programmed finger on the scanner for 5 seconds after it has been accepted. The green indicator ring will turn off and back on and beep once, indicating silent mode is off.
Clearing All Programmed Fingerprints:
- Hold the reset button for 5 seconds.
- After 5 seconds, the indicator ring will flash green twice and beep twice, signaling that all fingerprints have been cleared. The safe will not open until a new fingerprint is programmed.
- If 100 max fingerprints are already programmed, the indicator ring will flash 5 times and beep 5 times. In this case, it is recommended to clear all fingerprints and restart the programming process.
Securing Your Safe (Bolt Down):
- Use provided hardware or consult a hardware retailer for appropriate fasteners.
- Open the safe door and remove the four black caps on the safe floor or back wall to access bolt-down holes.
- Drill pilot holes in the floor surface. For concrete, use a hammer drill and a 3/8" concrete drill bit.
- Insert and drive plastic anchoring plugs into the pilot holes.
- Secure the safe by threading anchor bolts through the bolt-down holes and ratcheting them down tight. Ensure the metal washer is on top of the rubber washer and tighten to compress the rubber washer, preventing water entry.
- Replace the four black caps.
Loading Your Safe:
- Store documents or heat-sensitive items at the bottom for fire protection.
- Store ammunition separately from valuables.
- Do not place items that will put pressure against the door when closed.
- Store heavier items on the floor or away from the middle of shelves.
Maintenance Features:
- Hinges and Internal Mechanisms: Permanently lubricated, requiring no maintenance. Opening the door panel may void the warranty; consult customer service experts before doing so.
- Keeping Your Safe Dry:
- Place a moisture/protective barrier between the safe and concrete floor.
- Install in a climate-controlled area (heat in winter, cooling in summer).
- In high humidity areas, use an internal dehumidifier and/or desiccants to protect contents from rust or mildew. Dehumidifiers should not touch the side or back walls.
Warranty:
- Lifetime Warranty: Covers damage from fire, forced entry, forced attack, or natural flood for the original owner. Also covers defective parts, paint, or lock.
- Replacement: If a replacement safe is deemed necessary, SA Consumer Products, Inc. will cover freight costs.
- Exclusions: Warranty is limited to the safe itself and excludes loss associated with contents or consequential damages.
- Requirements: Proof of registration and sales receipt are required for claims. Warranty is valid only in the United States and Canada.
- Usage Compliance: Warranty is valid only when the safe is used according to the manual's directions.
- Repair: Repairs may be in-home (parts and labor included) or factory replacement (freight prepaid, curbside delivery), at SA Consumer Products, Inc.'s discretion.