36
ENGLISH
Attention: If the product is not confi gured correctly (MASTER or SLAVE) the RESET function can be used, which resets the
product to factory conditions. This procedure is explained in the remote control PRODUCT RESET paragraph (page 22).
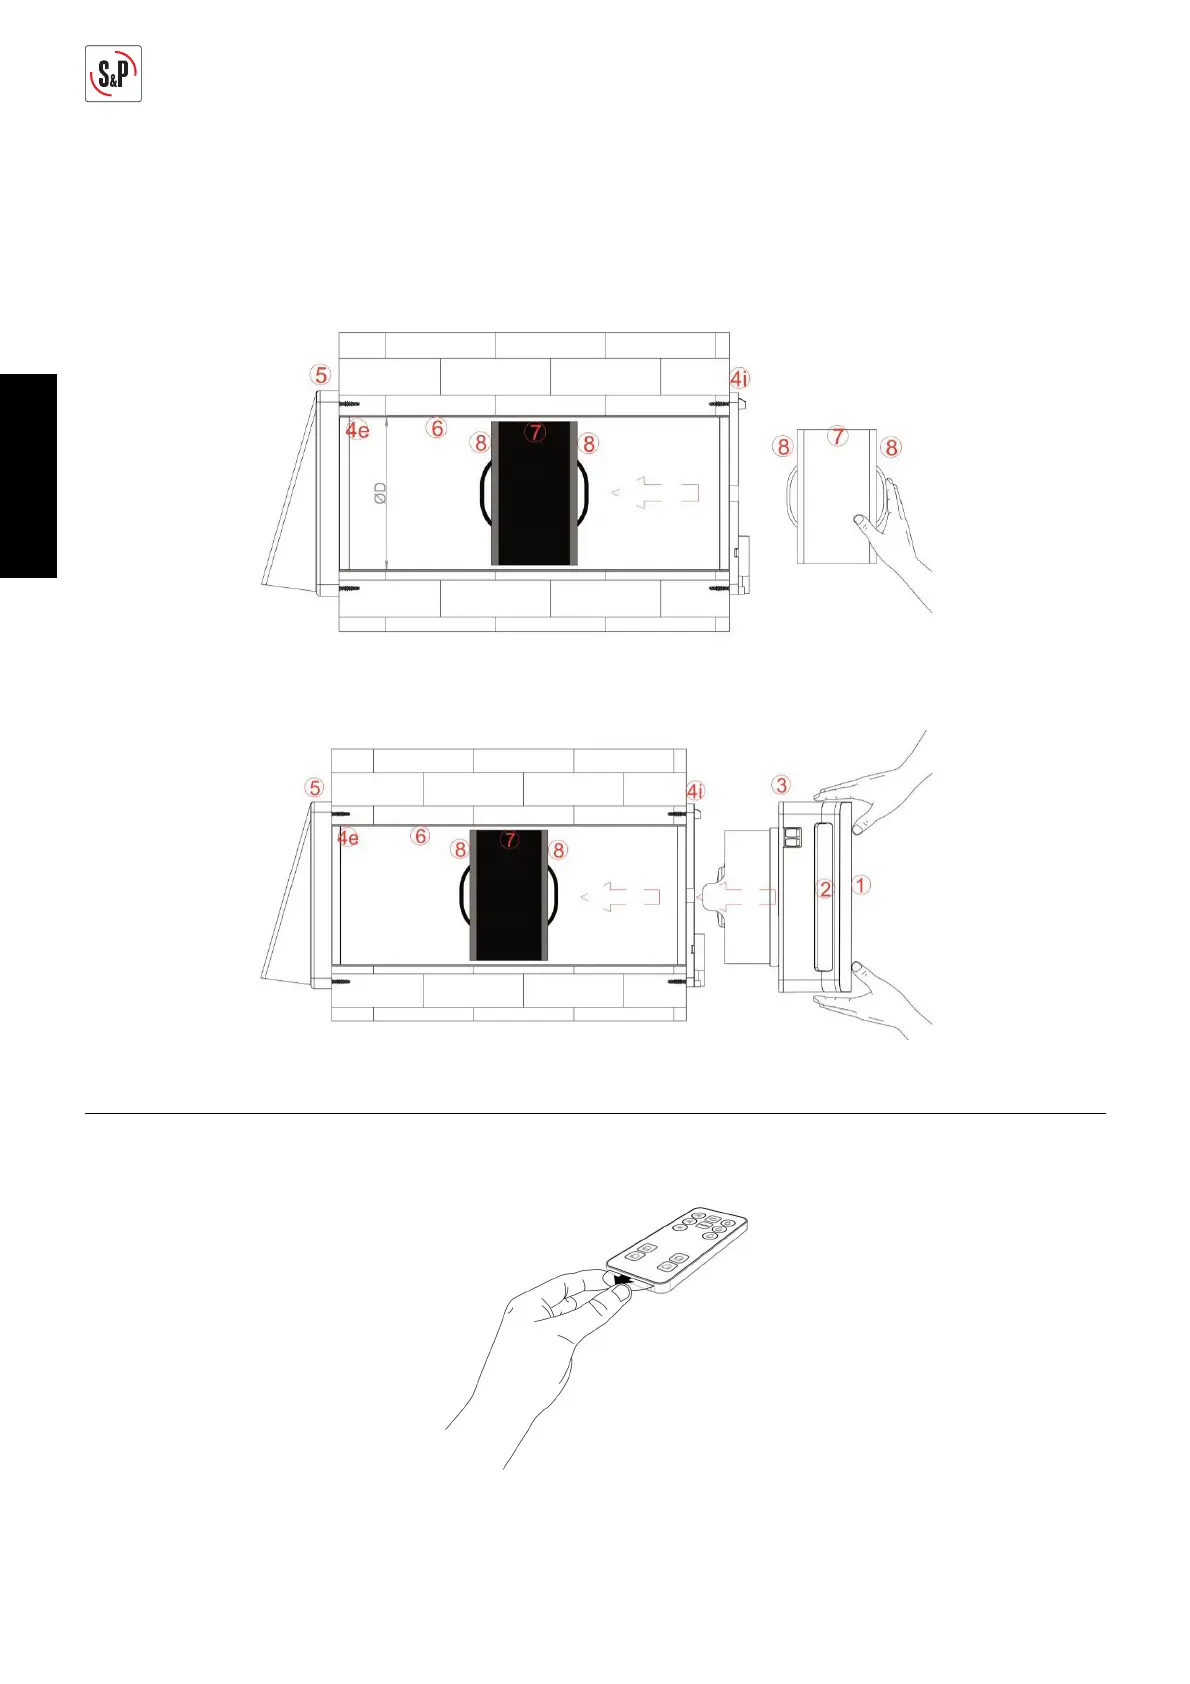
3 CONCLUSION OF THE ASSEMBLY
Having done the connection, put the terminal block and the cables back in their housing. Insert the ceramic exchanger (7)
with the relative fi lters (8), positioning it half way along the integrated tube (6) as shown in the below image:
Snap the main unit (3), together with the damper components (2) and front embellisher (1) already mounted on it, into the
wall attachment (4i) until all the teeth are fastened.
Make sure you install the main unit on the wall with the switches at the top left.
REMOTE CONTROL RD VERSION
REMOVAL OF PROTECTIVE LABEL
To be able to use the remote control, remove the protective label, as shown below.
 Loading...