11
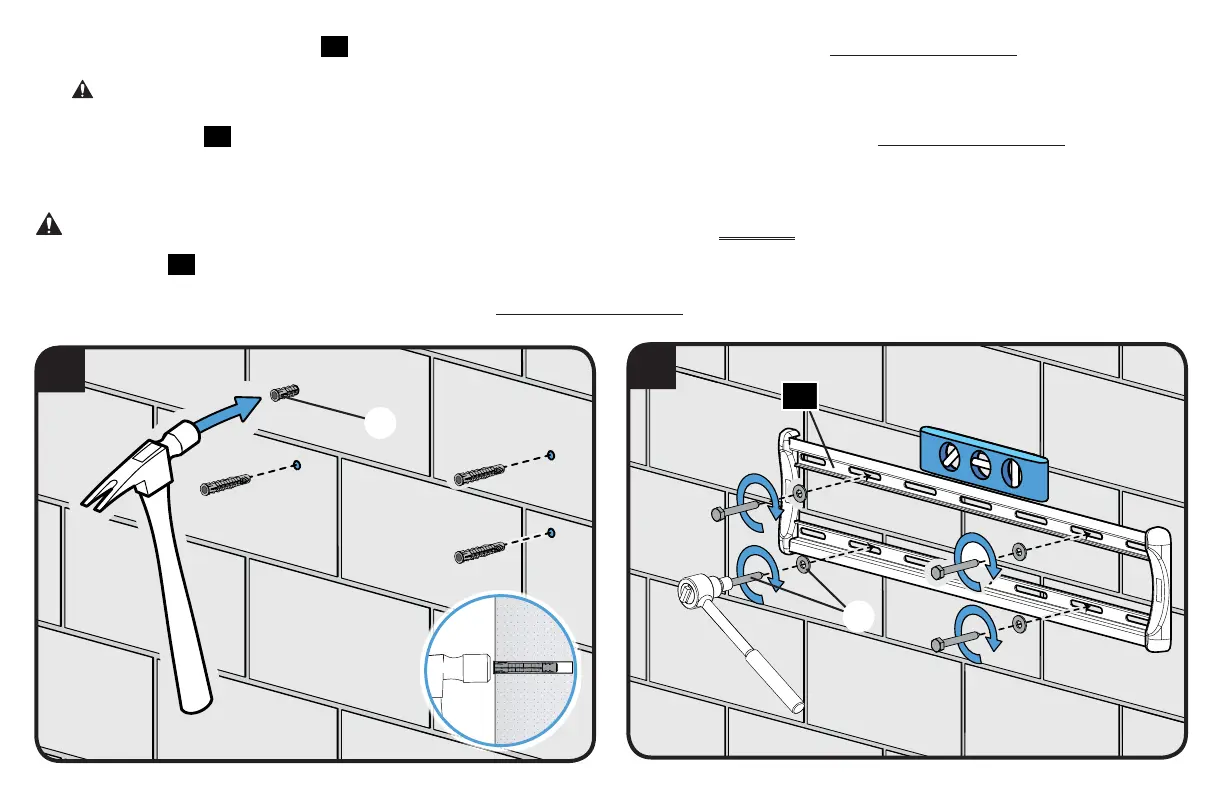
3. Remove the wall plate template
14
and insert four anchors (Fischer UX 10 x 60R - included in the Concrete Installation Kit*).
CAUTION: Be sure the anchors are seated flush with the concrete surface.
4. Install wall plate
15
using four lag bolts and four washers (use only the lag bolts and washers from the Concrete Installation Kit*). Tighten the
lag bolts only until the washers are pulled firmly against the wall plate.
CAUTION: Avoid potential personal injury or property damage! All four lag bolts MUST BE firmly tightened to prevent unwanted movement
of the wall plate
15
.
Ensure the wall plate is securely fastened to the wall before continuing on to the next step.
*
Contact Customer Service at 1-888-333-9952 to have the Concrete Installation Kit shipped directly to you.
4
3
15
*
*